
Series: GT-CP Video Tutorial
Noritake GT-CP Tutorial | Part 2: Send Text and Image with GTOP
Table of Contents
Last update: March 14, 2019
This web-page is intended as a text supplement for the video above. This page will provide all of the necessary information (web links, images, etc.) to achieve the goals accomplished in the video tutorial.
Overview
In this video, we’re going to send text and an image to our connected GT-CP module using the GTOP tool.
Note:
If you do not have the GTOP tool and drivers yet, please see Part 1. And download the GTOP tool from this page.
Run GTOP Tool
Go to the GTOP download folder, double-click on GTOP, hit run, and GTOP will pop up.

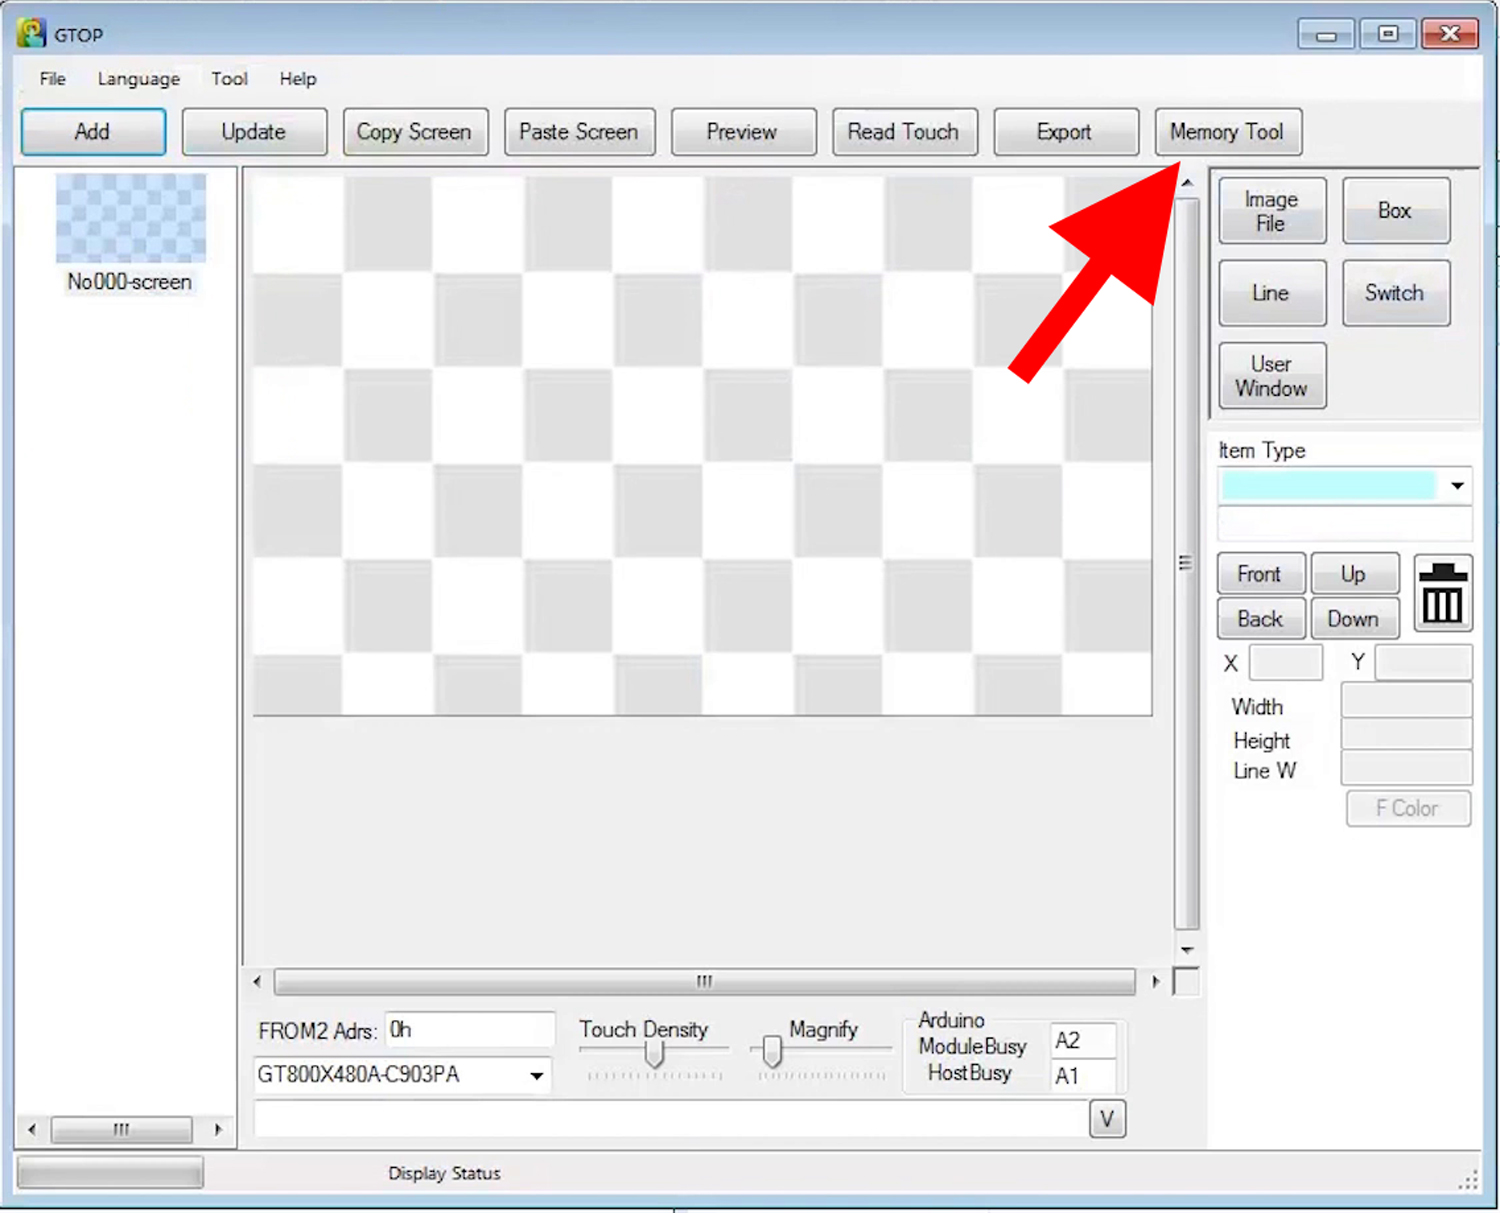
We’re going to use the memory tool aspect of GTOP for this tutorial.
So, click on memory tool and we’ll hop over to the memory tool application.
Make sure that the model is the same as the connected module.
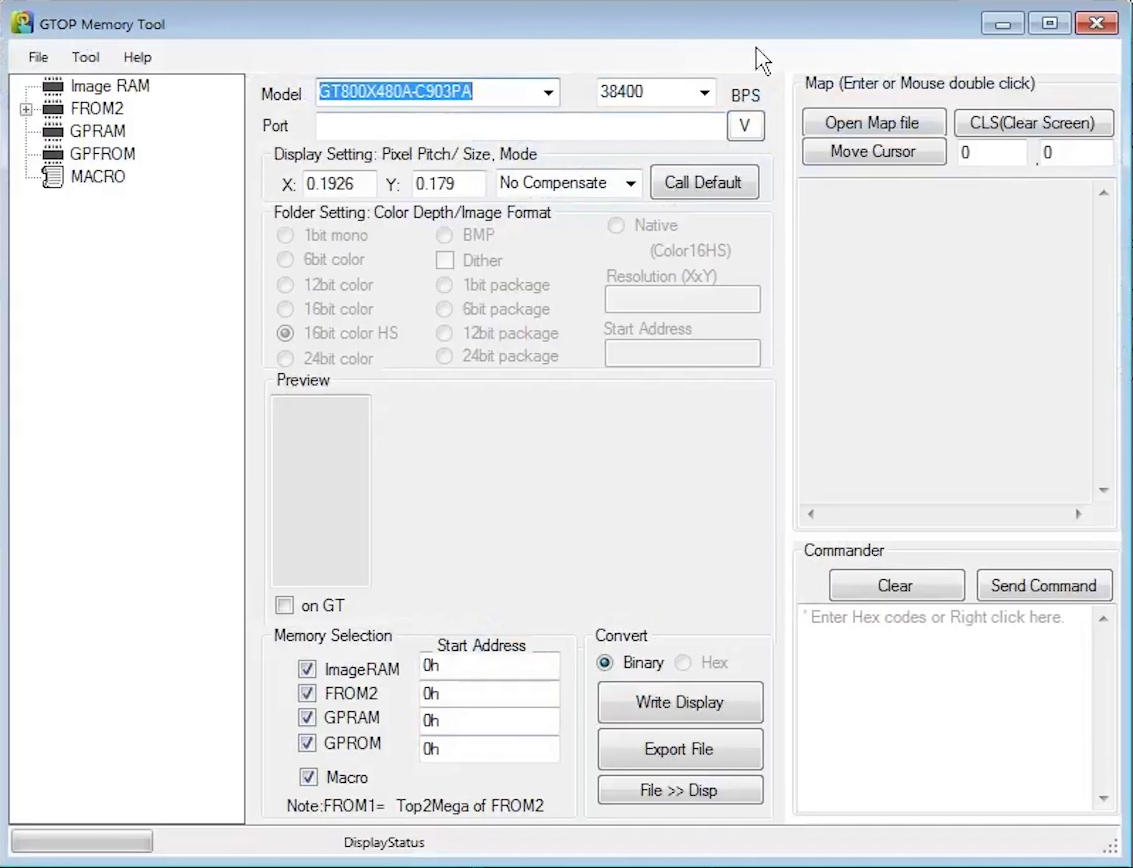
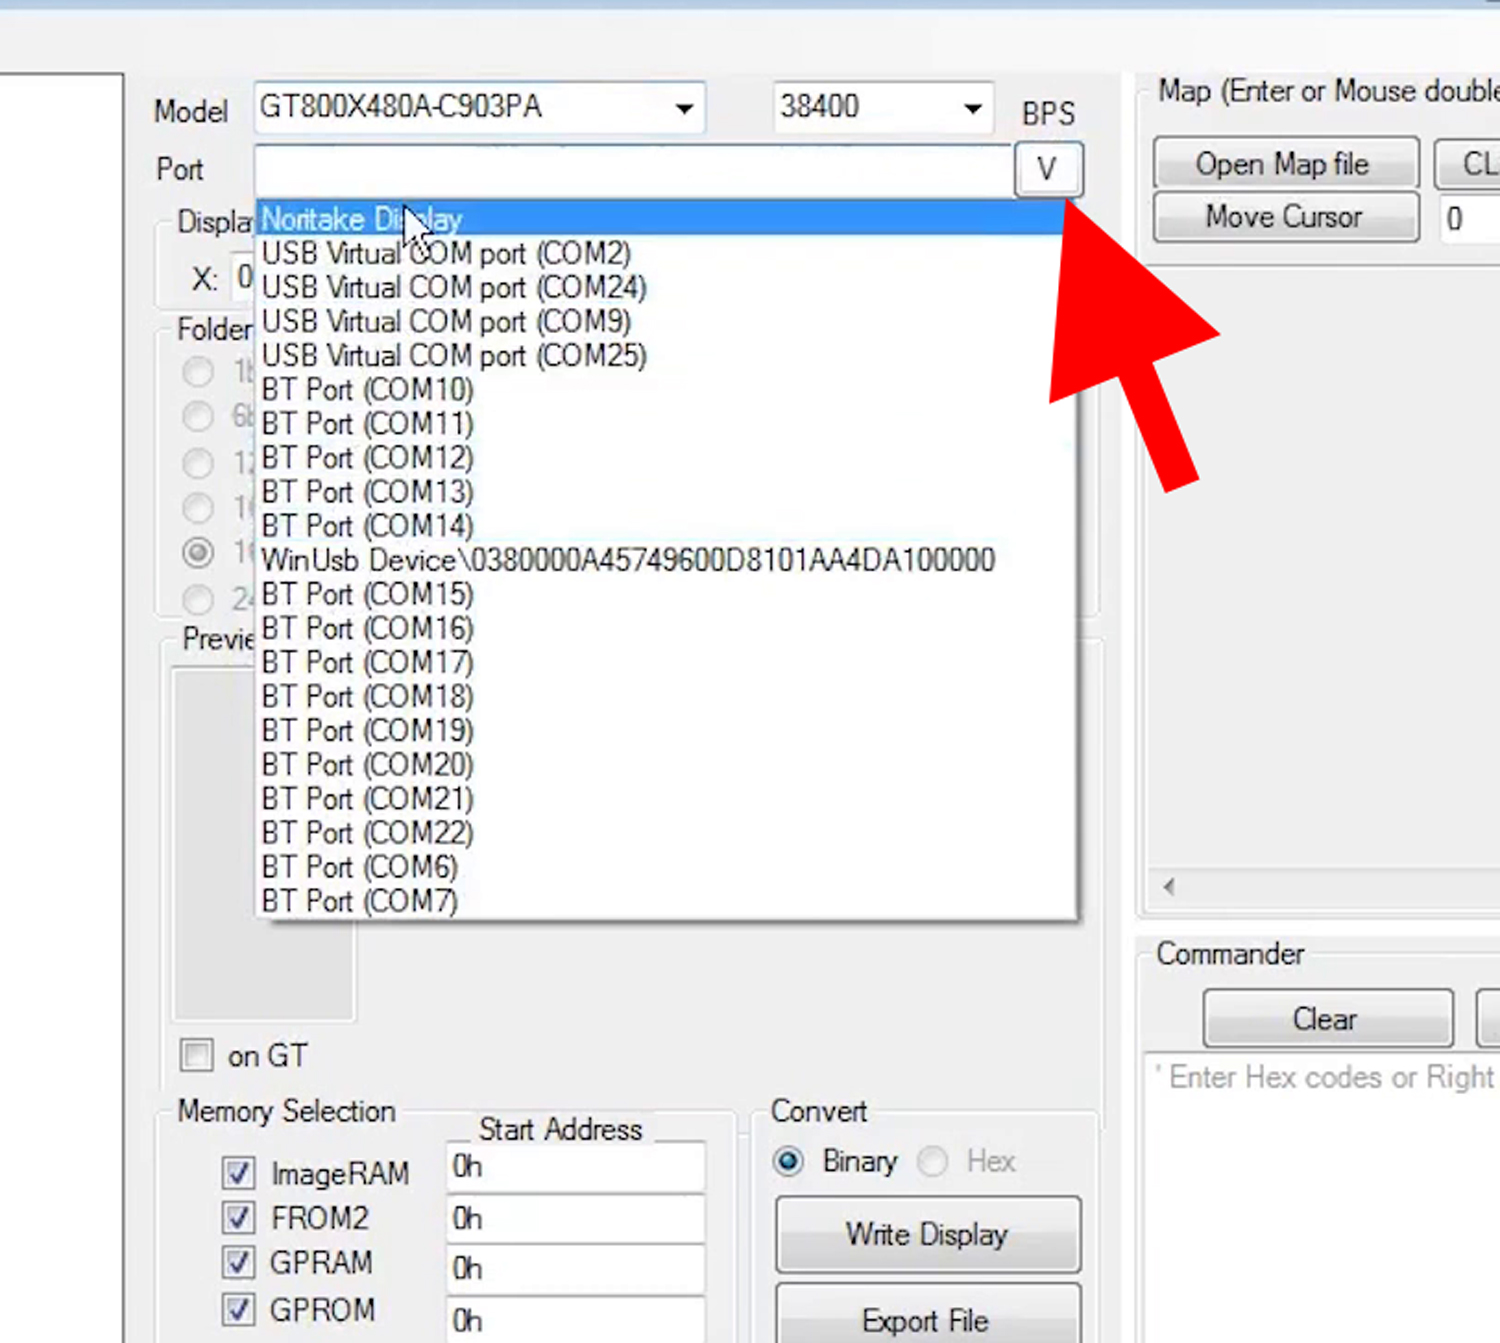
We have to specify the associated port as well.
So, hit the down arrow to list all your ports and we’ll choose Noritake display.
So once that’s connected you’ll see that the display status bar has changed to “Connected” with the correct resolution and correct module type.
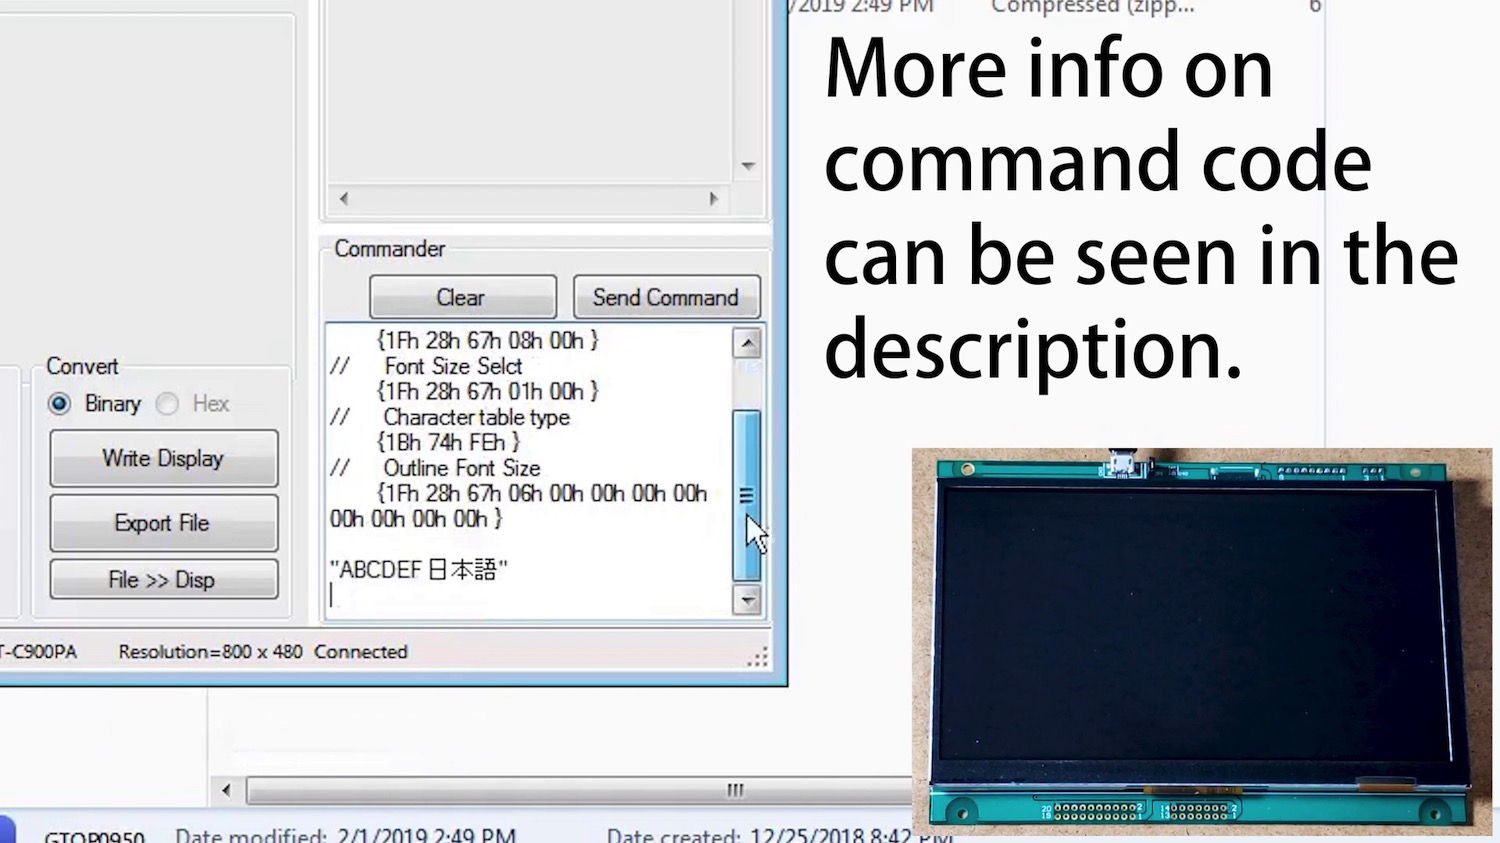
So now we can go over to commander and right click on the text box, go down to setup outline font and built in Japanese font and this will generate a whole bunch of command code to set up an outline font.

Note:
An outline font is an easy to read font that is built into the GT-CP module and each letter is scalable and with the change in size, the edges of the characters will be smooth always.
Send Command
Show Text
So, the end of this code, within these quotations, we’ll write “Hello YouTube” and this text will be written on to the display.
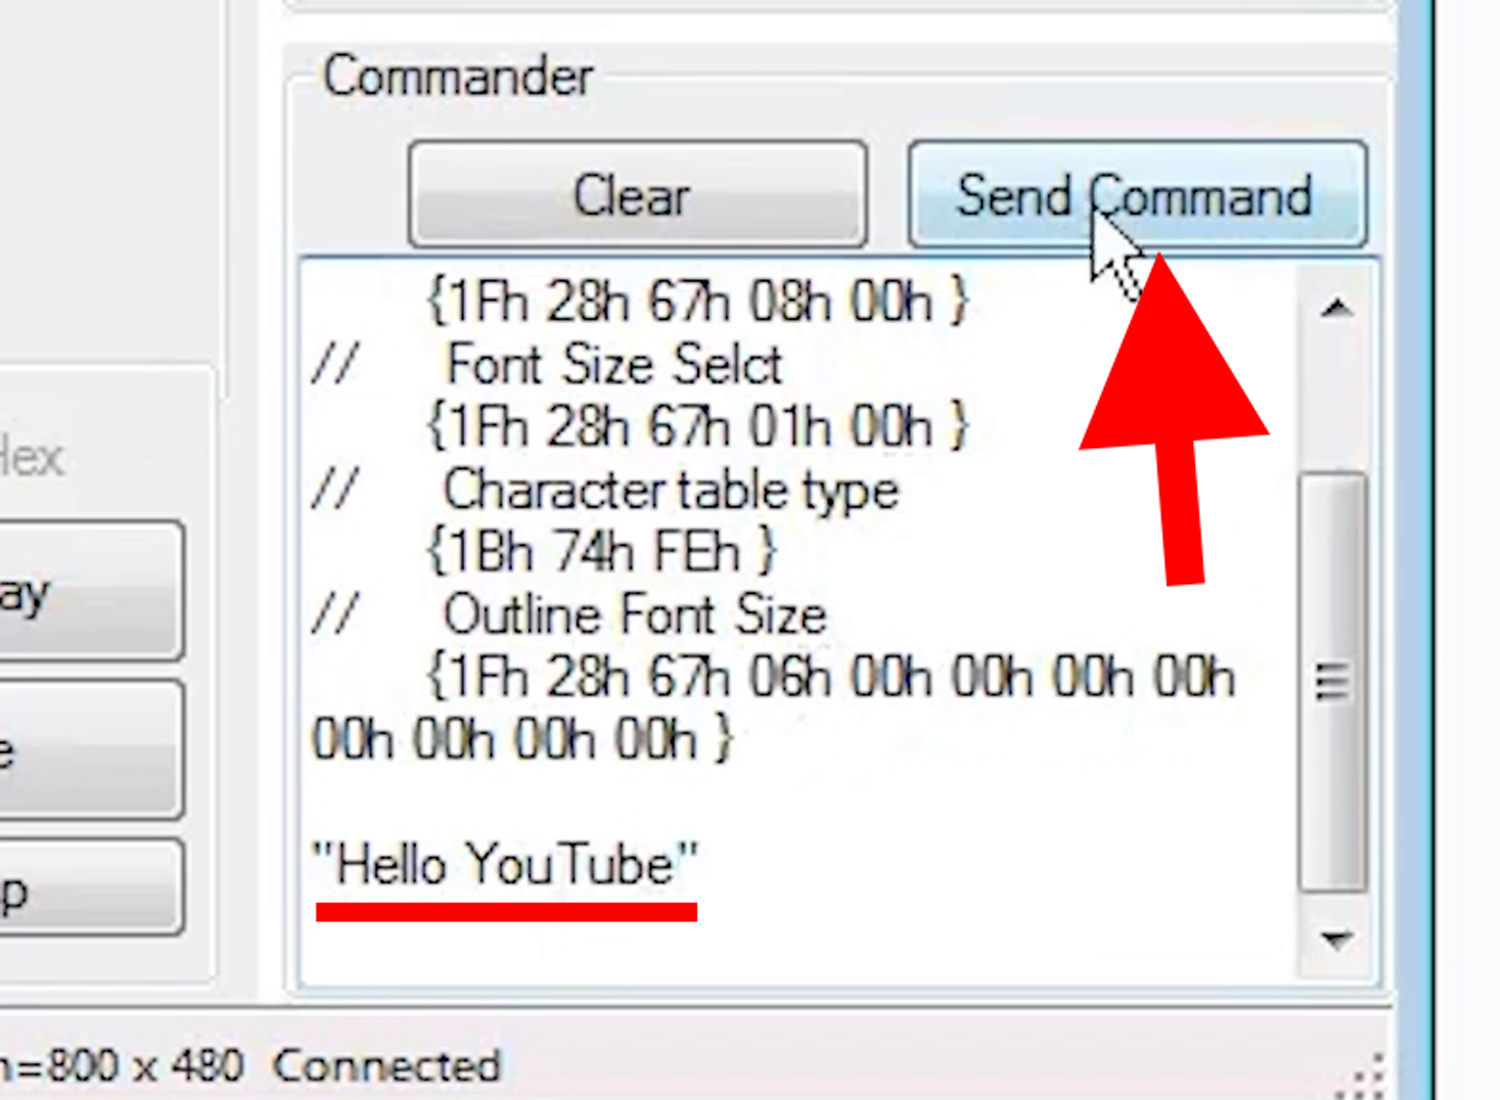
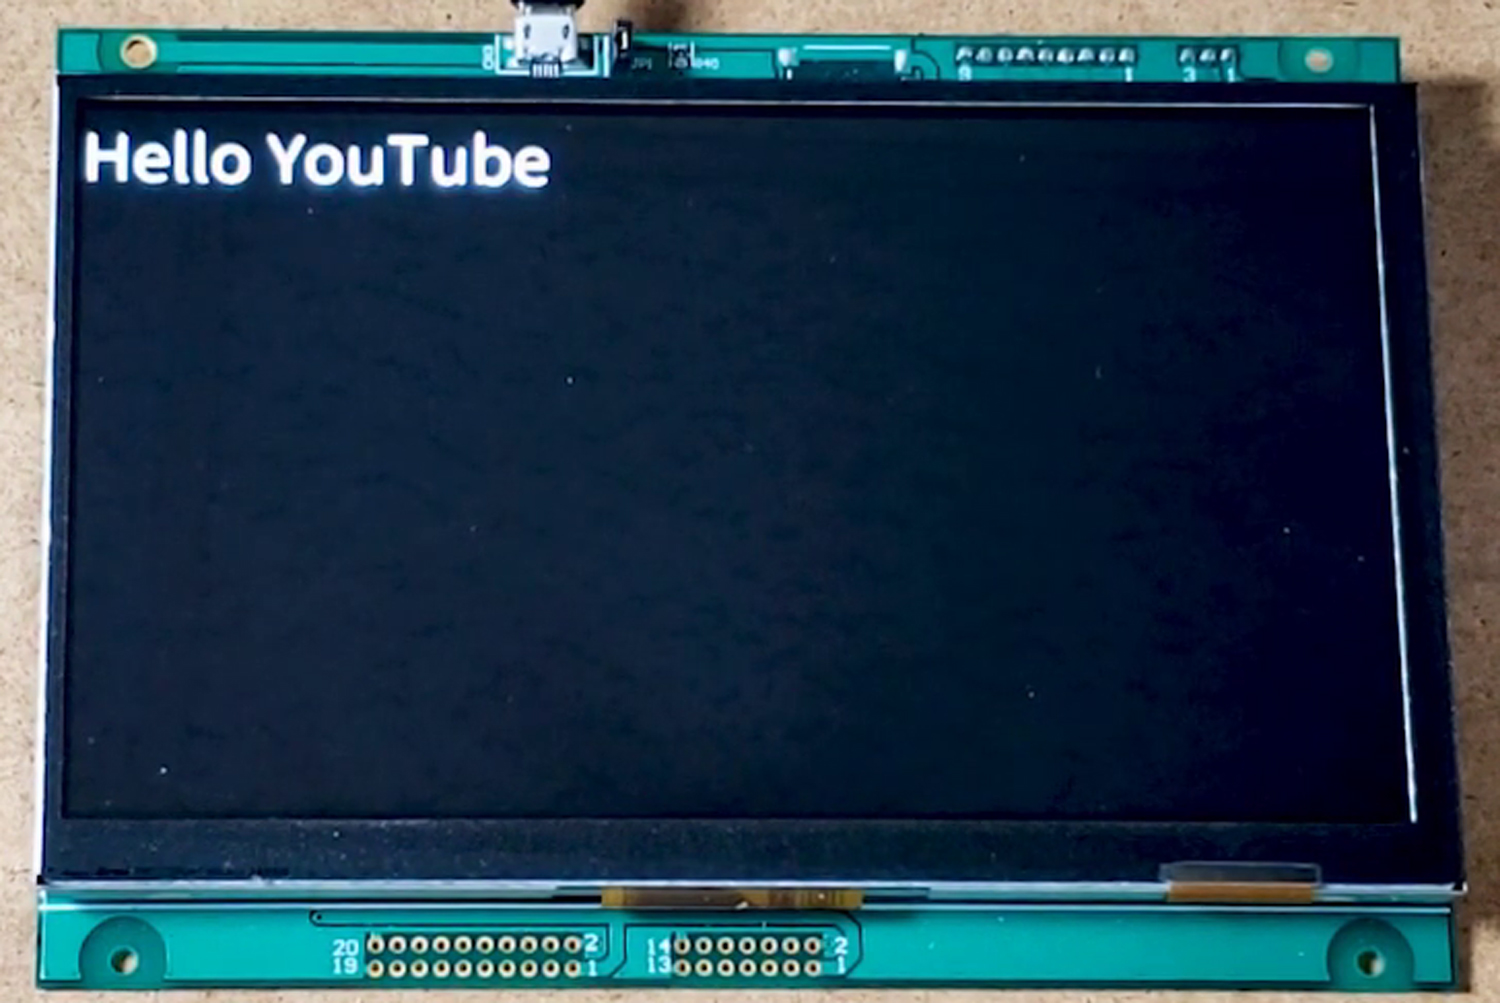
Next, we’ll hit “Send Command” and you’ll see “Hello YouTube” pop-up on the display.
Show an Image
Now, let’s show an image onto the display.
First, we want to expand FROM2, as this will be the node we’ll be dealing with.
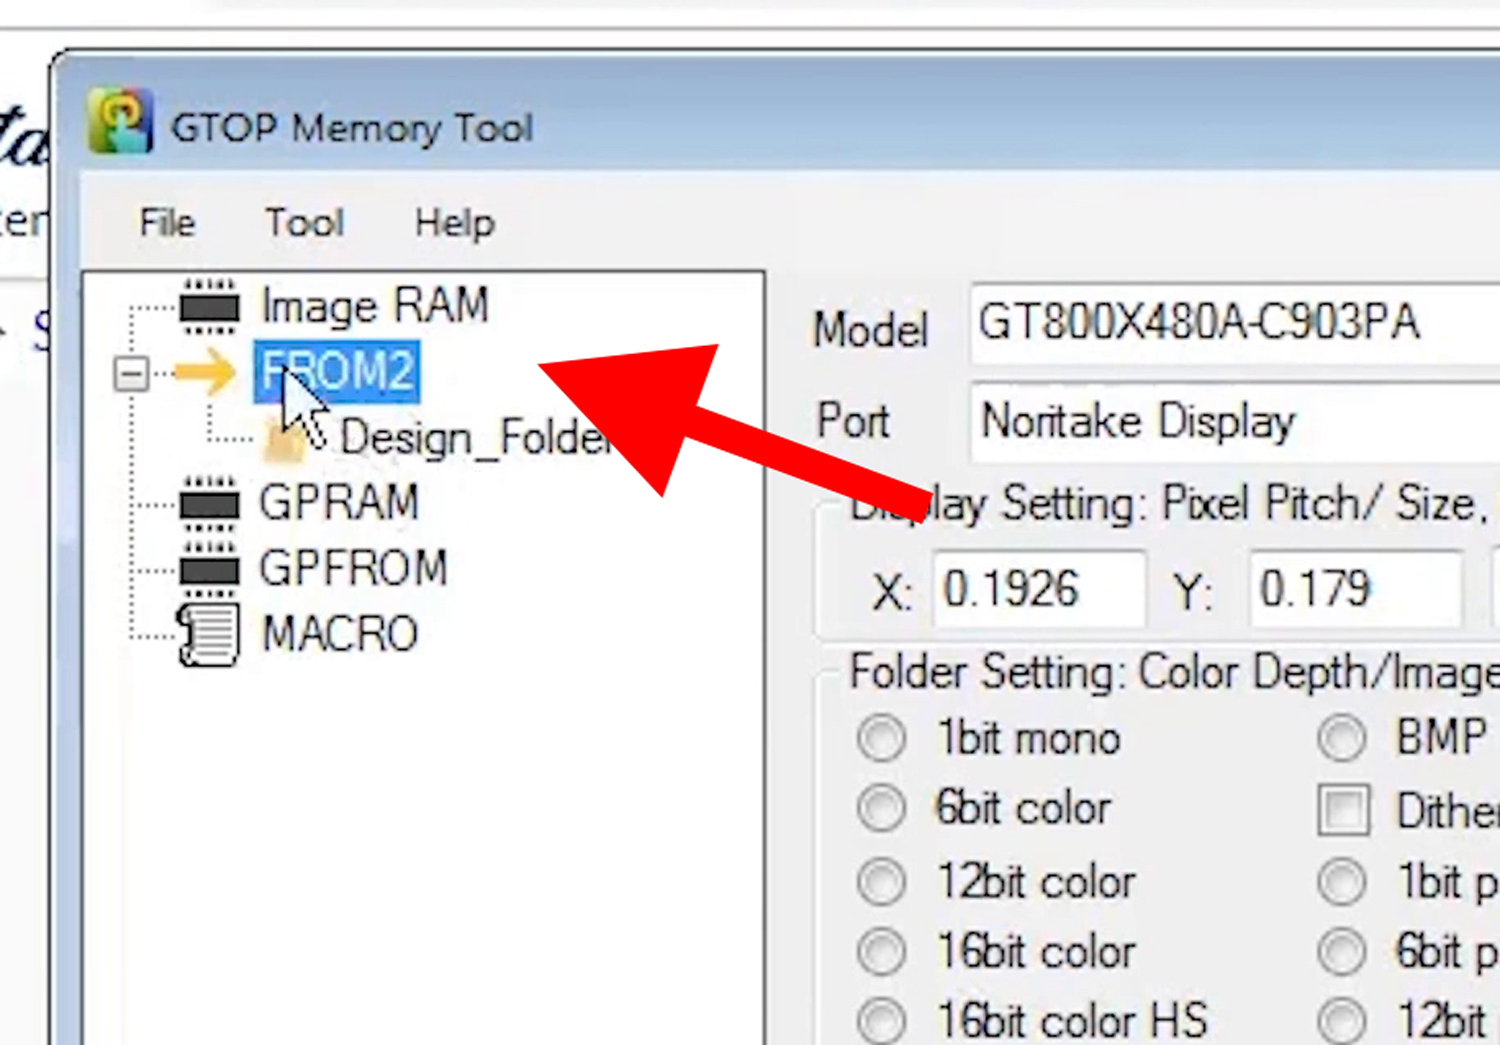
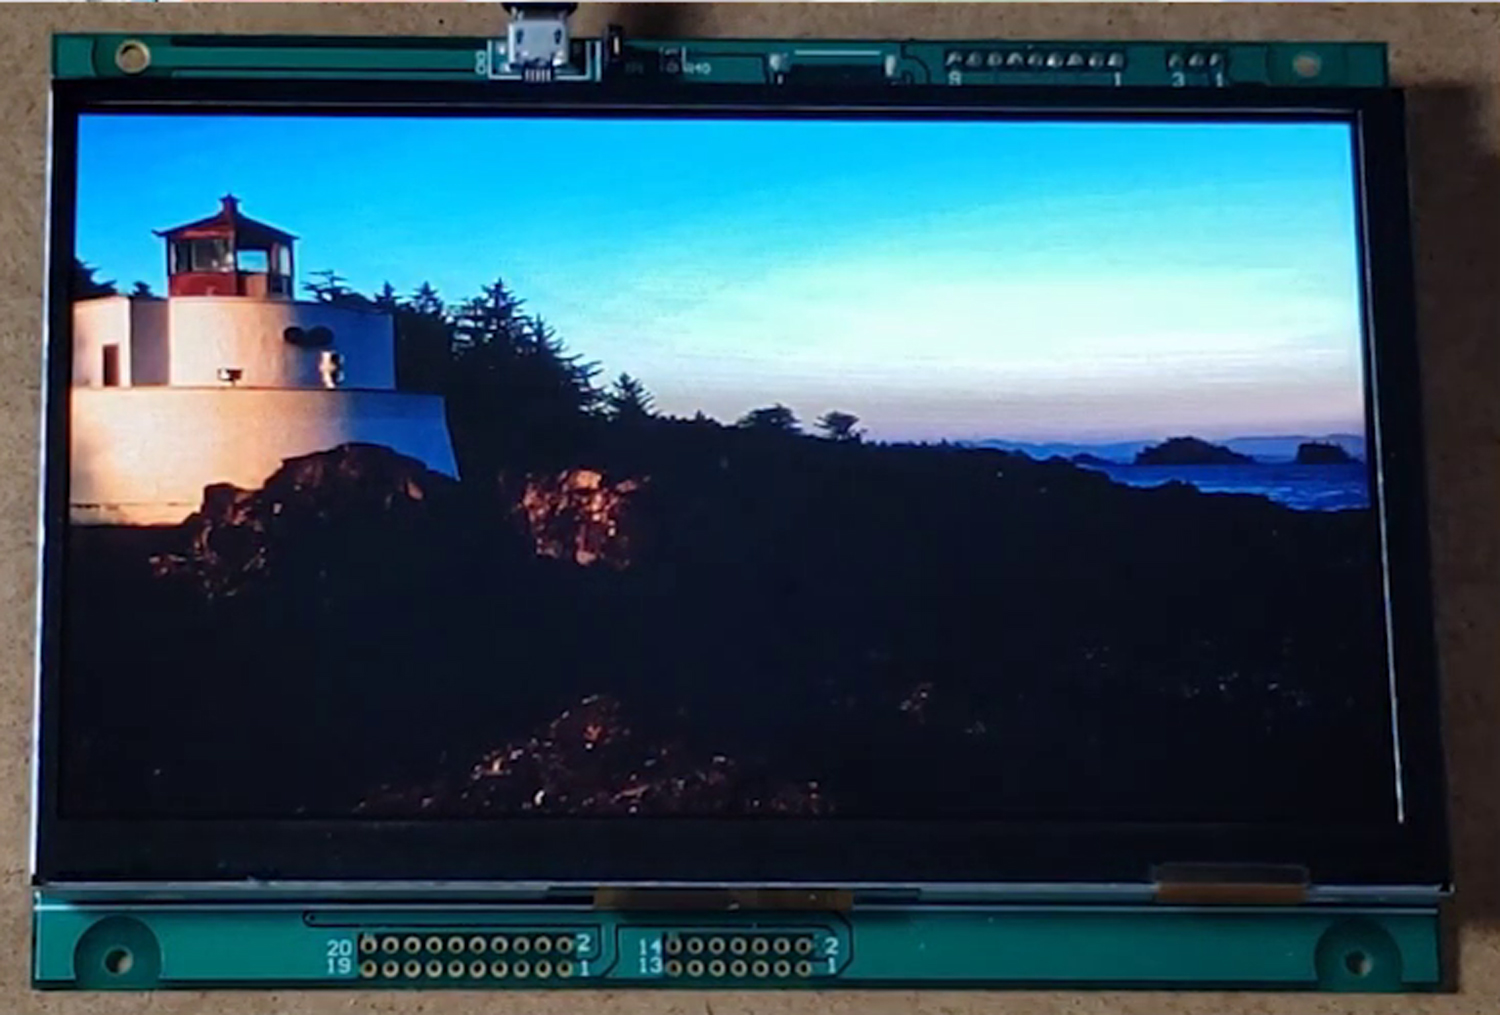
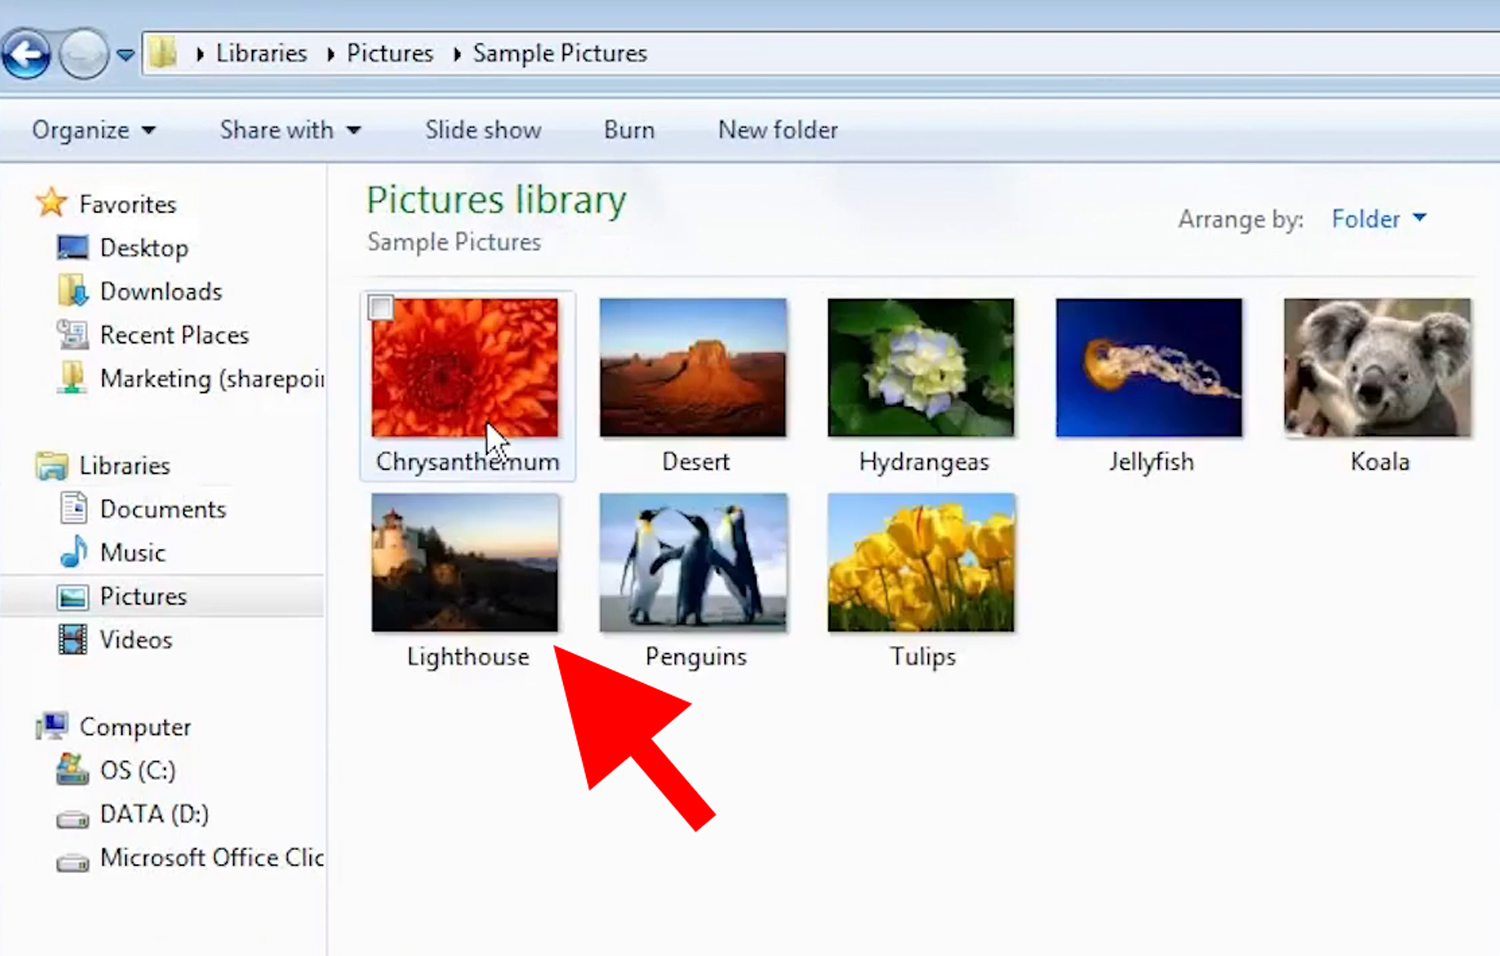
Let’s find an image that you want to display in Windows Explorer. So, I’ll go to “Pictures” and “Sample Pictures” and I’ll choose the lighthouse photo. I’ll drag it and drop it into FROM2.
See, it pops up right there. We need to click on the FROM2 node, specify the resolution as 800 × 480 because the image we’re using is larger than that.
Once you click on lighthouse.jpg, we’ll see that it compensates the resolution from 1024 x 768 to 800 x 480 so it can be properly viewed on the module.
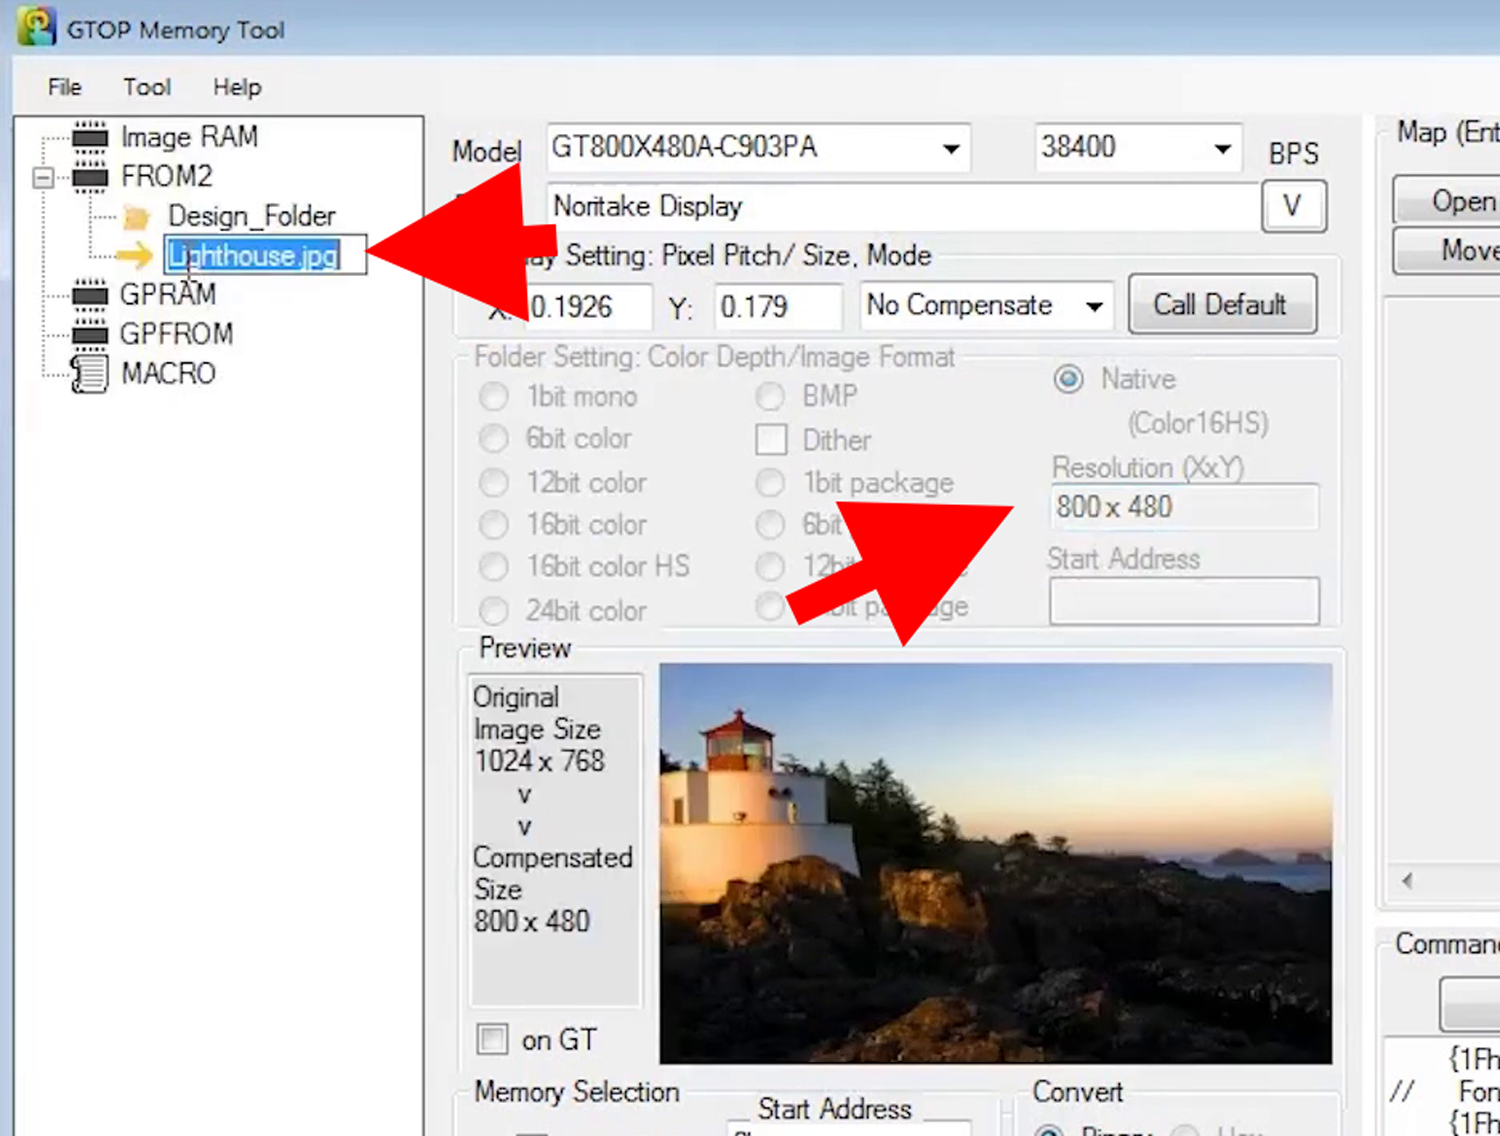
I’ll hit the check box next to “on GT” to preview that on the module.
