Series: GT-EP Video Tutorial
Example Code Explanation
Table of Contents
Last update: June 22, 2018
https://www.youtube.com/watch?v=q3Wmxy2TQtE
This webpage is intended as a text supplement for the video above. This page will provide all of the necessary information (web links, images, etc.) to achieve the goals accomplished in the video tutorial.
1. Overview
I will be explaining every single line of code in the example program that is automatically generated when you create your first menu file.
2. USB Setup
This is a very important line.
|
1 |
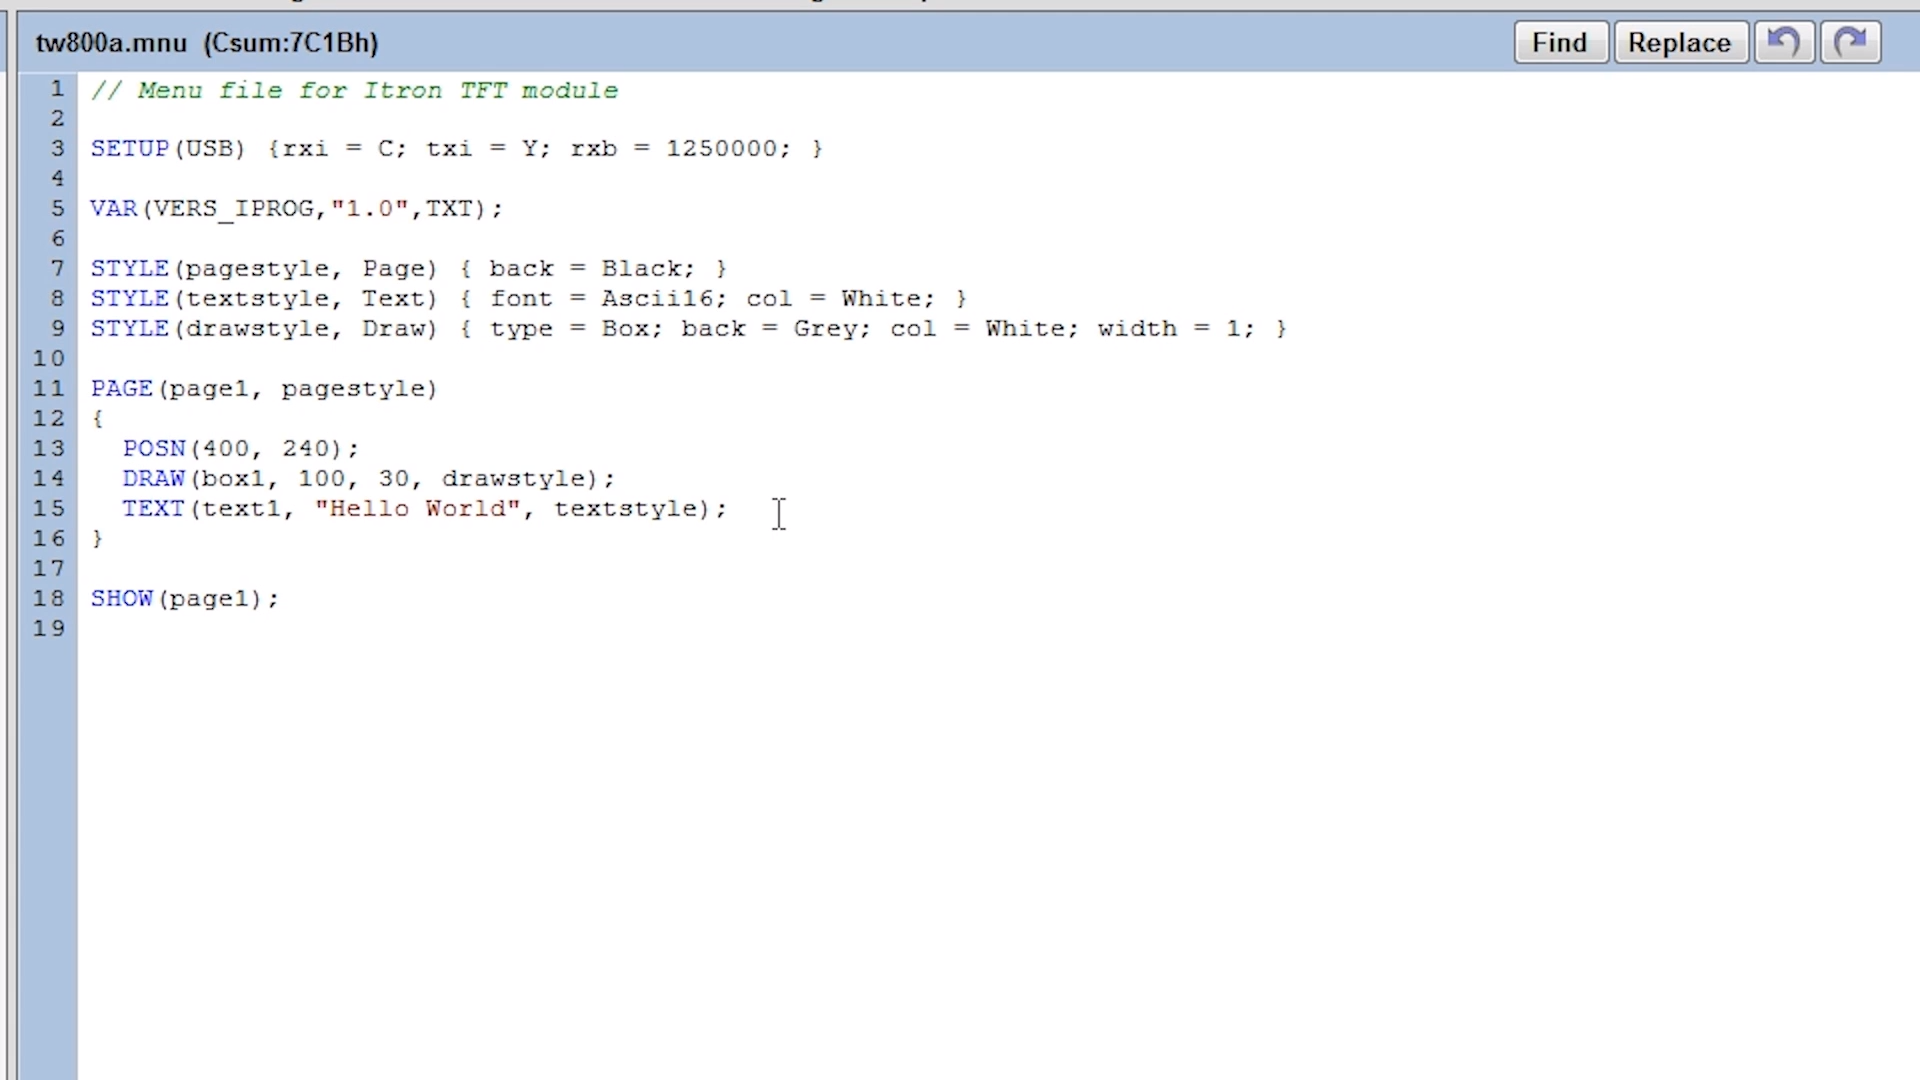
SETUP(USB) {rxi = C; txi = Y; rxb = 1250000; } |
It starts with SETUP(USB) and this essentially sets up the USB communication so you can send and receive files between the PC and your GT-EP module.
3. VAR command
This is an example of how to set up a variable.
|
1 |
VAR (VERS_IPROG,"1.0",TXT); |
VERS_IPROG is the name of the variable.
The 1.0 within the quotations means it’s a string literal of 1.0 and txt means it’s a text variable. So it’s a text variable containing 1.0 in text.
4. STYLE Commands
Style commands essentially set the parameters for whatever they are describing. The following grouping of three style commands sets the page, text, and draw styles for the program.
|
1 2 3 |
STYLE (pagestyle, Page) { back = Black; } STYLE (textstyle, Text) { font = Ascii16; col = White; } STYLE (drawstyle, Draw) { type = Box; back = Grey; col = White; width = 1; } |
This first style is a page style for the main page and all its doing is setting the page’s background to a black color.
|
1 |
STYLE (pagestyle, Page) { back = Black; } |
The second style is a text style setting the style of whatever text you might want to write. This example set the text font to ASCII16 and the color to white, so there will be white text.
|
1 |
STYLE (textstyle, Text) { font = Ascii16; col = White; } |
This third style is a draw style, it will draw a box so type is set to box, setting the background of the box to gray, and the outline of the box to white and the outline will be one pixel wide so setting the width to one.
|
1 |
STYLE (drawstyle, Draw) { type = Box; back = Grey; col = White; width = 1; } |
5. PAGE Command
The PAGE command set up a page that we want to show later. This example is using the page style that we instantiated earlier. So this page will have a black background.
|
1 2 3 4 5 6 |
PAGE (page1, pagestyle) { POSN (400, 240); DRAW (box1, 100, 30, drawstyle); TEXT (text1, "Hello World", textstyle); } |
|
1 |
STYLE (pagestyle, Page) { back = Black; } |
POSN Command
This will set the cursor position to 400 on X and 240 on Y.
|
1 |
POSN (400, 240); |
DRAW command
DRAW command labels whatever you’re drawing.
|
1 |
DRAW (box1, 100, 30, drawstyle); |
So this is being labeled as box 1 and its being drawn with a width of 100 and height of 30 and it’s using the draw style that we talked about earlier up here so it will be a box, that’s gray , with white outline, with an outline width of 1.
|
1 |
STYLE (drawstyle, Draw) { type = Box; back = Grey; col = White; width = 1; } |
TEXT Command
We will also use the TEXT command, and again this is labeling the text as text 1.
|
1 |
TEXT (text1, "Hello World", textstyle); |
“Hello World” will be stored to text1 and assigned to the text style that we made earlier. So the font of “Hello World” will be ASCII16 and the color of that text will be white.
|
1 |
STYLE (textstyle, Text) { font = Ascii16; col = White; } |
6. SHOW Command
This last command SHOW(page1); is doing exactly what it says.
|
1 |
SHOW (page1); |
It’ll show whatever we’re doing in page one on the display.
7. Result
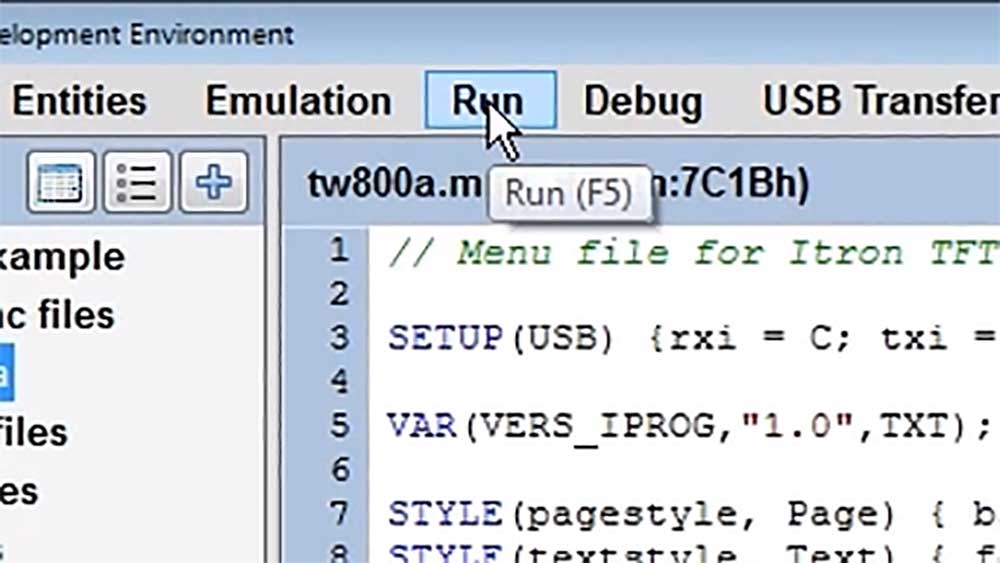
To actually see what’s going on let’s go up and hit run.
Now we haven’t saved a project yet so let’s do that. I’m going to save it as the same thing I labeled it before.
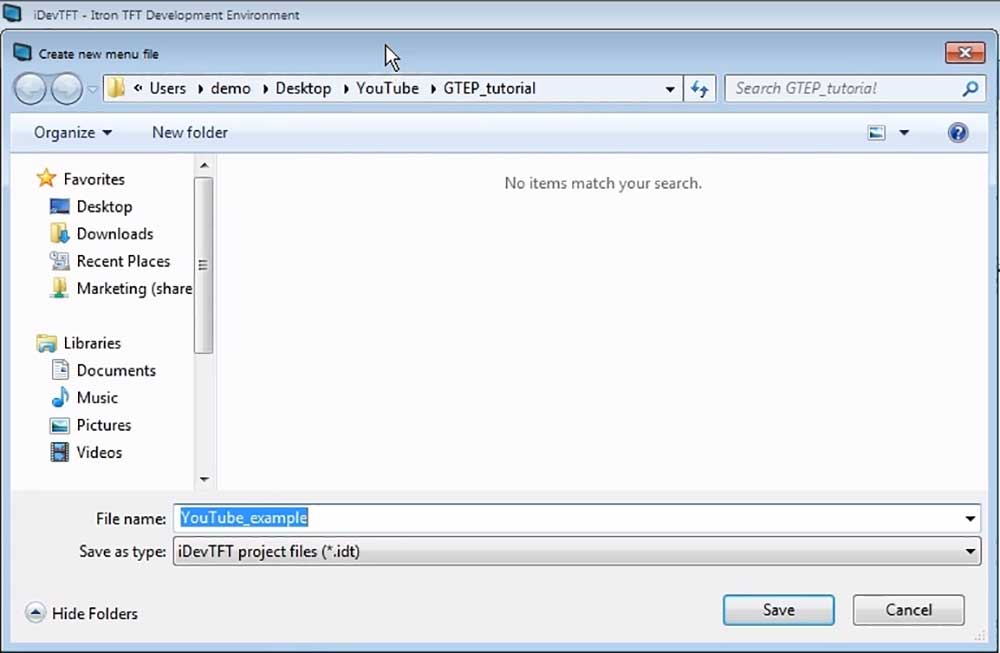
So hit save and now it runs the example program.
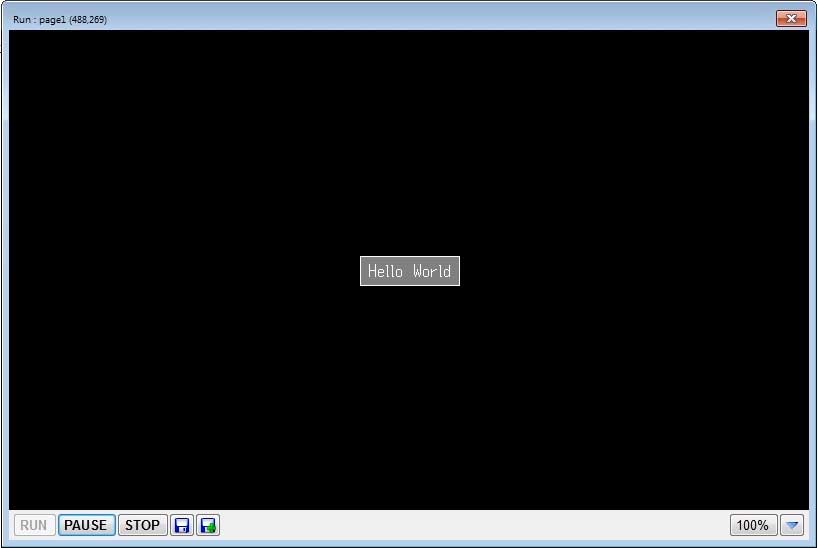
So it’s in the exact position that it was saying before with a gray box that has a white outline with “Hello World” in white text.