GU-TFT Tool Provides the easiest way to evaluate and customize your GU-TFT module.

This tool installs a USB driver for the Noritake GU800X480A-C903P display module as well as an evaluation application to help you quickly get familiar with our product. This application allows you to write text, display images, and create custom switches on the GU800X480A-C903P module. Choose from either USB or UART to communicate.
Note: This tool is designed for GU800X480A-C903P and deprecated for other models. If you have a recent Noritake TFT module such as GTWV070C3A00PA, please use GTOMP.
Download
Update: 06-10-2016
System Requirements:
- Microsoft Windows 7/8 (32bit/64bit) with .NET framework 4.0 or 4.5
- Serial Communication Port (USB / UART)
- 4MB of Hard Drive space
Application Setup:
- Unzip the file onto your Desktop or into MyDocuments. Open the folder and double click on “TFT_Tool_setup”
- After the installation has finished, restart your PC so the GU-TFT driver is properly installed.
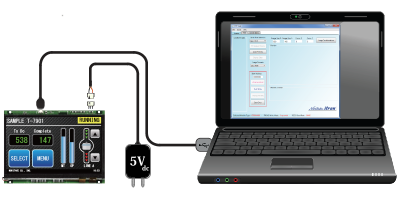
- Connect your GU-TFT module to your PC via USB.
- Launch the “TFT Tool” application that is now installed on your PC.
- You can now use this tool to evaluate your Noritake GU-TFT.
Conditions:
Applicable Display Models:
- GT800X480A-C903P
Tested operating systems:
- Microsoft Windows 7/8 (32bit/64bit) with .NET framework 4.0 or 4.5
Note:
- This tool is supplied “As is” without any warranty.
- Its possible to fail or malfunction under a specific combination of peripherals and PC or operating system.
- When using “bus-powered” mode, please verify the GU-TFT module’s power consumption with the module’s hardware specification.
- Power requirements are reported as “bus-powered” 100mA. Please check that the USB host/hub is capable of providing sufficient power. When using “bus-powered” mode, please verify the GU-TFT module’s power consumption with the module’s hardware specification.
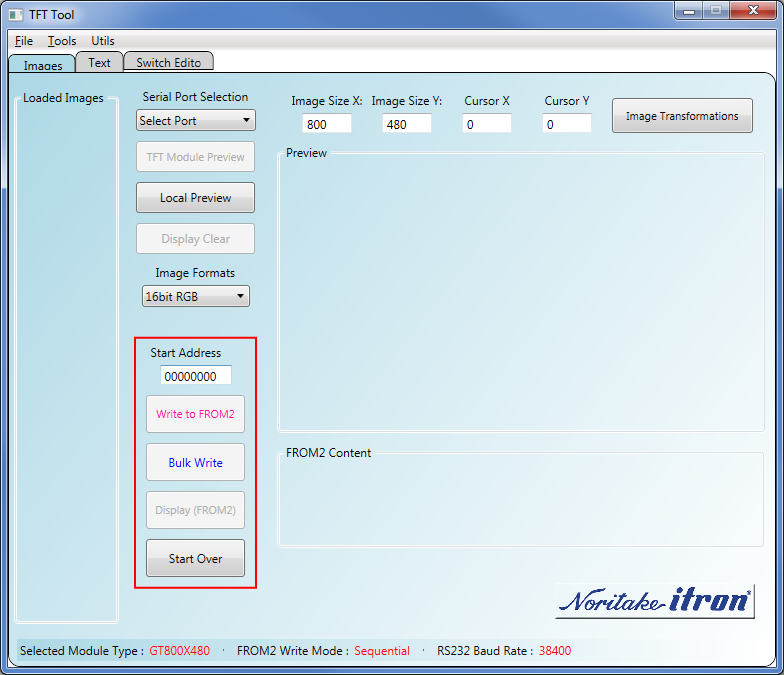
Display “Hello” on your GU-TFT:
- With your GU-TFT module connected to your PC and GU-TFT tool open, select the serial port that your module is connected to.
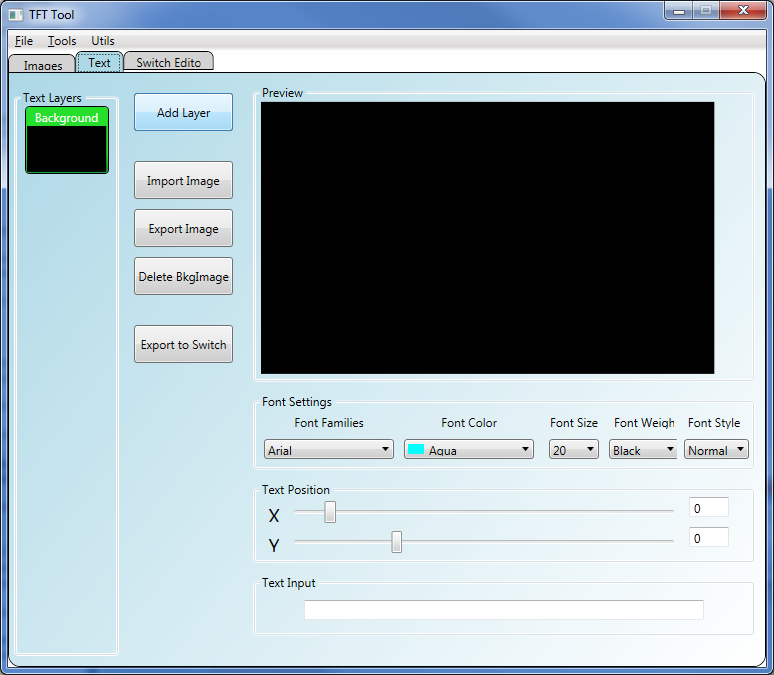
- Once the connection is successful, navigate to the “Text” tab.
- Type “Hello” in the “Text Input” field. You should see your text show up in the “Preview” window.
- Click on “Export Image” and you will be taken back to the “Images” tab and your text image will appear in the “Loaded Images” section.
- Click on “TFT Module Preview” and your text will be sent to your module.
Display a bitmap image on your GU-TFT:
- With your GU-TFT module connected to your PC and GU-TFT tool open, select the serial port that your module is connected to.
- Once the connection is successful, make sure you are on the “Images” tab.
- In order to load an image, go to File > Open Image Files. Now you can choose any image that you want to see on your module.
- Once you click “Open” on your desired image, it will appear in the “Loaded Images” section. To send this image to the display, click on it and then click “TFT Module Preview”. You should now see the image on your module.
Tutorial Video: Displaying an Image with GU-TFT Tool
Screenshots: