Series: Using the GT-SP Touch Panel TFT Display with Arduino
Displaying DHT11 Sensor Module Values on Touch Screen
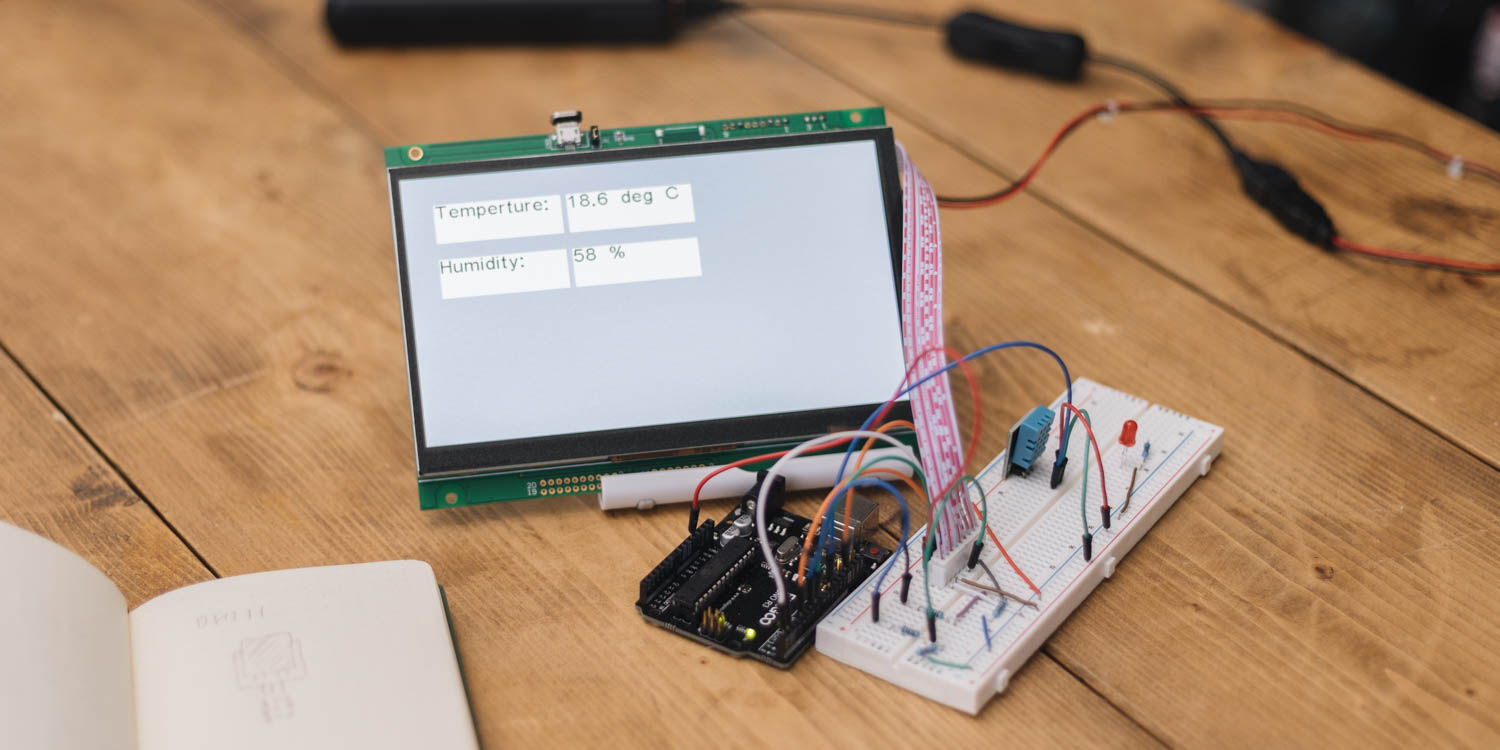
Table of Contents
DownloadDownload sample project & program (for GT Design Studio & Arduino)
Hello everyone, I’m @kissaten, a beginner in electronics. In this series, I’m explaining the process of connecting a 7-inch touch display (GT-SP series “GTWV070S3A00P”) to an Arduino and working on various projects.
This time, I took on a project where I connected the DHT11 temperature and humidity sensor module to an Arduino, retrieved its data, and displayed the temperature and humidity on the screen.
Please note that this article is a continuation of the previous one (“Controlling an LED Connected to Arduino from a Touch Screen”). If you haven’t seen the previous content yet, you can check it out here.
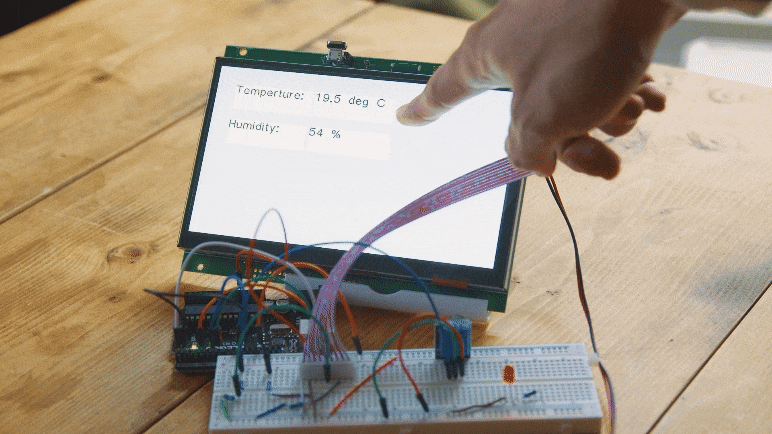
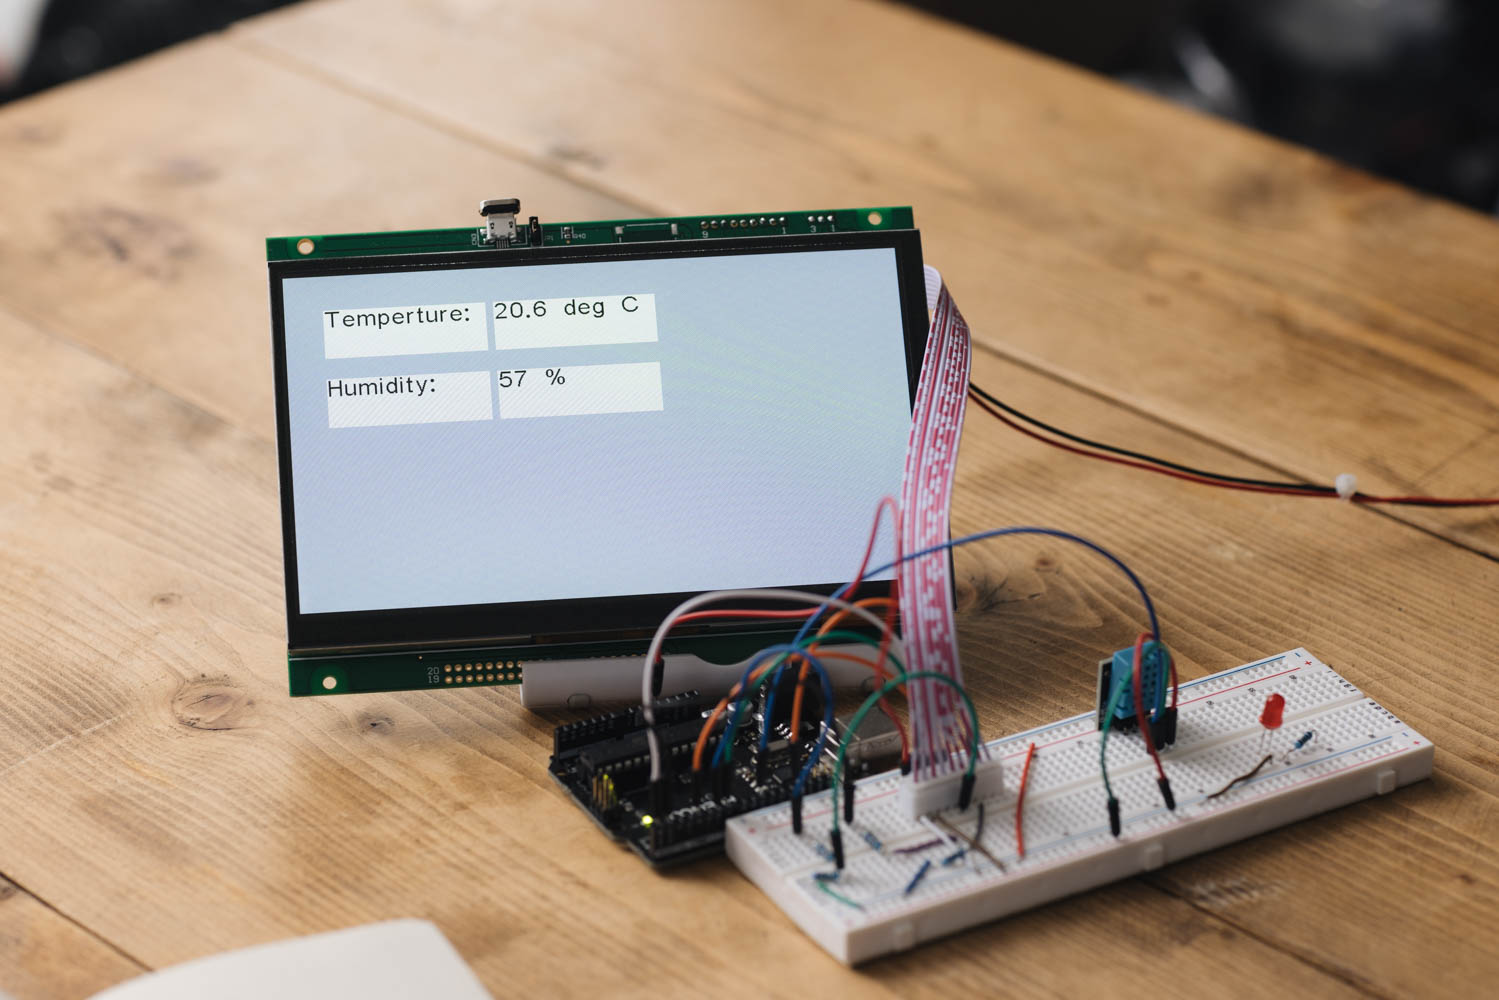
This GIF shows temperature and humidity changes by touching the sensor.
Connecting the Temperature and Humidity Sensor Module DHT11
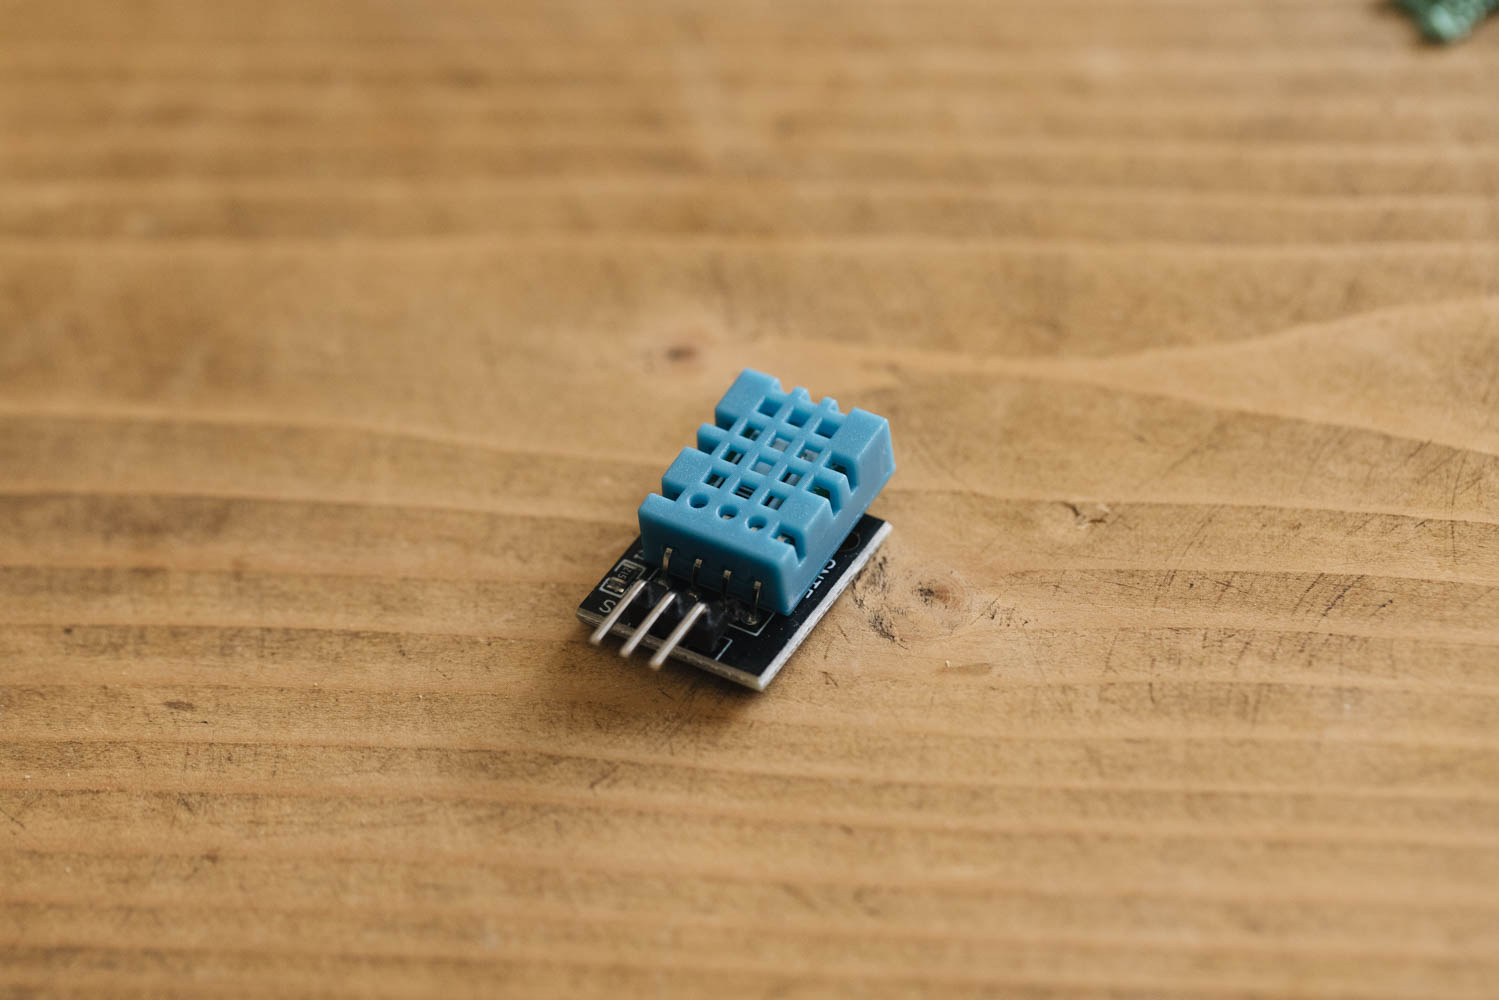
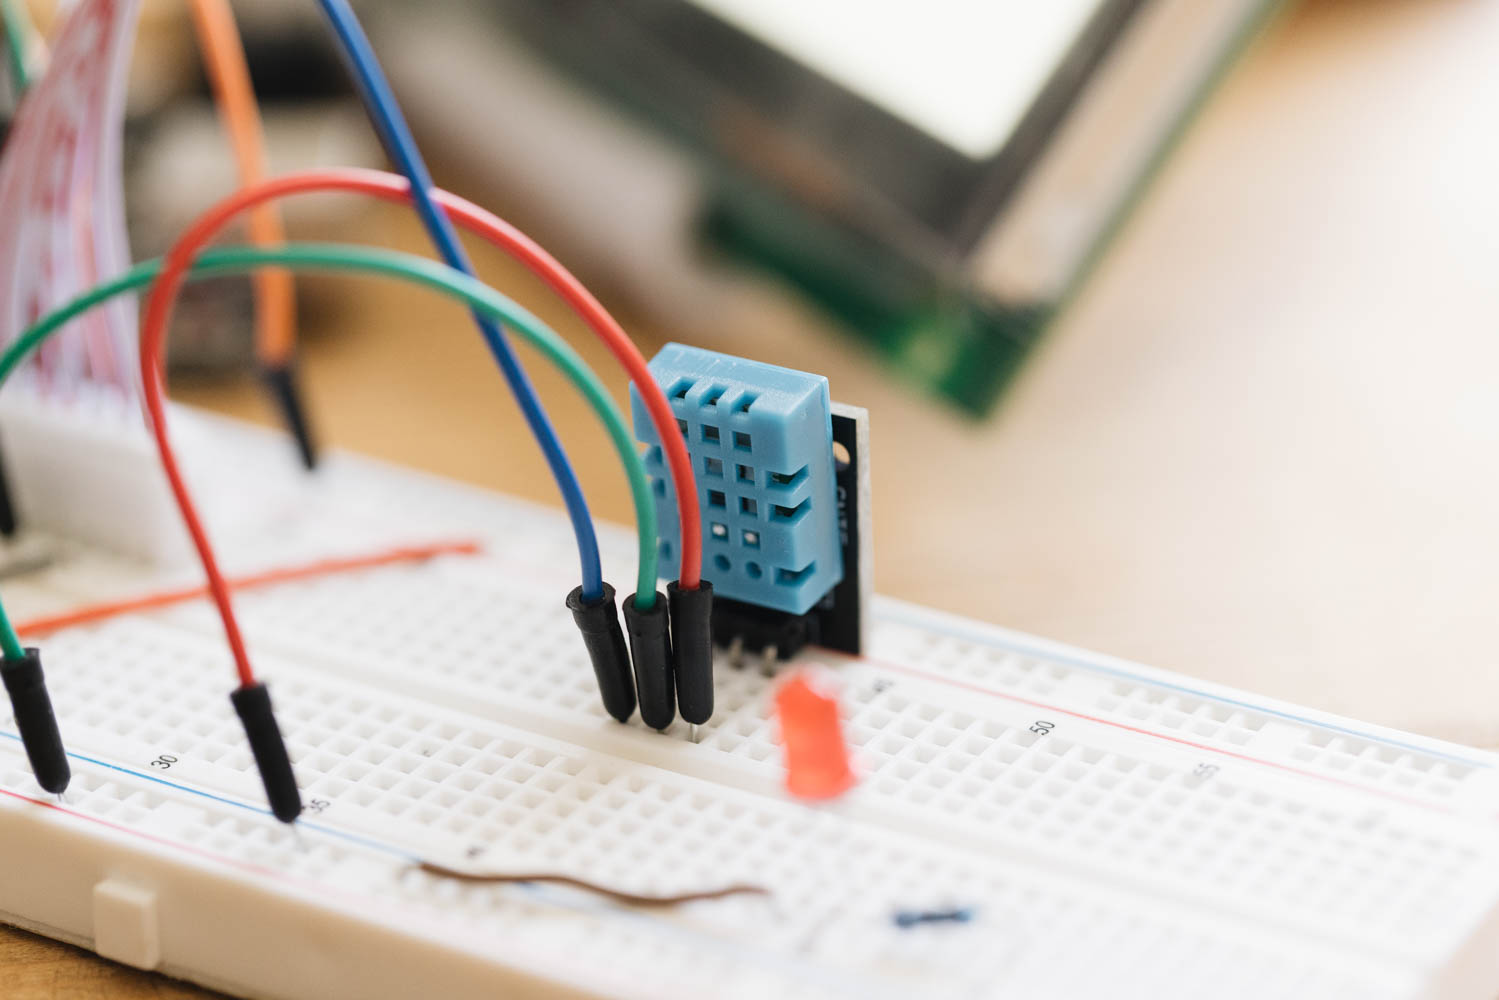
To receive data from the temperature and humidity sensor module DHT11, we will add DHT11 to the previous circuit. The DHT11 we are using this time is a module. Connect the GND, 5V, and DATA pins to the corresponding pins on the Arduino. For this setup, we connected the DATA pin to D10 on the Arduino, but depending on the DHT11 module you have, the wiring positions may vary, so please verify it.
(Wiring between GT-SP and Arduino is omitted. If you need detailed information, please refer to the previous articles.)
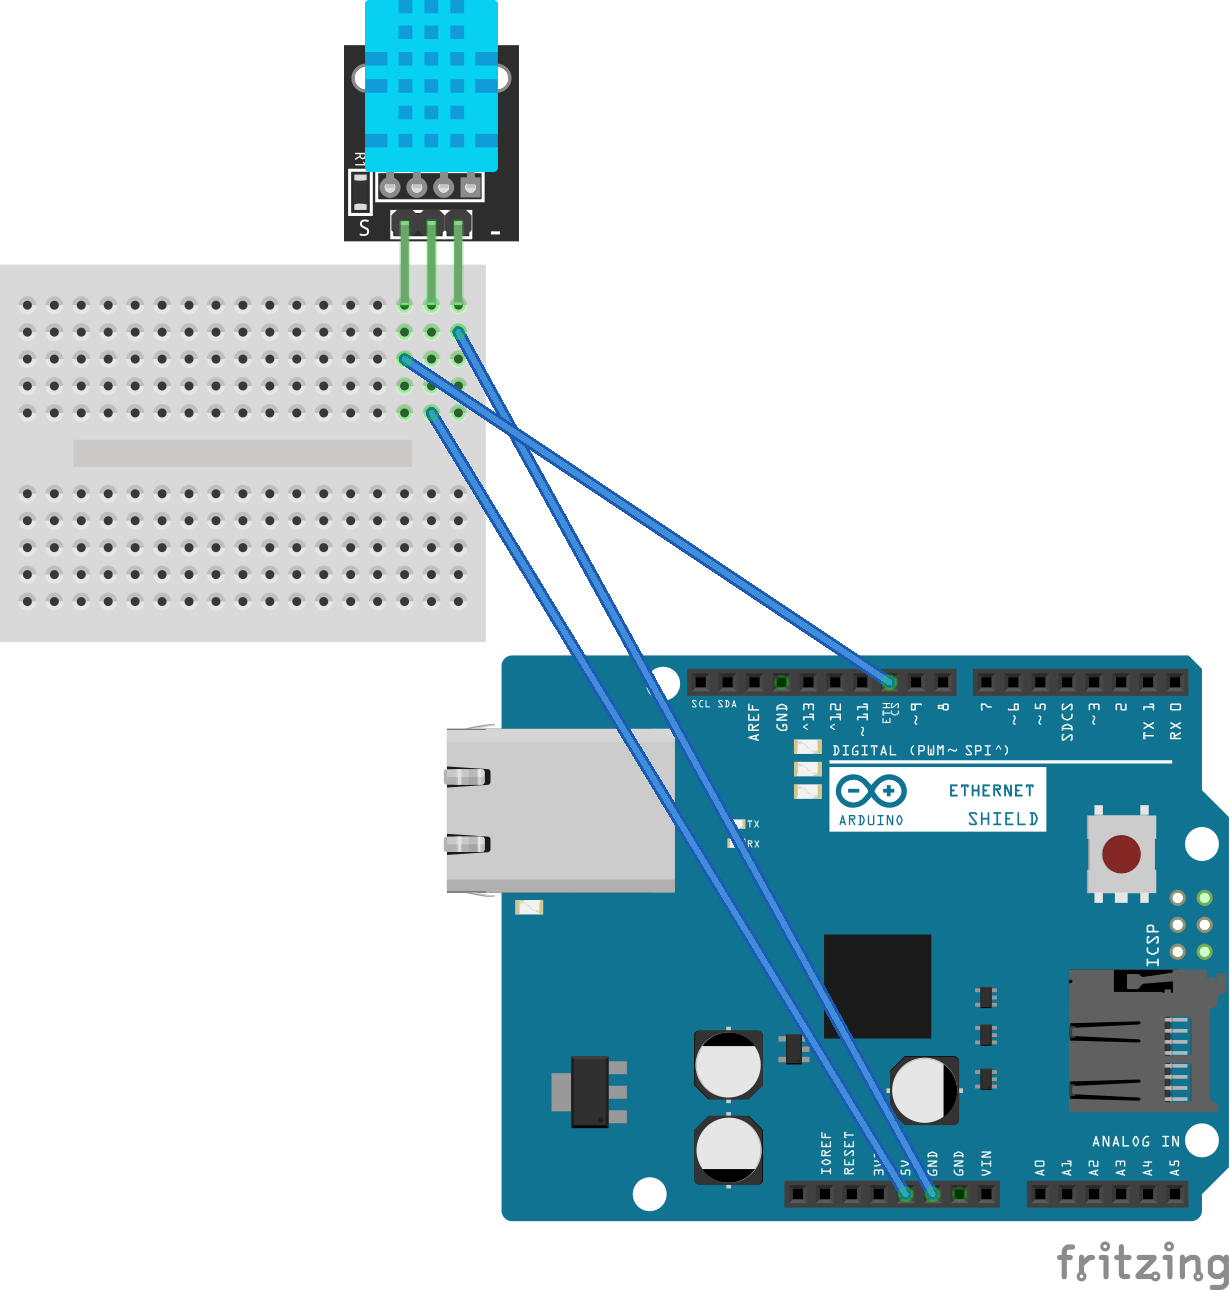
Picture by [Fritzing (CC BY-SA)]
Creating a Project for Writing on a Touch Screen
Explanation:
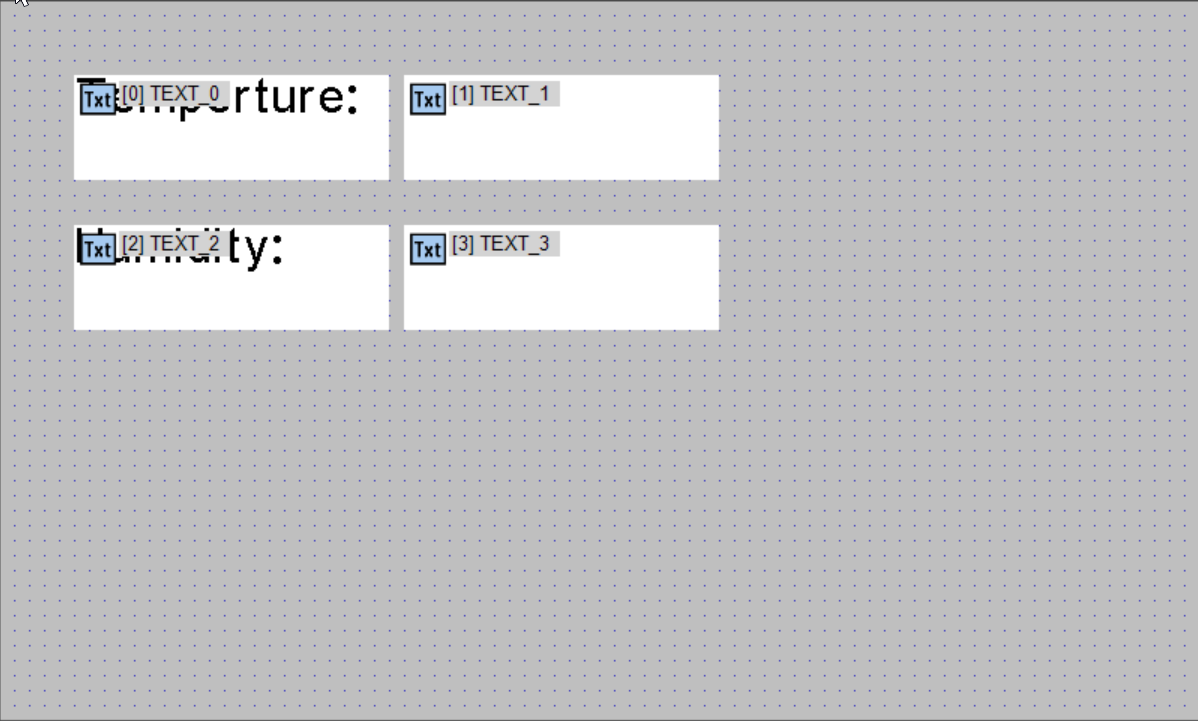
On the page labeled “PAGE_0,” we will create four text objects named “TEXT_0” through “TEXT_3.” In “TEXT_0,” we’ll insert the heading “Temperature,” and in “TEXT_2,” we’ll add the heading “Humidity.” “TEXT_1” will be used to display temperature, while “TEXT_3” will be used to display humidity values.
These text objects serve as the receiving end to display values sent from Arduino. Therefore, no event actions need to be configured for them.
Creating an Arduino Program
Building upon the previous articles, we will create the following program:
Please note that to use the DHT11 sensor, you’ll need two libraries. You can download the ZIP files for each library from their respective pages by clicking on “CODE > DOWNLOAD ZIP.” After downloading, install these libraries in the Arduino IDE by going to “Sketch > Include Library > Add .ZIP Library.”
https://github.com/adafruit/Adafruit_Sensor
https://github.com/adafruit/DHT-sensor-library
DownloadDownload sample project & program (for GT Design Studio & Arduino)
|
1 2 3 4 5 6 7 8 9 10 11 12 13 14 15 16 17 18 19 20 21 22 23 24 25 26 27 28 29 30 31 32 33 34 35 36 37 38 39 40 41 42 43 44 45 46 47 48 49 50 51 52 53 54 55 56 57 58 59 60 61 62 63 64 65 66 67 68 69 70 71 72 73 74 75 76 77 78 79 80 81 82 83 84 85 86 87 88 89 90 91 92 93 94 95 96 97 |
#include <string.h> // 必要なヘッダーファイルをインクルード | Include necessary header files #include "DHT.h" // DHTセンサー用のライブラリをインクルード | Include library for DHT sensor // ピン設定 | Pin assignments #define GT_DTR 4 //DTR #define GT_DSR 6 //DSR #define GT_TRDY 7 //TRDY <--未使用 | unused in this sample #define DHT_SENSOR_PIN 10 // DHTセンサーのデータピン | Data pin for DHT sensor #define DHT_SENSOR_TYPE DHT11 // 使用するDHTセンサーの型 | Type of DHT sensor being used //変数 | Variable float temperature; //温度 | Temperature float humidity; //湿度 | Humidity DHT dht(DHT_SENSOR_PIN, DHT_SENSOR_TYPE); // DHTセンサーオブジェクトを作成 | Create DHT sensor object //////////////////////////////////////////////////// // setup //////////////////////////////////////////////////// void setup() { // ピン初期設定 | Pin settings pinMode(GT_DTR, INPUT); pinMode(GT_DSR, OUTPUT); pinMode(GT_TRDY, INPUT); digitalWrite(GT_TRDY, LOW); // シリアル通信設定 | Serial communication settings Serial.begin(38400); // 38400bps Baud rate Serial.setTimeout(100); // シリアルタイムアウト | Serial timeout dht.begin(); // DHTセンサーの初期化 | Initialize DHT sensor } //////////////////////////////////////////////////// // loop //////////////////////////////////////////////////// void loop() { //温度と湿度の取得 | Get temperature and humidity temperature = dht.readTemperature(false); // trueならば華氏 それ以外は摂氏 | Fahrenheit if true, Celsius otherwise humidity = dht.readHumidity(); if (isnan(humidity) || isnan(temperature)) { // センサーからの読み取りエラー時のメッセージ出力 | Output error message for sensor read failure gtsp_ObjPrpSet_string(1, 0x40, "Error"); //Object No.1 / 0x40 = Text0 gtsp_ObjPrpSet_string(3, 0x40, "Error"); //Object No.3 / 0x40 = Text0 } else{ //温度と湿度の出力 | Output temperature and humidity gtsp_ObjPrpSet_string(1, 0x40, String(temperature,1) + " deg C"); //Object No.1 / 0x40 = Text0 gtsp_ObjPrpSet_string(3, 0x40, String(humidity,0) + " %"); //Object No.3 / 0x40 = Text0 } delay(2000); } /********************** 関数 | Function **********************/ //////////////////////////////////////////////////// // オブジェクト制御コマンド - プロパティ設定 (文字列用) | Object Control Command - Property Setting (for String) //////////////////////////////////////////////////// void gtsp_ObjPrpSet_string(int obj, int prp, String val ) { gt_print("CMD"); //コマンドヘッダ | Command header gt_put(0xd3); //オブジェクト-プロパティ設定コマンド | Object-Property Setting gt_put(obj >> 0); //オブジェクトNo. 下位バイト | Object No. Lower byte gt_put(obj >> 8); //オブジェクトNo. 上位バイト| Object No. Upper byte gt_put(prp >> 0); //プロパティNo. 下位バイト | Property No. Lower byte gt_put(prp >> 8); //プロパティNo. 上位バイト| Property No. Upper byte gt_put(val.length() >> 0); //データ長 最下位バイト | Data length Least significant byte gt_put(val.length() >> 8); //データ長 下位バイト | Data length second byte gt_put(val.length() >> 16); //データ長 上位バイト | Data length third byte gt_put(val.length() >> 24); //データ長 最上位バイト| Data length Most significant byte gt_print(val); //文字列送信 | character string transmission } //////////////////////////////////////////////////// // 1byte送信 | Send byte to GT-SP //////////////////////////////////////////////////// void gt_put(unsigned char onebyte) { while ( digitalRead(GT_DTR) == HIGH ) {} //busycheck Serial.write(onebyte); } //////////////////////////////////////////////////// // 文字列送信 | Send String to GT-SP //////////////////////////////////////////////////// void gt_print(String val) { int val_i; //文字列を1文字ずつ送信 | Send string per one byte for (val_i = 0; val_i < val.length(); val_i++) { while ( digitalRead(GT_DTR) == HIGH ) {} //busycheck Serial.print(val.substring(val_i, val_i+1)); } } |
Interpreting the Program
To enable the use of the DHT11 sensor, we perform library and pin setup at the beginning of the program.
We retrieve the temperature using dht.readTemperature() and the humidity using dht.readHumidity(). Regarding dht.readTemperature(true), it returns the temperature in Celsius (°C) by default but switches to Fahrenheit (°F) if specified as “true.”
After receiving these values, we append units and display them on the text objects.
The delay(2000) within the program is inserted because the DHT11 requires a 2-second interval for accurate readings. For more details, please refer to the DHT11 specifications.
Execution Result
We were able to display the humidity and temperature obtained from the DHT11 on the text objects. Displaying sensor values like this is a frequently used feature, in my opinion.
Next, we will use the values obtained in this session to add various decorations to the GT-SP.