Series: Getting Started with GT-CP
Getting Started with GT-CP | GTOMP Sample Image Menu : Use Sample Program
- GTOMP Sample Image Menu : Use Sample Program
- GTOMP Sample Image Menu
- Loading samples using GTOMP
- Writing an image
- Writing a program
Series: Getting Started with GT-CP
- Step 1. Connect Display
- Step 2. Install GTOMP
- Step 3. Display “Hello, World!”
- Step 4. Store and Display a Sample Image
- Step 5. Adjust the Touch Sensitivity
- Step 6. Adjust the Touch Sensitivity for Various Cases
- Step 7. Connecting to a Host Controller
- Step 8. Three control methods for GT-CP
- Case Study : Image Gallery Program
- Case Study : Tenkey Program
- Case Study : Image Gallery And Slider Program
GTOMP Sample Image Menu : Use Sample Program
“GTOMP” is software for designing and programming GT-CP.
I will introduce how to make the sample program work using GTOMP.
GTOMP Sample Image Menu
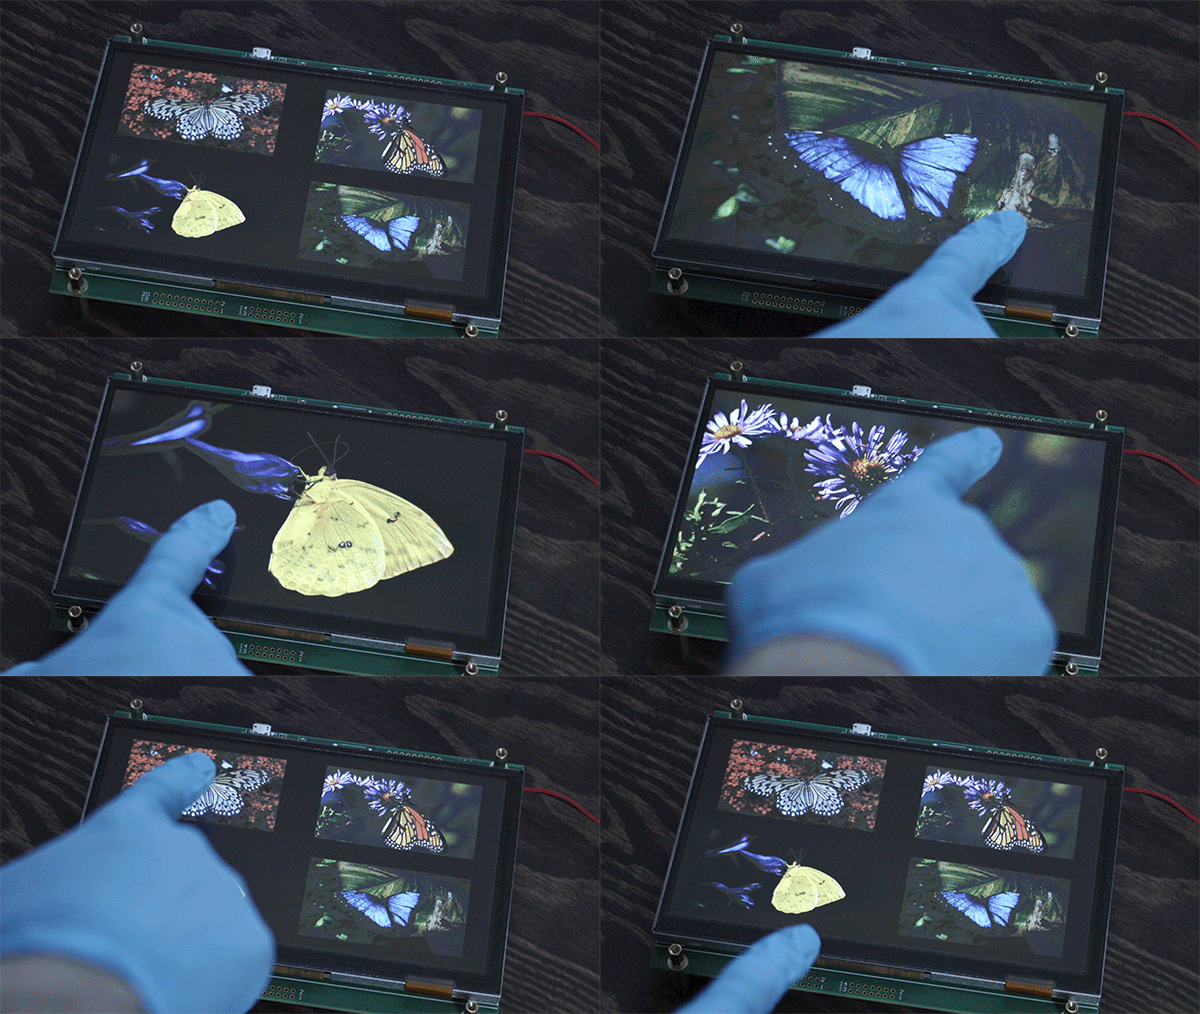
Display the menu of the image list. Then tap the image to enlarge the photo display.
Write this program with GTOMP and actually run it.
The point is that you can create such a gallery without writing a single line of program code.
Loading samples using GTOMP
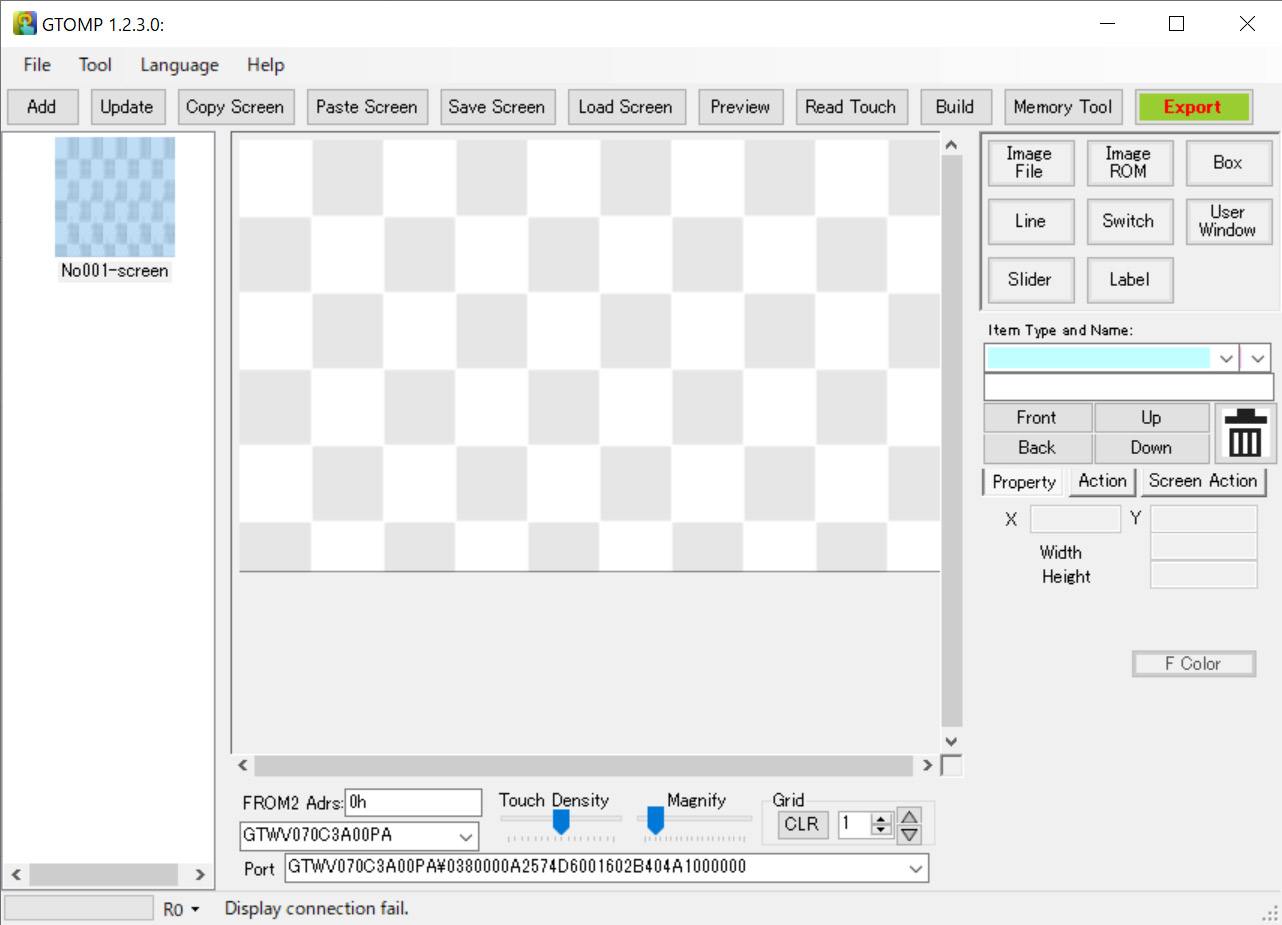
Connect GT-CP and open GTOMP. At this time, make sure that the connected port is correct.
Next, prepare sampleimage.gto in sampleimage.zip from the link.
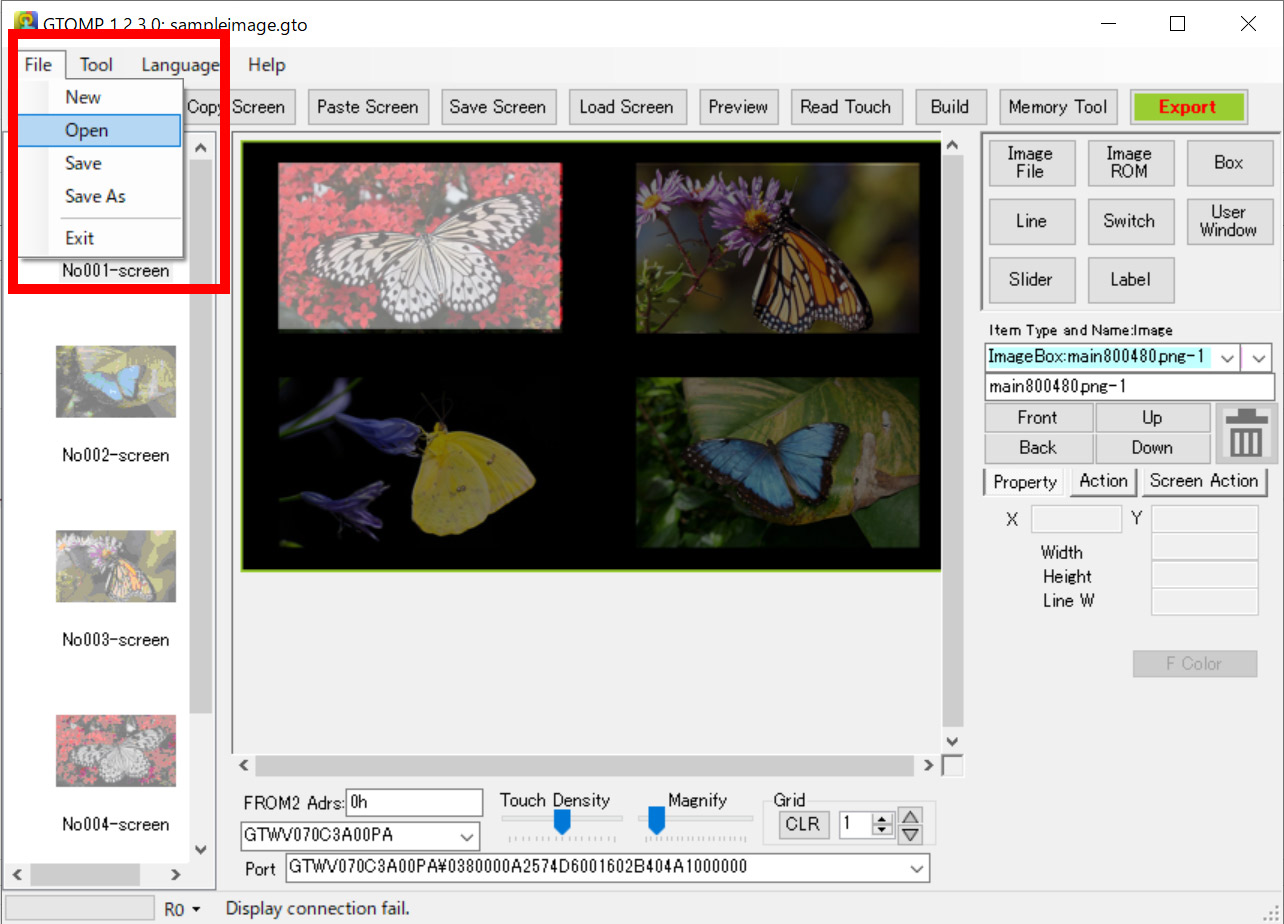
Open “sampleimage.gto” from “File”-> “OPEN” of GTOMP. Then all the images etc. will be prepared.
Writing an image

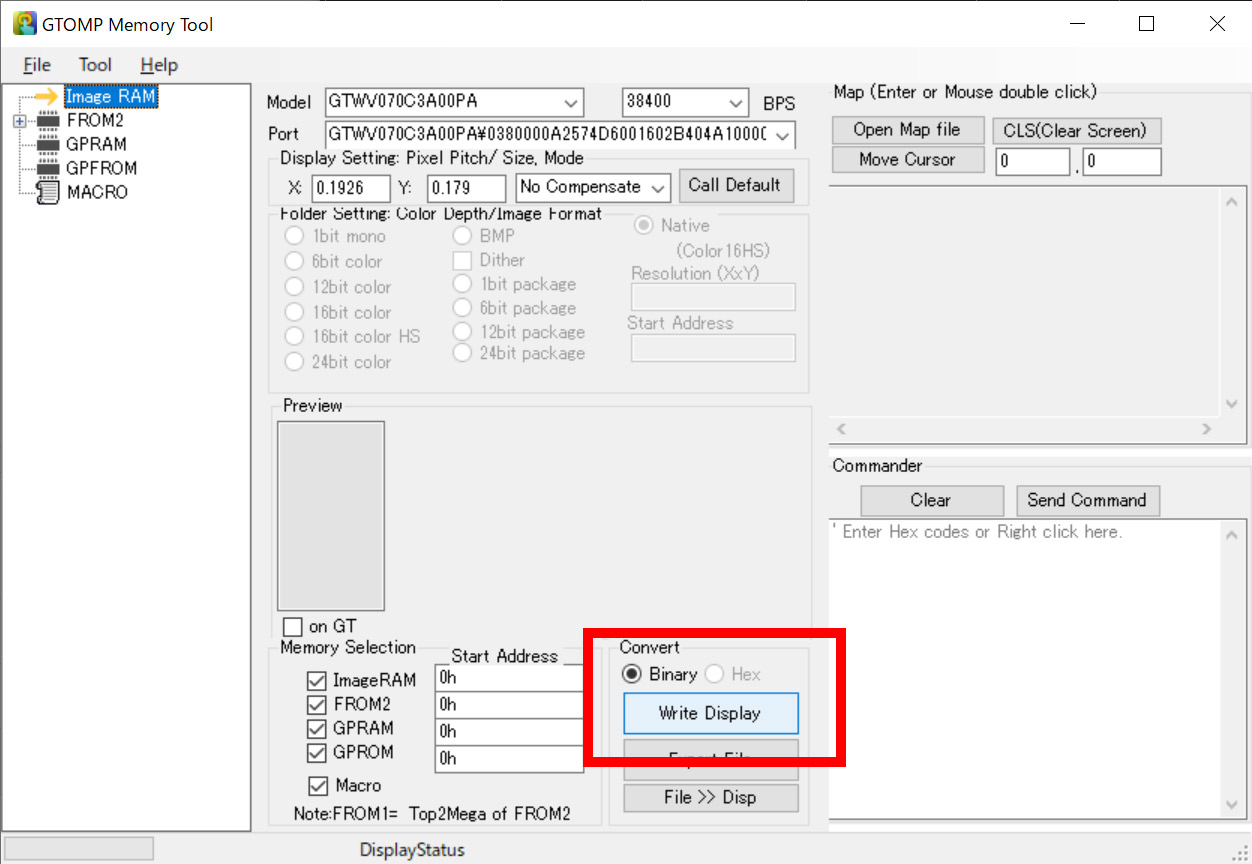
Next, open “Memory Tool” and write an image file etc. to FROM2(Internal flash memory) of GT-CP from “Write Display”.
Then the memory tool closes.
Writing a program

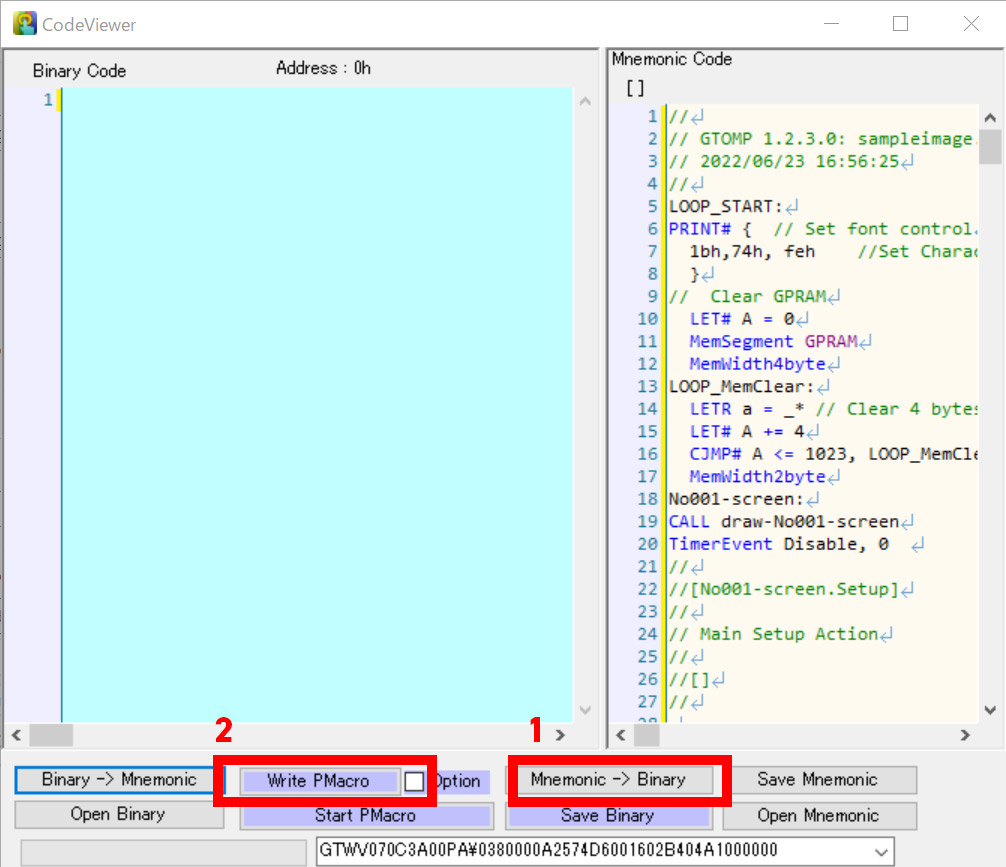
Click “Build” at the top right of the screen, and click “OK” on the confirmation screen.
(The Code Viewer screen opens)
Click “Mnemonic-> Binary” at the bottom of the screen, and click “OK” on the confirmation screen.
(Source code is converted to binary code)
Then click “Write PMacro” on the left
(The program is written to the module)
Click “Yes” when the completion window is displayed.
(The contents of the sample program are executed on the module)

Since the writing is completed, please check the operation of the module.
The “Terminal” screen will open, but please close it as it will not be used this time.
