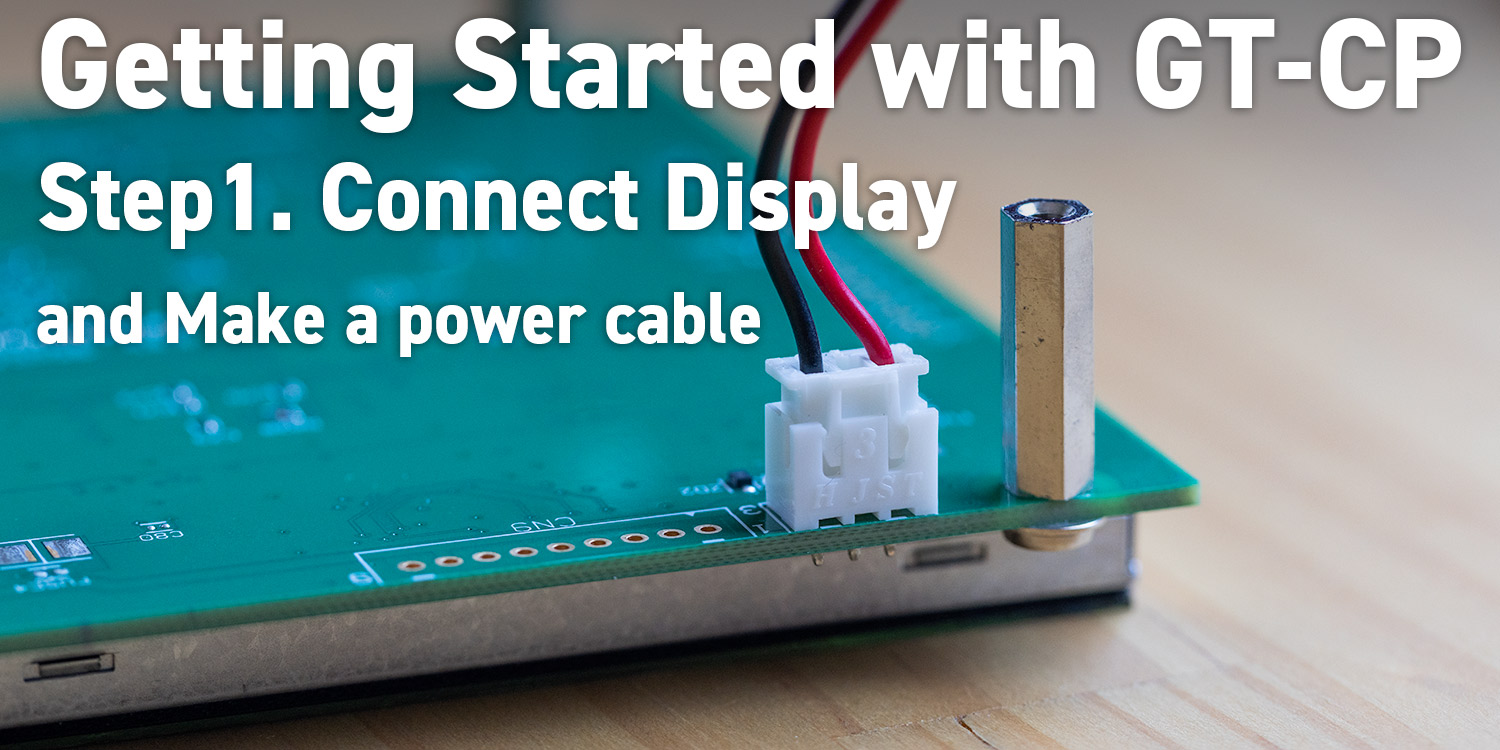
Series: Getting Started with GT-CP
Getting Started with GT-CP | Step 1. Connect Display
Series: Getting Started with GT-CP
- Step 2. Install GTOMP
- Step 3. Display “Hello, World!”
- Step 4. Store and Display a Sample Image
- Step 5. Adjust the Touch Sensitivity
- Step 6. Adjust the Touch Sensitivity for Various Cases
- Step 7. Connecting to a Host Controller
- Step 8. Three control methods for GT-CP
- GTOMP Sample Image Menu : Use Sample Program
- Case Study : Image Gallery Program
- Case Study : Tenkey Program
- Case Study : Image Gallery And Slider Program
What is GT-CP?
GT-CP is a series of LCD Touch Screen Modules that offer intelligent command operation. These modules work with high or low-end microcontrollers and can easily be used in an embedded GUI application. Powerful commands minimize host overhead and improve development efficiency. Built-in memory allows for quick and easy access to multiple language font tables and user-defined interface graphics.
For more information: https://www.noritake-elec.com/products/lcd-touch-screen/gt-cp
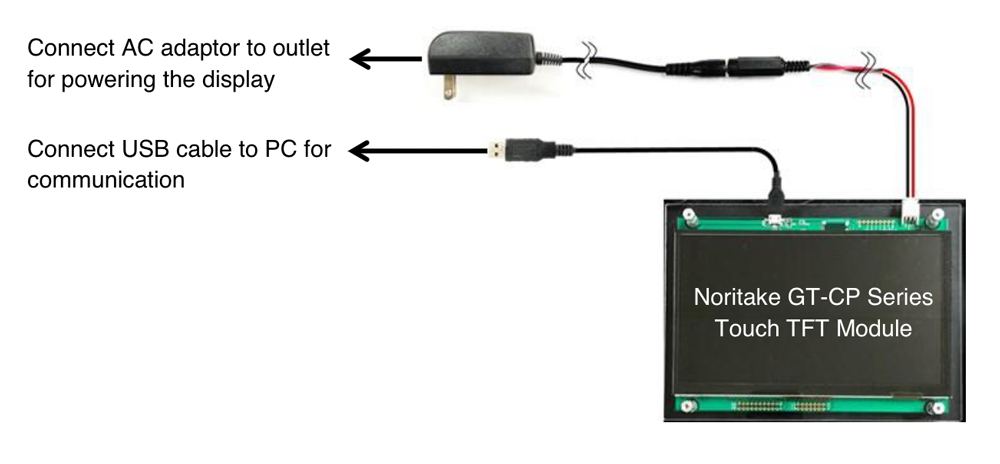
Connection Diagram
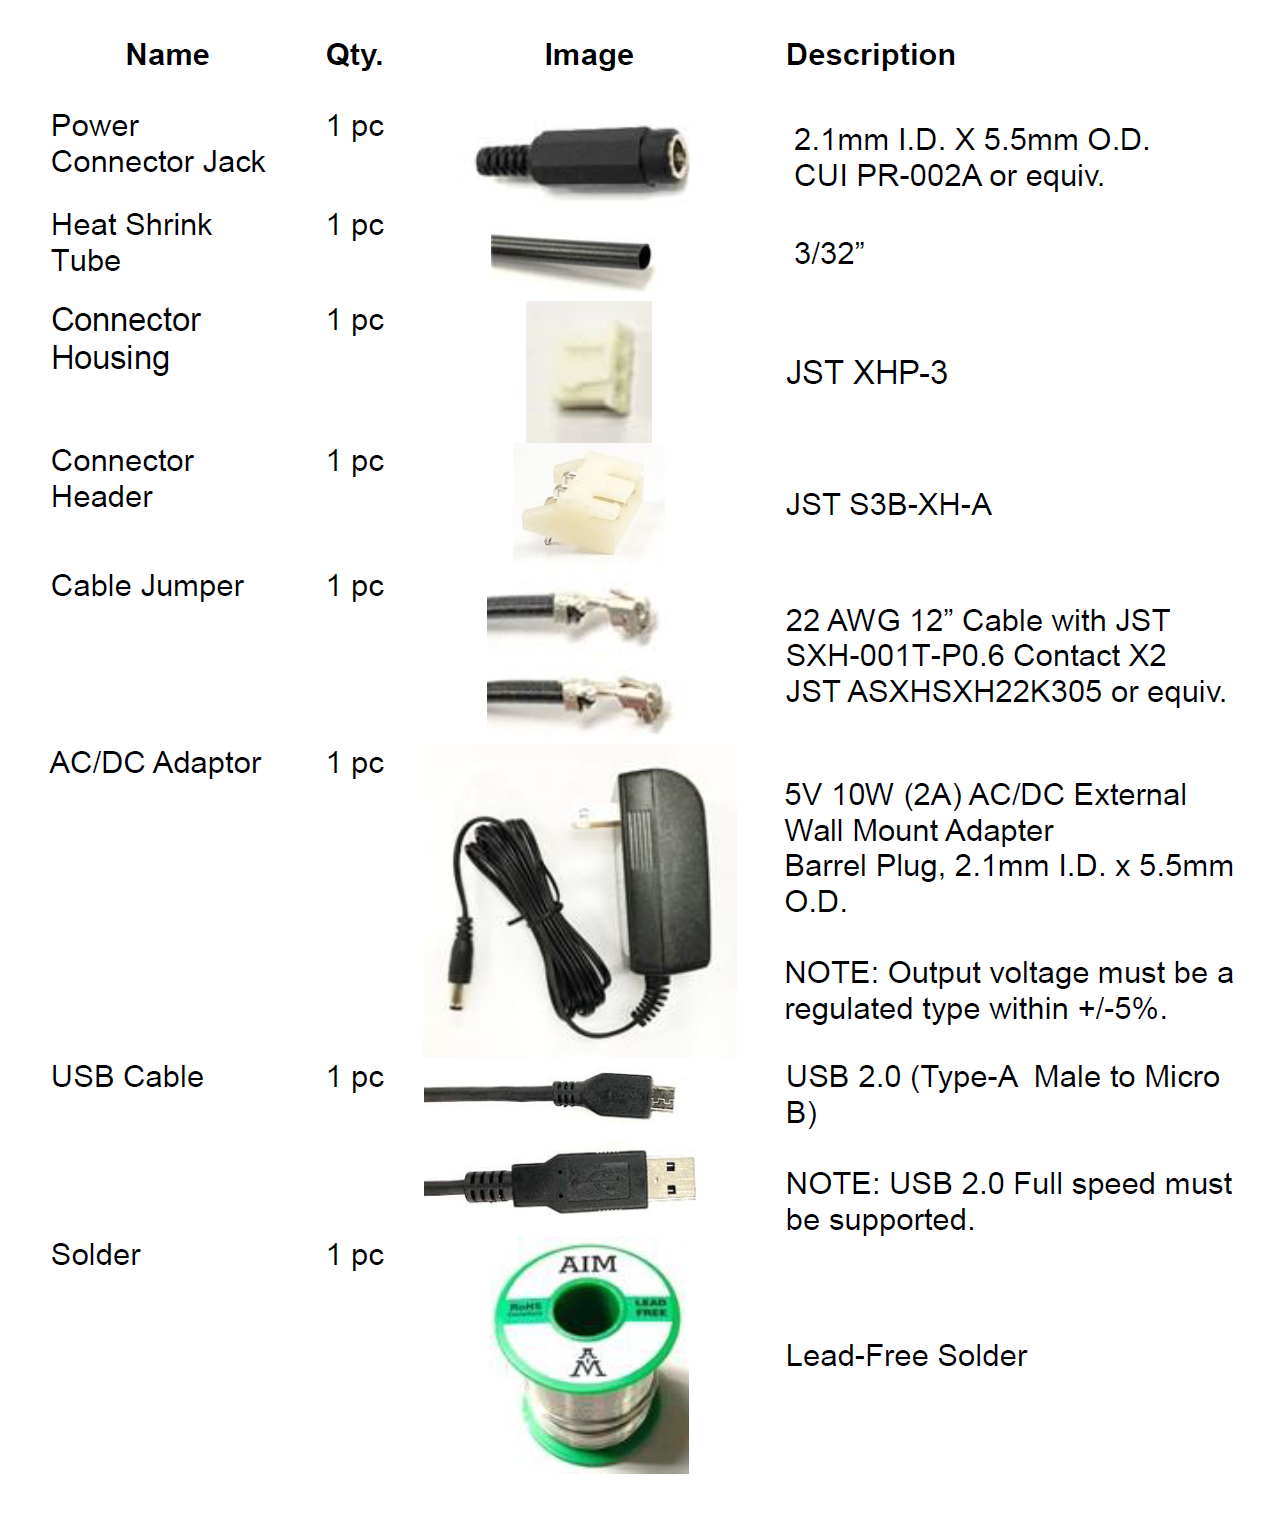
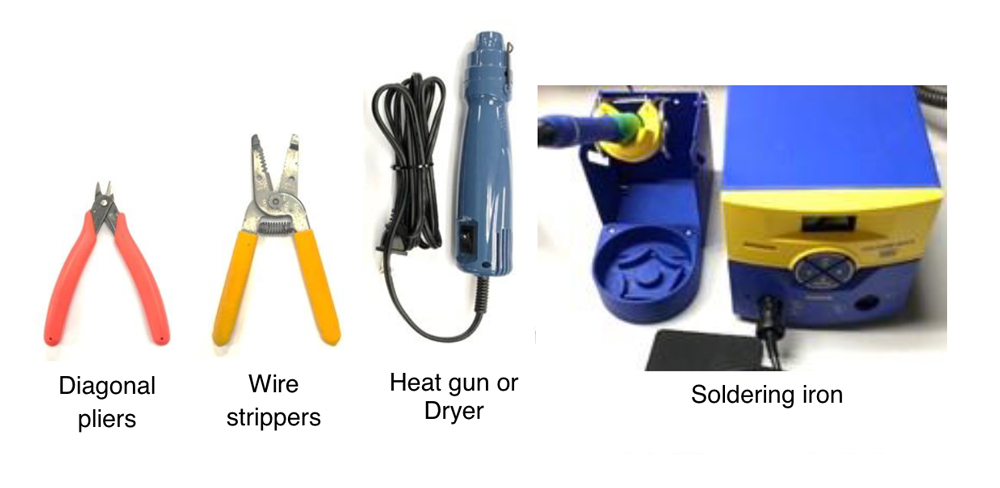
Materials
Tools
The following tools are necessary to make a power cable and solder a connector header onto the board.
Connect Display
1. Make a power cable.
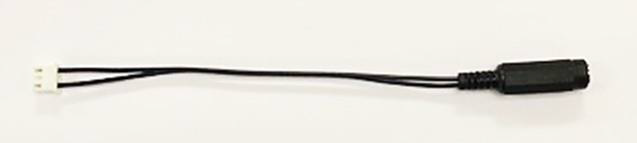
Power Cable
- Cut a jumper cable in half (6” each).
- Open the case of power connector jack.
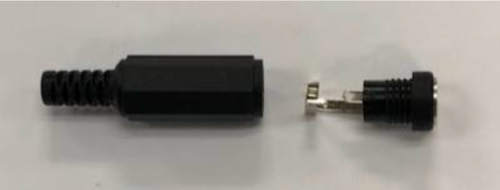
- Solder the cable jumper to the power connector jack.
i. Note: The center pong is positive voltage.
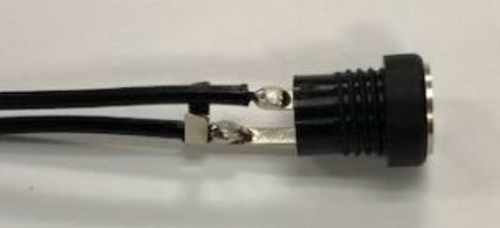
- Use a proper length heat shrink tube to isolate the 5V solder point in the power connector.
- Insert the contact pins to the connector housing as seen below. Make sure that the 5V pin is inserted into the housing section right next to the notch of the JST connector.
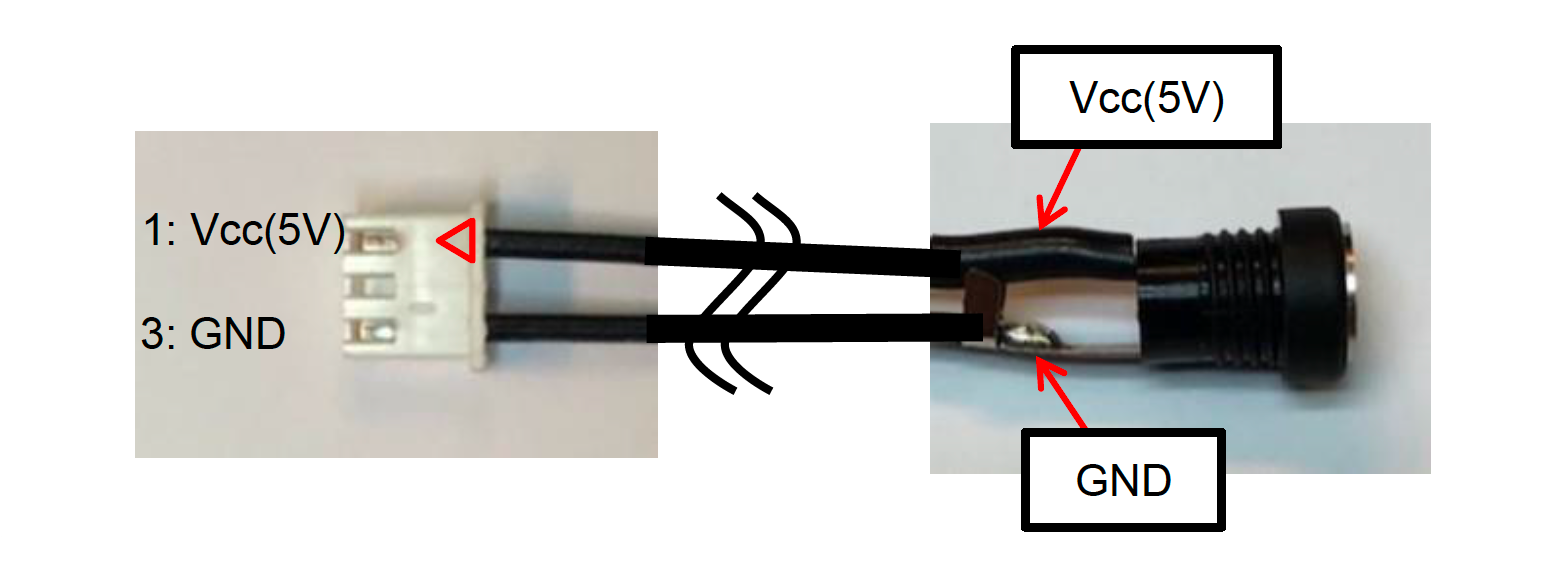
Attention: Please be careful not to mistake the connection of Vcc(5V) and GND.
2. Solder a connector header on GT-CP module’s power connector (CN8).
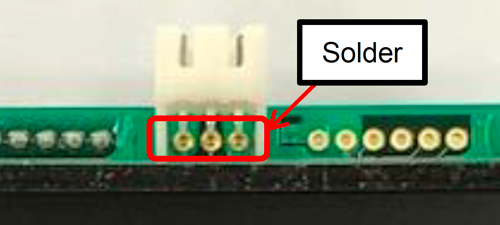
GTWQ043C3A00PA, GTWQ043C3B00PWA (Wide Operating Temperature model) Power Connector
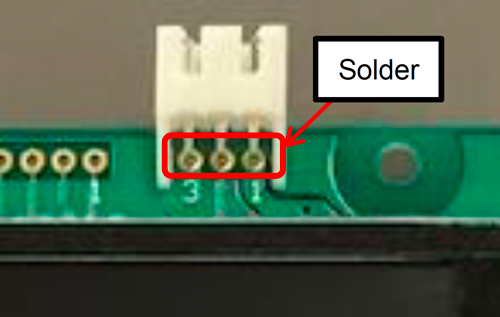
GTWV070C3A00PA Power Connector
3. Plug the power cable to the connector header.
4. Plug the power jack to the power plug of the AC/DC adaptor.
5. Plug the USB cable to Noritake GT-CP TFT touch module.
6. Plug the AC/DC Adaptor to the wall plug to power the GT-CP module and then plug the USB cable to PC.
7. Plug the USB cable into the PC.
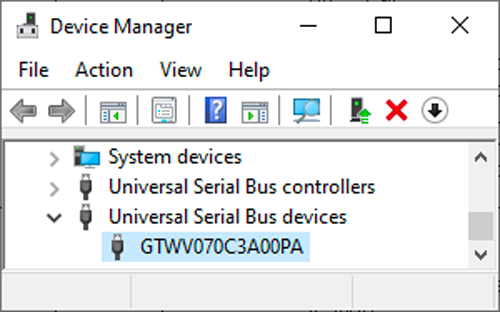
8. Microsoft Windows will recognize the GT-CP module via USB connection.
9. Check if Windows installed the GT-CP module as a Universal Serial Bus device.
- Open “Device Manager” and find “GTWV070C3A00PA”.