Series: Getting Started with GT-CP
Getting Started with GT-CP | Step 2. Install GTOMP
Series: Getting Started with GT-CP
- Step 1. Connect Display
- Step 3. Display “Hello, World!”
- Step 4. Store and Display a Sample Image
- Step 5. Adjust the Touch Sensitivity
- Step 6. Adjust the Touch Sensitivity for Various Cases
- Step 7. Connecting to a Host Controller
- Step 8. Three control methods for GT-CP
- GTOMP Sample Image Menu : Use Sample Program
- Case Study : Image Gallery Program
- Case Study : Tenkey Program
- Case Study : Image Gallery And Slider Program
What is GTOMP?
GTOMP is a Microsoft Windows based application software and provides a quick and easy way to display images and text on the GT-CP series touch TFT modules. GTOMP can also store and manage the images on the GT-CP module’s onboard FROM2 memory.
System Requirements:
- Microsoft Windows 7 / 8.1 / 10 with .Net Framework 4.5
- Serial Communication Port (USB or UART)
- 4MB or more hard drive space
Application Setup
- Please download the latest version of GTOMP from our website:
https://www.noritake-elec.com/support/design-resources/tools/gtomp - Please follow the “Application Setup” instructions found on the GTOMP webpage.
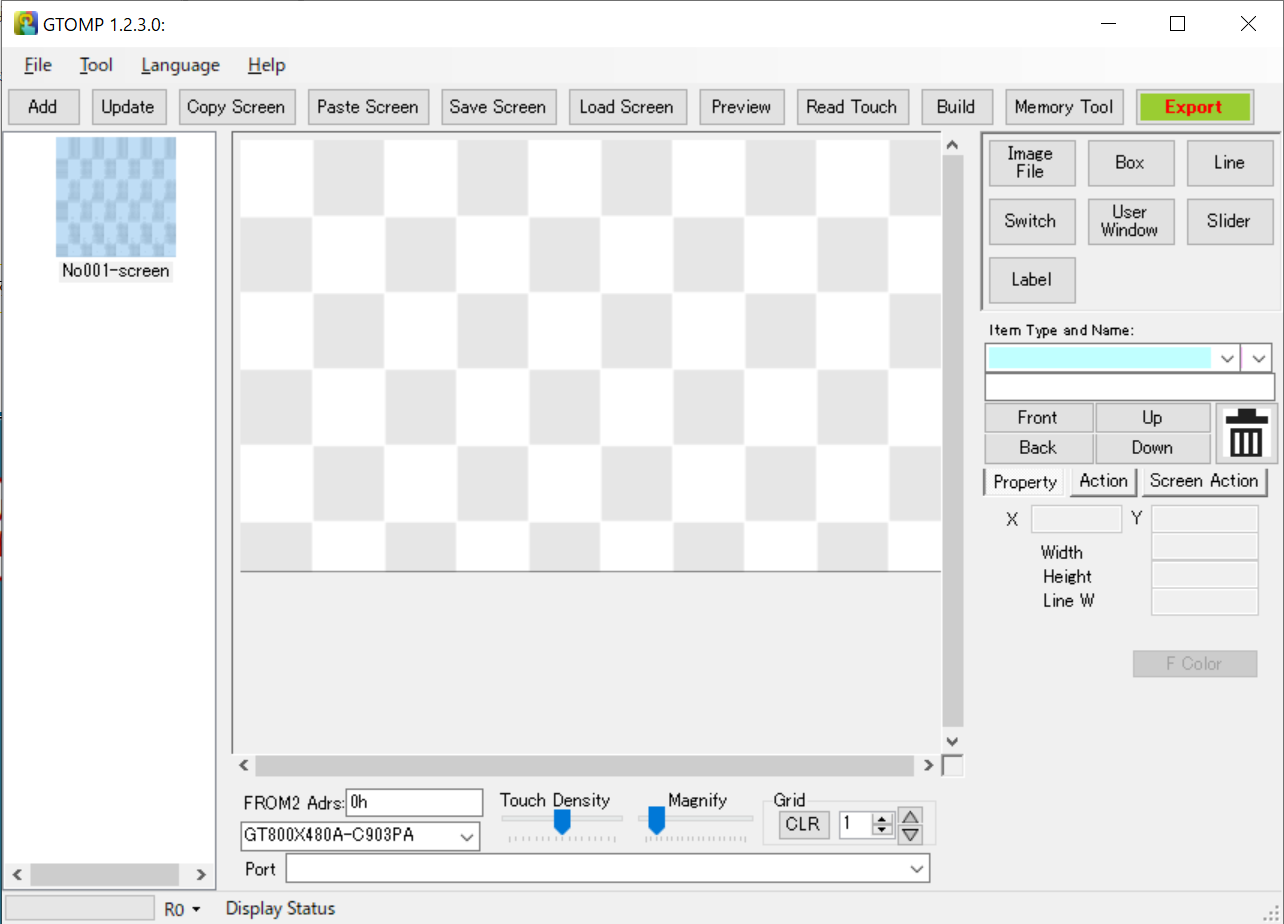
- Now, you should find the GTOMP execution file “GTOMPXXXX.exe” in the extracted location. Launch GTOMP and you will see the following:

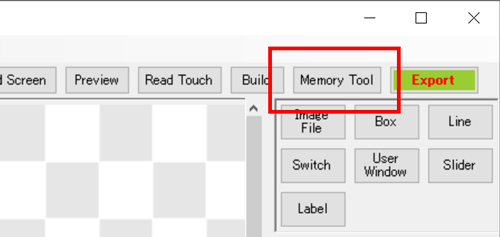
- Click on the “Memory Tool” button.

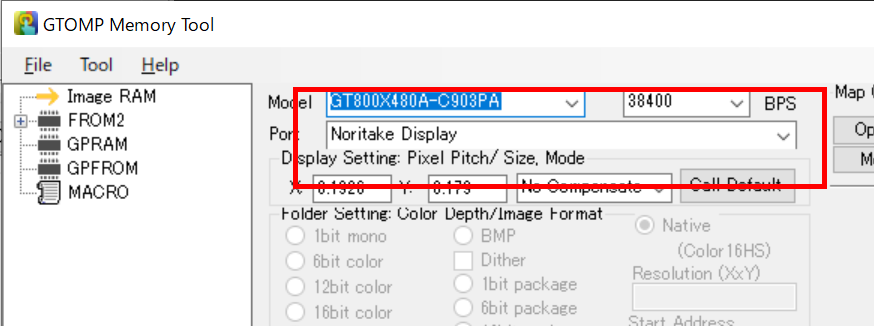
- Select the communication interface (Port) for the connected GT-CP module.
- After connecting the GT-CP module to the PC with a USB cable, select “Noritake Display” from the port list shown below:

- After connecting the GT-CP module to the PC with a USB cable, select “Noritake Display” from the port list shown below:
- When the module has successfully connected to GTOMP, the status indicator will change from “DisplayStatus” to displaying detailed information about the connected module.

