
Series: Using the GT-SP Touch Panel TFT Display with Arduino
Automatically Controlling Display Brightness Using a Light Sensor
Table of Contents
DownloadDownload sample project & program (for GT Design Studio & Arduino)
Hello everyone, I’m @kissaten, a beginner in electronics. In this series, I’m explaining the process of connecting a 7-inch touch display (GT-SP series “GTWV070S3A00P”) to an Arduino and working on various projects.
The GT-SP has a control command that allows the host computer to adjust the screen brightness. This time, we will use this along with a light sensor to create a mechanism that automatically adjusts the screen’s brightness according to the current ambient light.
For example, this is intended for use in situations where you want to keep the display at an optimal brightness according to the time of day or environment, such as a control panel installed in an environment where the ambient light changes frequently, or a smart home switch used in a dark room at night.
Adding the Connection Between Arduino and Light Sensor
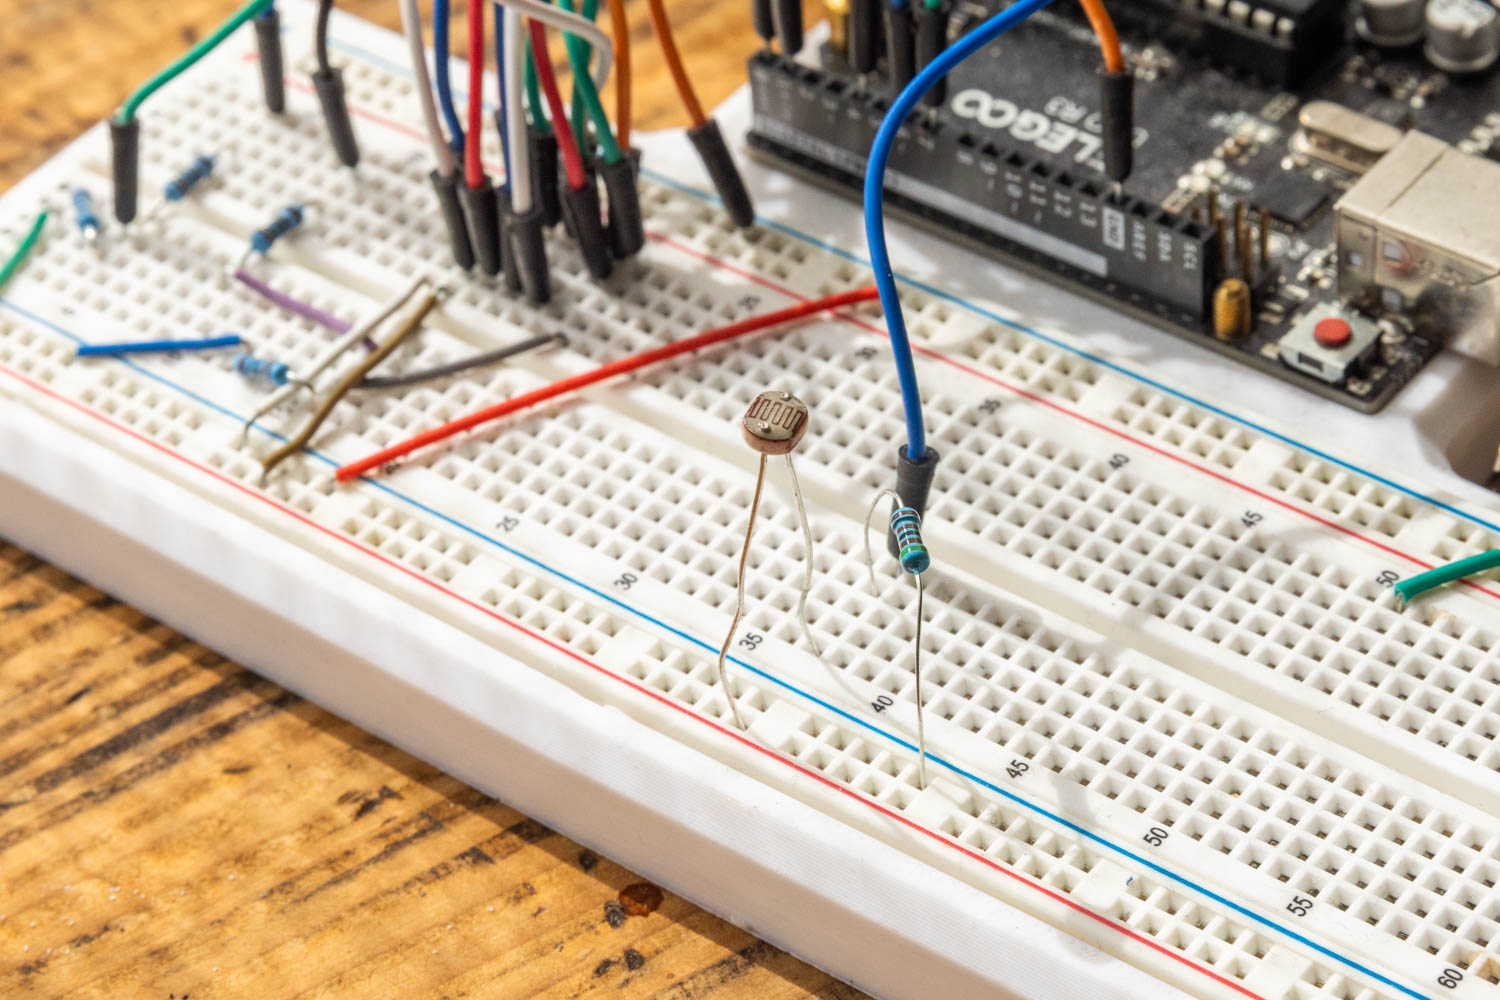
To read the ambient light this time, we will add a light sensor and a fixed resistor (10kΩ) to the circuit. A voltage divider circuit is formed by the light sensor and the fixed resistor, and the Arduino reads the voltage that changes according to the ambient light.
Connect the junction of the light sensor and the fixed resistor to the analog input pin (A0) of the Arduino. Please refer to the circuit diagram below for specific connection points.
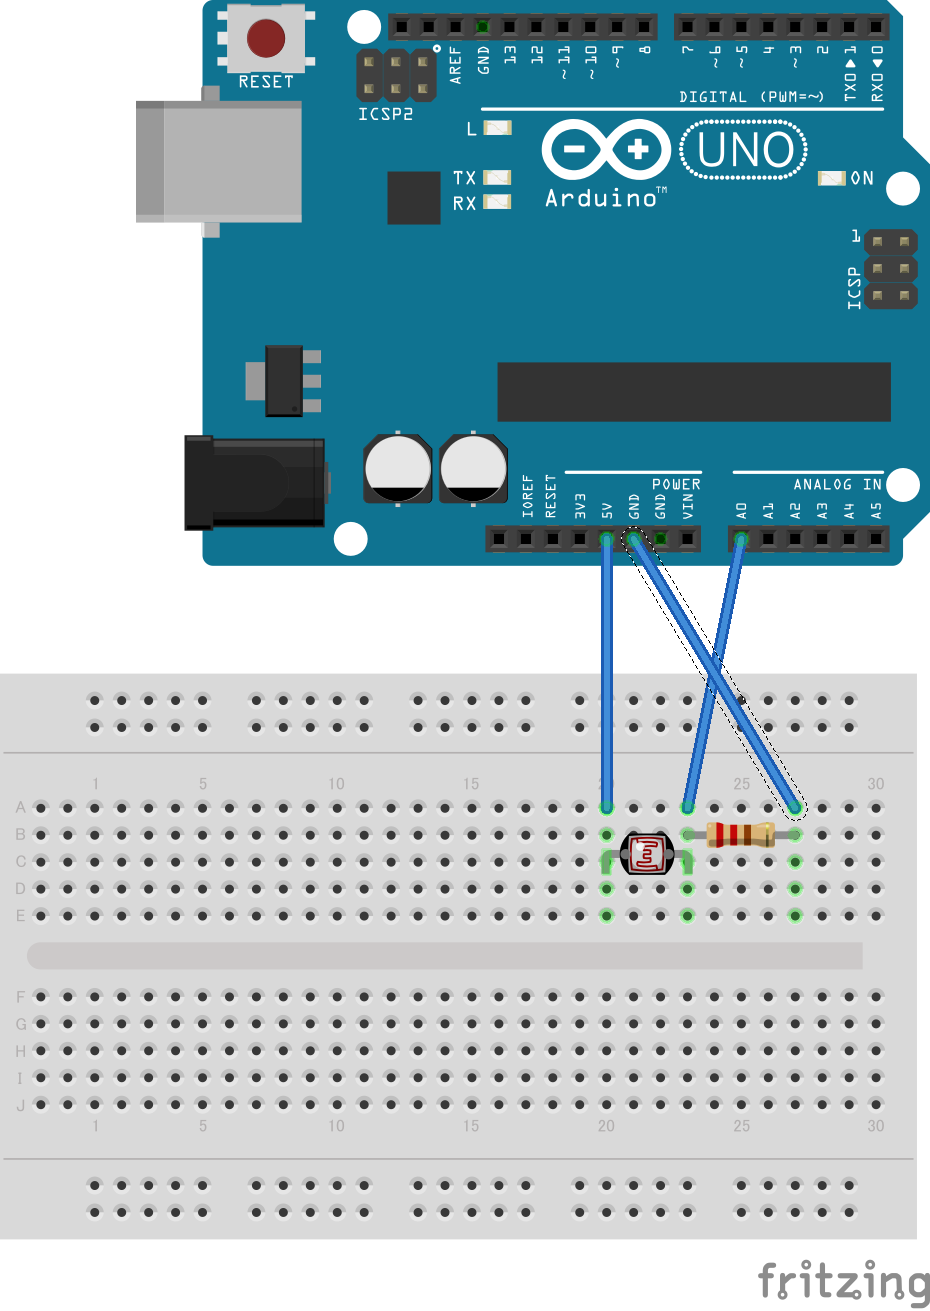
Picture by [Fritzing (CC BY-SA)]
The objective this time is to read the difference in light intensity between a dark room and a bright room as a numerical value with the sensor, and reflect it directly in the GT-SP backlight brightness.
Creating the Program to Write to Arduino
Here is the program we created this time.
DownloadDownload sample project & program (for GT Design Studio & Arduino)
|
1 2 3 4 5 6 7 8 9 10 11 12 13 14 15 16 17 18 19 20 21 22 23 24 25 26 27 28 29 30 31 32 33 34 35 36 37 38 39 40 41 42 43 44 45 46 47 48 49 50 51 52 53 54 55 56 57 58 59 60 61 62 63 64 65 66 67 68 69 70 71 72 73 74 75 76 77 78 79 80 81 82 83 84 85 86 87 88 89 90 91 92 93 94 95 96 97 98 99 100 101 102 103 104 105 106 107 108 109 110 111 112 113 114 115 116 117 118 119 120 121 122 123 124 125 126 127 128 129 130 131 132 133 134 135 136 137 138 139 140 141 142 143 144 145 146 147 148 149 150 151 152 153 154 155 156 157 158 159 160 161 162 163 164 165 166 167 168 169 170 171 172 173 174 175 176 177 178 179 180 181 182 183 184 185 186 187 188 189 190 |
#include <Arduino.h> #include <string.h> // ピン接続 | Pin assign #define GT_DTR 4 // DTR #define GT_DSR 6 // DSR #define GT_TRDY 7 // TRDY <--未使用 | Disused #define SENSOR_PIN A0 // 光センサ接続ピン | Light Sensor Pin // 変数設定 | Variable settings int current_brightness = -1; // 現在の輝度 | Current brightness const int min_brightness = 3; // 最小輝度 (約1.4%) | Minimum brightness const int sensorMin = 100; // センサ最小値 | Sensor minimum value const int sensorMax = 1000; // センサ最大値 | Sensor maximum value // 最後に同期した時間を記録する変数 | Variable to record the last synchronized time unsigned long last_sync_time = 0; void setup() { // ピン初期設定 | Pin Initialization pinMode(GT_DTR, INPUT); pinMode(GT_DSR, OUTPUT); pinMode(GT_TRDY, INPUT); digitalWrite(GT_DSR, LOW); // シリアル設定 | Serial setting Serial.begin(38400); // 38400bps Baud rate Serial.setTimeout(100); // シリアルタイムアウト | Serial timeout // GT-SPのシステムが完全に立ち上がるまで待機する | Wait until the GT-SP system fully starts up delay(1500); } void loop() { // センサの平均値を読み取る | Read average sensor value int sensorValue = readAverageSensor(); // センサの値を最小値から最大値の範囲内に収める | Constrain sensor value within min and max limits sensorValue = constrain(sensorValue, sensorMin, sensorMax); // センサの値を輝度(最小輝度から255)に変換する | Map sensor value to brightness (min_brightness to 255) int targetBrightness = map(sensorValue, sensorMin, sensorMax, min_brightness, 255); // 目標の輝度と現在の輝度との差分を計算する | Calculate the difference between target and current brightness int diff = targetBrightness - current_brightness; // 現在の時間を取得する | Get current time unsigned long current_time = millis(); // 輝度に変化がある場合は更新処理へ | Go to update process if brightness has changed if (diff != 0) { update_brightness(diff); last_sync_time = current_time; } // 変化がなくても5秒経過したら再送信(同期) | Resend every 5 seconds even if no change (sync) else if (current_time - last_sync_time >= 5000) { update_brightness(0); last_sync_time = current_time; } // ループの待機時間 | Loop delay delay(20); } /********************** カスタム関数 | Custom Functions **********************/ // 10回の平均をとって数値を安定させる関数 | Function to stabilize the value by taking the average of 10 times int readAverageSensor() { long total = 0; // 10回センサの値を読み取って合計する | Read sensor value 10 times and sum them for (int i = 0; i < 10; i++) { total += analogRead(SENSOR_PIN); // 0.002秒の待機 | 0.002 sec delay delay(2); } // 10で割って平均値を返す | Divide by 10 and return the average return total / 10; } // 輝度を更新して送信する関数 | Function to update brightness and send void update_brightness(int change_val) { // 現在の輝度に差分を足す | Add the difference to current brightness current_brightness = current_brightness + change_val; // 輝度が255を超えないように上限を設定 | Set upper limit so brightness does not exceed 255 if (current_brightness > 255) { current_brightness = 255; } // 輝度が最小値を下回らないように下限を設定 | Set lower limit so brightness does not fall below minimum if (current_brightness < min_brightness) { current_brightness = min_brightness; } // GT-SPへ輝度を送信 | Send brightness to GT-SP set_gtsp_brightness(current_brightness); } /********************** GT-SP関数 | Function for GT-SP **********************/ //////////////////////////////////////////////////// // オブジェクト制御コマンド - プロパティ設定(数値用) // Object Control Command - Property Setting (for Value) //////////////////////////////////////////////////// void gtsp_ObjPrpSet_val(int obj, int prp, int ln, unsigned long val) { gt_print("CMD"); // コマンドヘッダ | Command header gt_put(0xd3); // オブジェクト-プロパティ設定コマンド | Object-Property Setting gt_put(obj >> 0); // オブジェクトNo. 下位バイト | Object No. Lower byte gt_put(obj >> 8); // オブジェクトNo. 上位バイト | Object No. Upper byte gt_put(prp >> 0); // プロパティNo. 下位バイト | Property No. Lower byte gt_put(prp >> 8); // プロパティNo. 上位バイト | Property No. Upper byte gt_put(ln >> 0); // データ長 最下位バイト | Data length Least significant byte gt_put(ln >> 8); // データ長 下位バイト | Data length second byte gt_put(ln >> 16); // データ長 上位バイト | Data length third byte gt_put(ln >> 24); // データ長 最上位バイト | Data length Most significant byte if (ln >= 1) { gt_put(val >> 0); } if (ln >= 2) { gt_put(val >> 8); } if (ln >= 3) { gt_put(val >> 16); } if (ln >= 4) { gt_put(val >> 24); } } //////////////////////////////////////////////////// // オブジェクト制御コマンド - プロパティ設定(文字列用) // Object Control Command - Property Setting (for String) //////////////////////////////////////////////////// void gtsp_ObjPrpSet_string(int obj, int prp, String val) { gt_print("CMD"); // コマンドヘッダ | Command header gt_put(0xd3); // オブジェクト-プロパティ設定コマンド | Object-Property Setting gt_put(obj >> 0); // オブジェクトNo. 下位バイト | Object No. Lower byte gt_put(obj >> 8); // オブジェクトNo. 上位バイト | Object No. Upper byte gt_put(prp >> 0); // プロパティNo. 下位バイト | Property No. Lower byte gt_put(prp >> 8); // プロパティNo. 上位バイト | Property No. Upper byte gt_put(val.length() >> 0); // データ長 最下位バイト | Data length Least significant byte gt_put(val.length() >> 8); // データ長 下位バイト | Data length second byte gt_put(val.length() >> 16); // データ長 上位バイト | Data length third byte gt_put(val.length() >> 24); // データ長 最上位バイト | Data length Most significant byte gt_print(val); // 文字列送信 | Send string } //////////////////////////////////////////////////// // 文字列送信 | Send string to GT-SP //////////////////////////////////////////////////// void gt_print(String val) { int val_i; // 文字列を1文字ずつ送信 | Send string per one byte for (val_i = 0; val_i < val.length(); val_i++) { while (digitalRead(GT_DTR) == HIGH) { // ビジーチェック | Busy check } Serial.print(val.substring(val_i, val_i + 1)); } } //////////////////////////////////////////////////// // 1byte送信 | Send byte to GT-SP //////////////////////////////////////////////////// void gt_put(unsigned char onebyte) { while (digitalRead(GT_DTR) == HIGH) { // ビジーチェック | Busy check } Serial.write(onebyte); } //////////////////////////////////////////////////// // GT-SPへ輝度設定コマンドを送信する関数 // Function to send brightness setting command to GT-SP //////////////////////////////////////////////////// void set_gtsp_brightness(int val) { gt_print("CMD"); gt_put(0x58); gt_put(val); } |
Understanding the Program
When the light sensor reads the ambient light, the Arduino converts that numerical value into the screen brightness for the GT-SP and sends it to the display.
Specifically, in the loop function, which is the main part of the program, processing is performed in several steps.
First, the readAverageSensor function reads the numerical value of the light sensor. Here, instead of picking up the value just once, we calculate the average of 10 continuous measurements. This allows us to receive a stable numerical value without being confused by noise or momentary flickering.
Next, the constrain function is used to securely keep the read value within the expected range (100 to 1000), and then the map function is used to smoothly convert it to the GT-SP screen brightness scale (3 to 255). It is thanks to this calculation that seamless dimming is possible, rather than step-by-step changes.
Then, we check if there is a difference between the calculated “target brightness” and the “current brightness”. If there is a difference, the update_brightness function is called to update the brightness. In this function, an upper and lower limit safety check is performed so that the calculated result does not exceed 255 or fall below 3, and finally, it is sent from the host computer to the GT-SP as a control command to change the brightness, thereby switching the display’s light and dark levels.
Furthermore, even if there is no change in brightness, a mechanism is included to resend the current brightness every 5 seconds. This automatically restores the original brightness when the GT-SP side restarts.
Summary
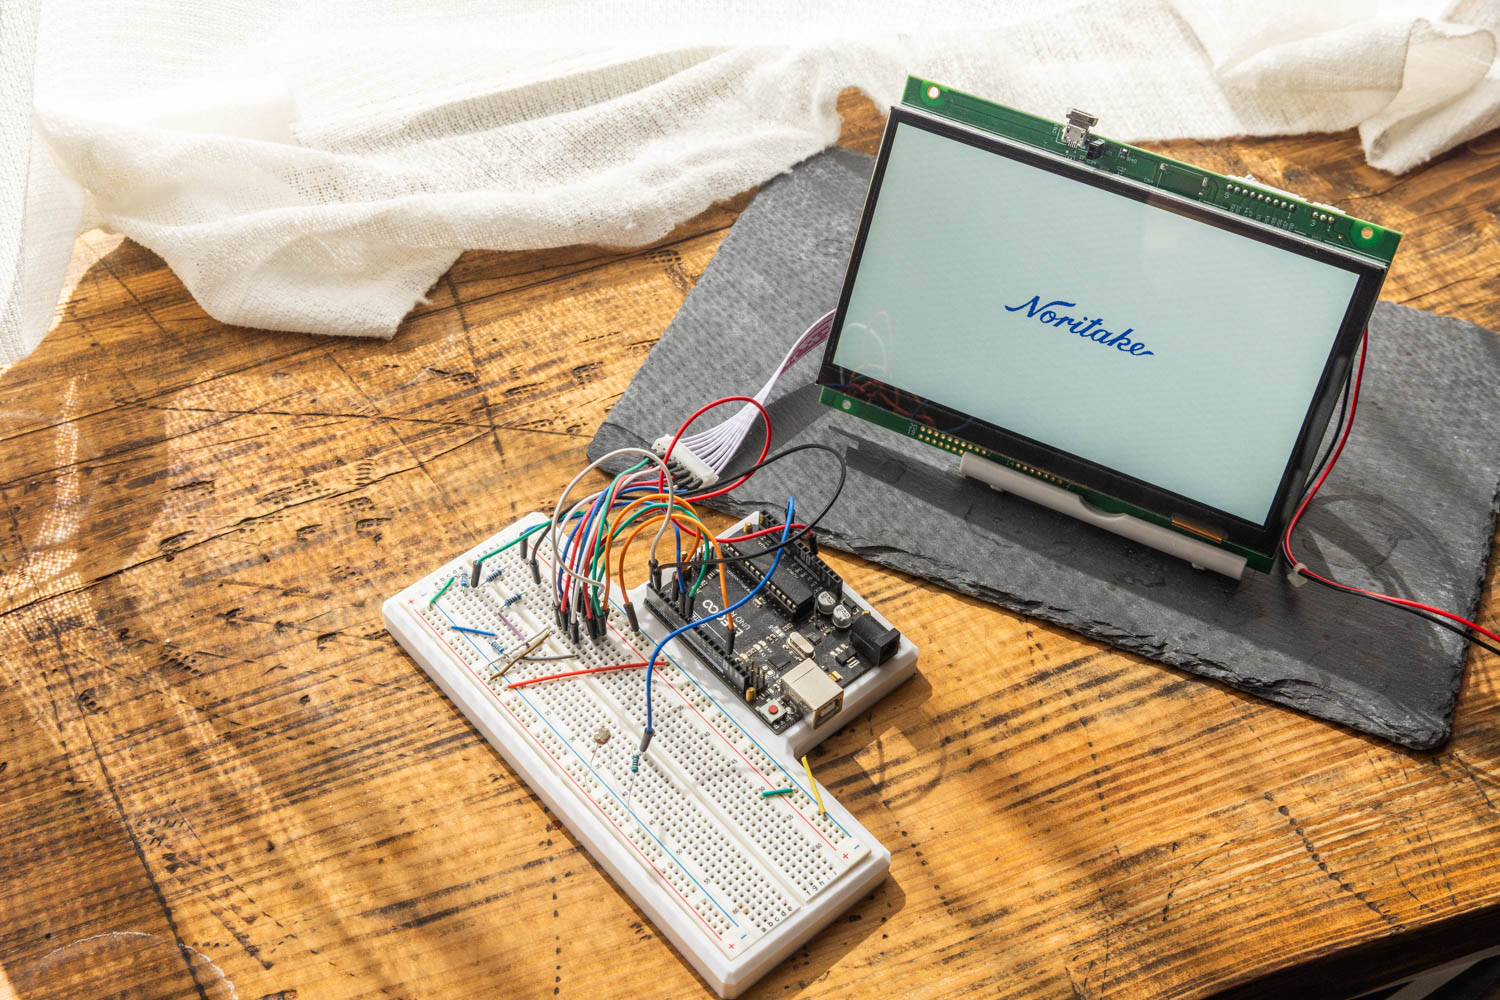
When we write the program and actually turn the room lights on and off, the GT-SP screen smoothly follows the changes in ambient light and changes its brightness. Even in a dark room, the screen is not too dazzling, and you can check the display comfortably.
Next time, we will continue to introduce practical electronic construction ideas using the GT-SP.