
Series: Using the GT-SP Touch Panel TFT Display with Arduino
Displaying Animation on the GT-SP by Switching Multiple Images
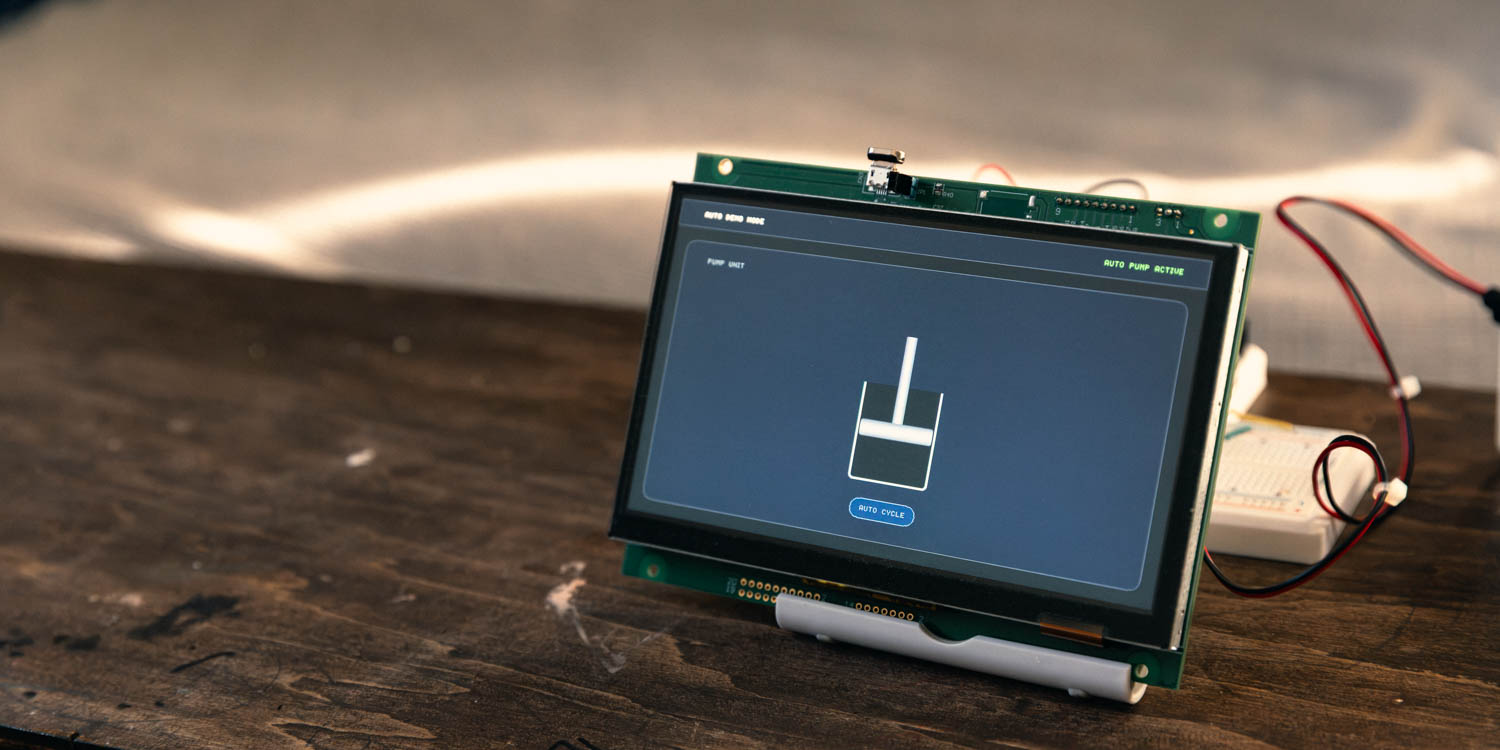
Table of Contents
DownloadDownload sample project & program (for GT Design Studio & Arduino)
Hello everyone, I’m @kissaten, a beginner in electronics. In this series, I’m explaining the process of connecting a 7-inch touch display (GT-SP series “GTWV070S3A00P”) to an Arduino and working on various projects.
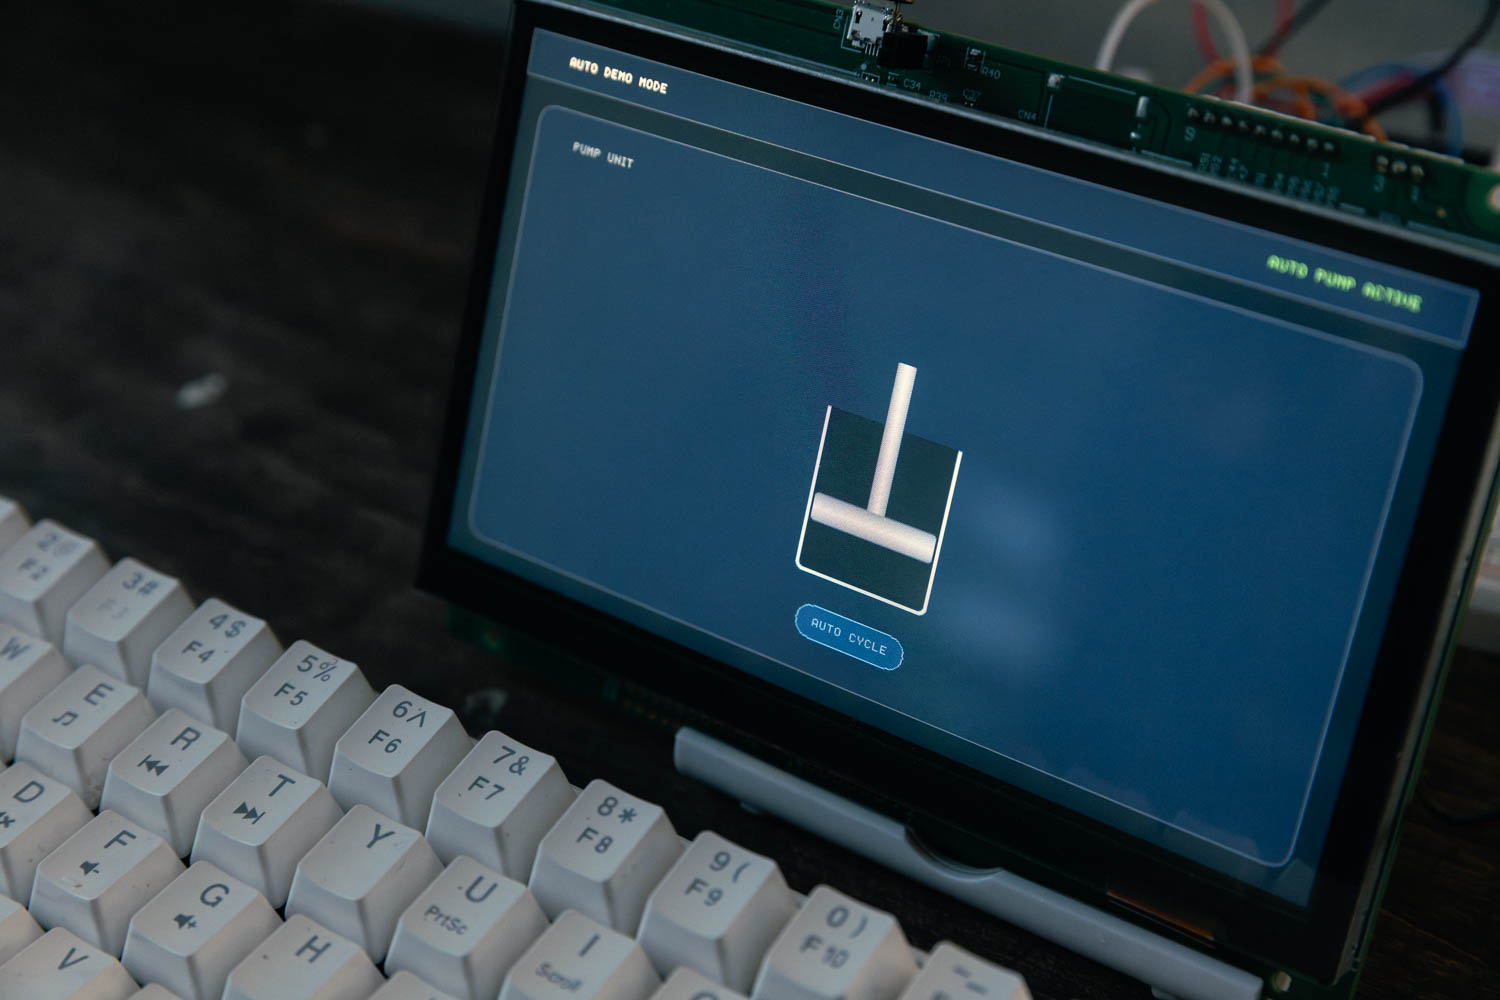
This time, we will register multiple images in GT Design Studio and display an animation on the GT-SP by switching the displayed images in sequence under host computer control.
For this example, we prepared 10 images showing slightly different states of a pump and display them sequentially at fixed intervals. By continuously switching between multiple still images, the pump appears to be moving on the GT-SP.
Preparing Images for Animation
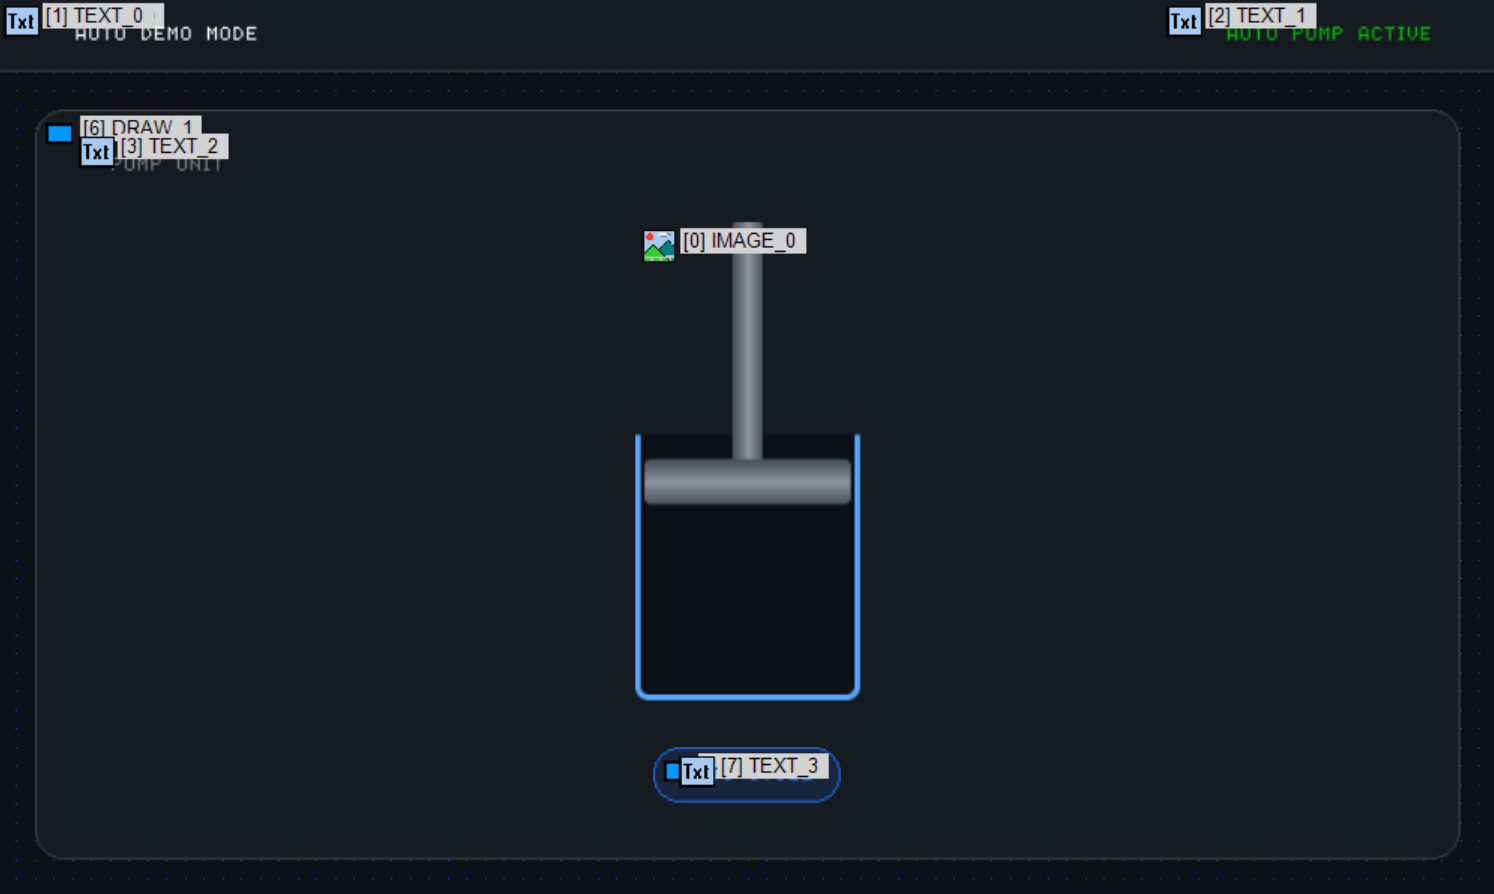
First, prepare the images to be used for the animation.
In this example, we use 10 images, from pump_01.png to pump_10.png, each showing a slightly different state of the pump.
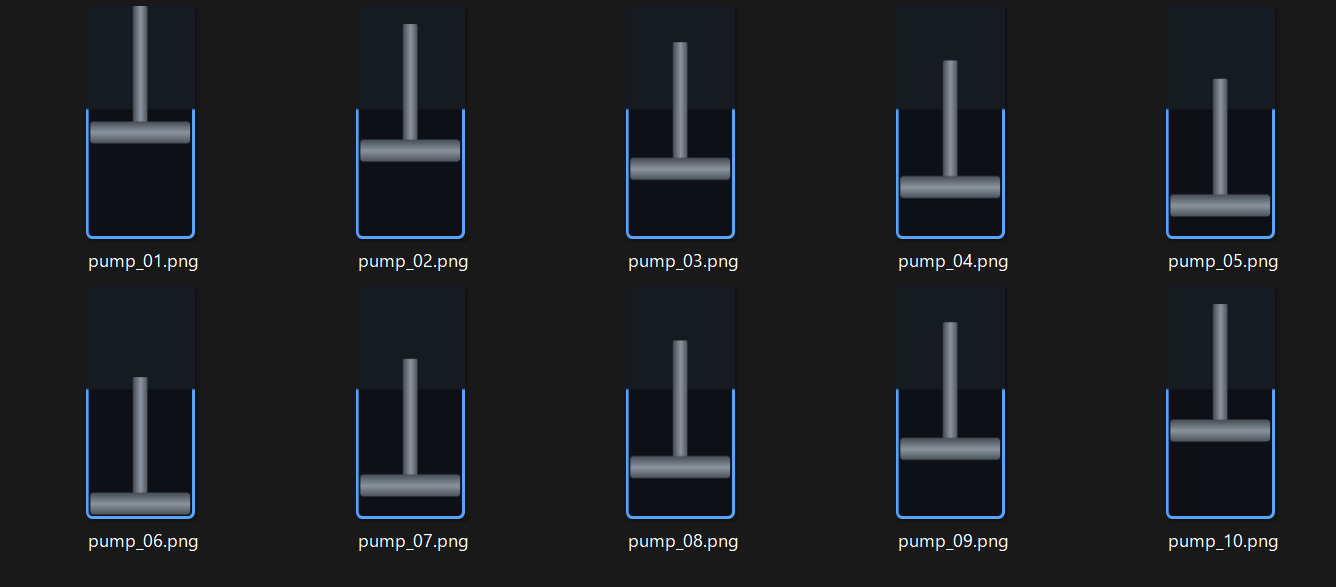
The images are displayed in order from the first to the tenth. After the last image is displayed, the sequence returns to the first image, creating a repeating animation.
Creating the Screen in GT Design Studio
Next, create the screen in GT Design Studio.
Register the 10 images used in this example to the project from “Image” at the top of the screen.
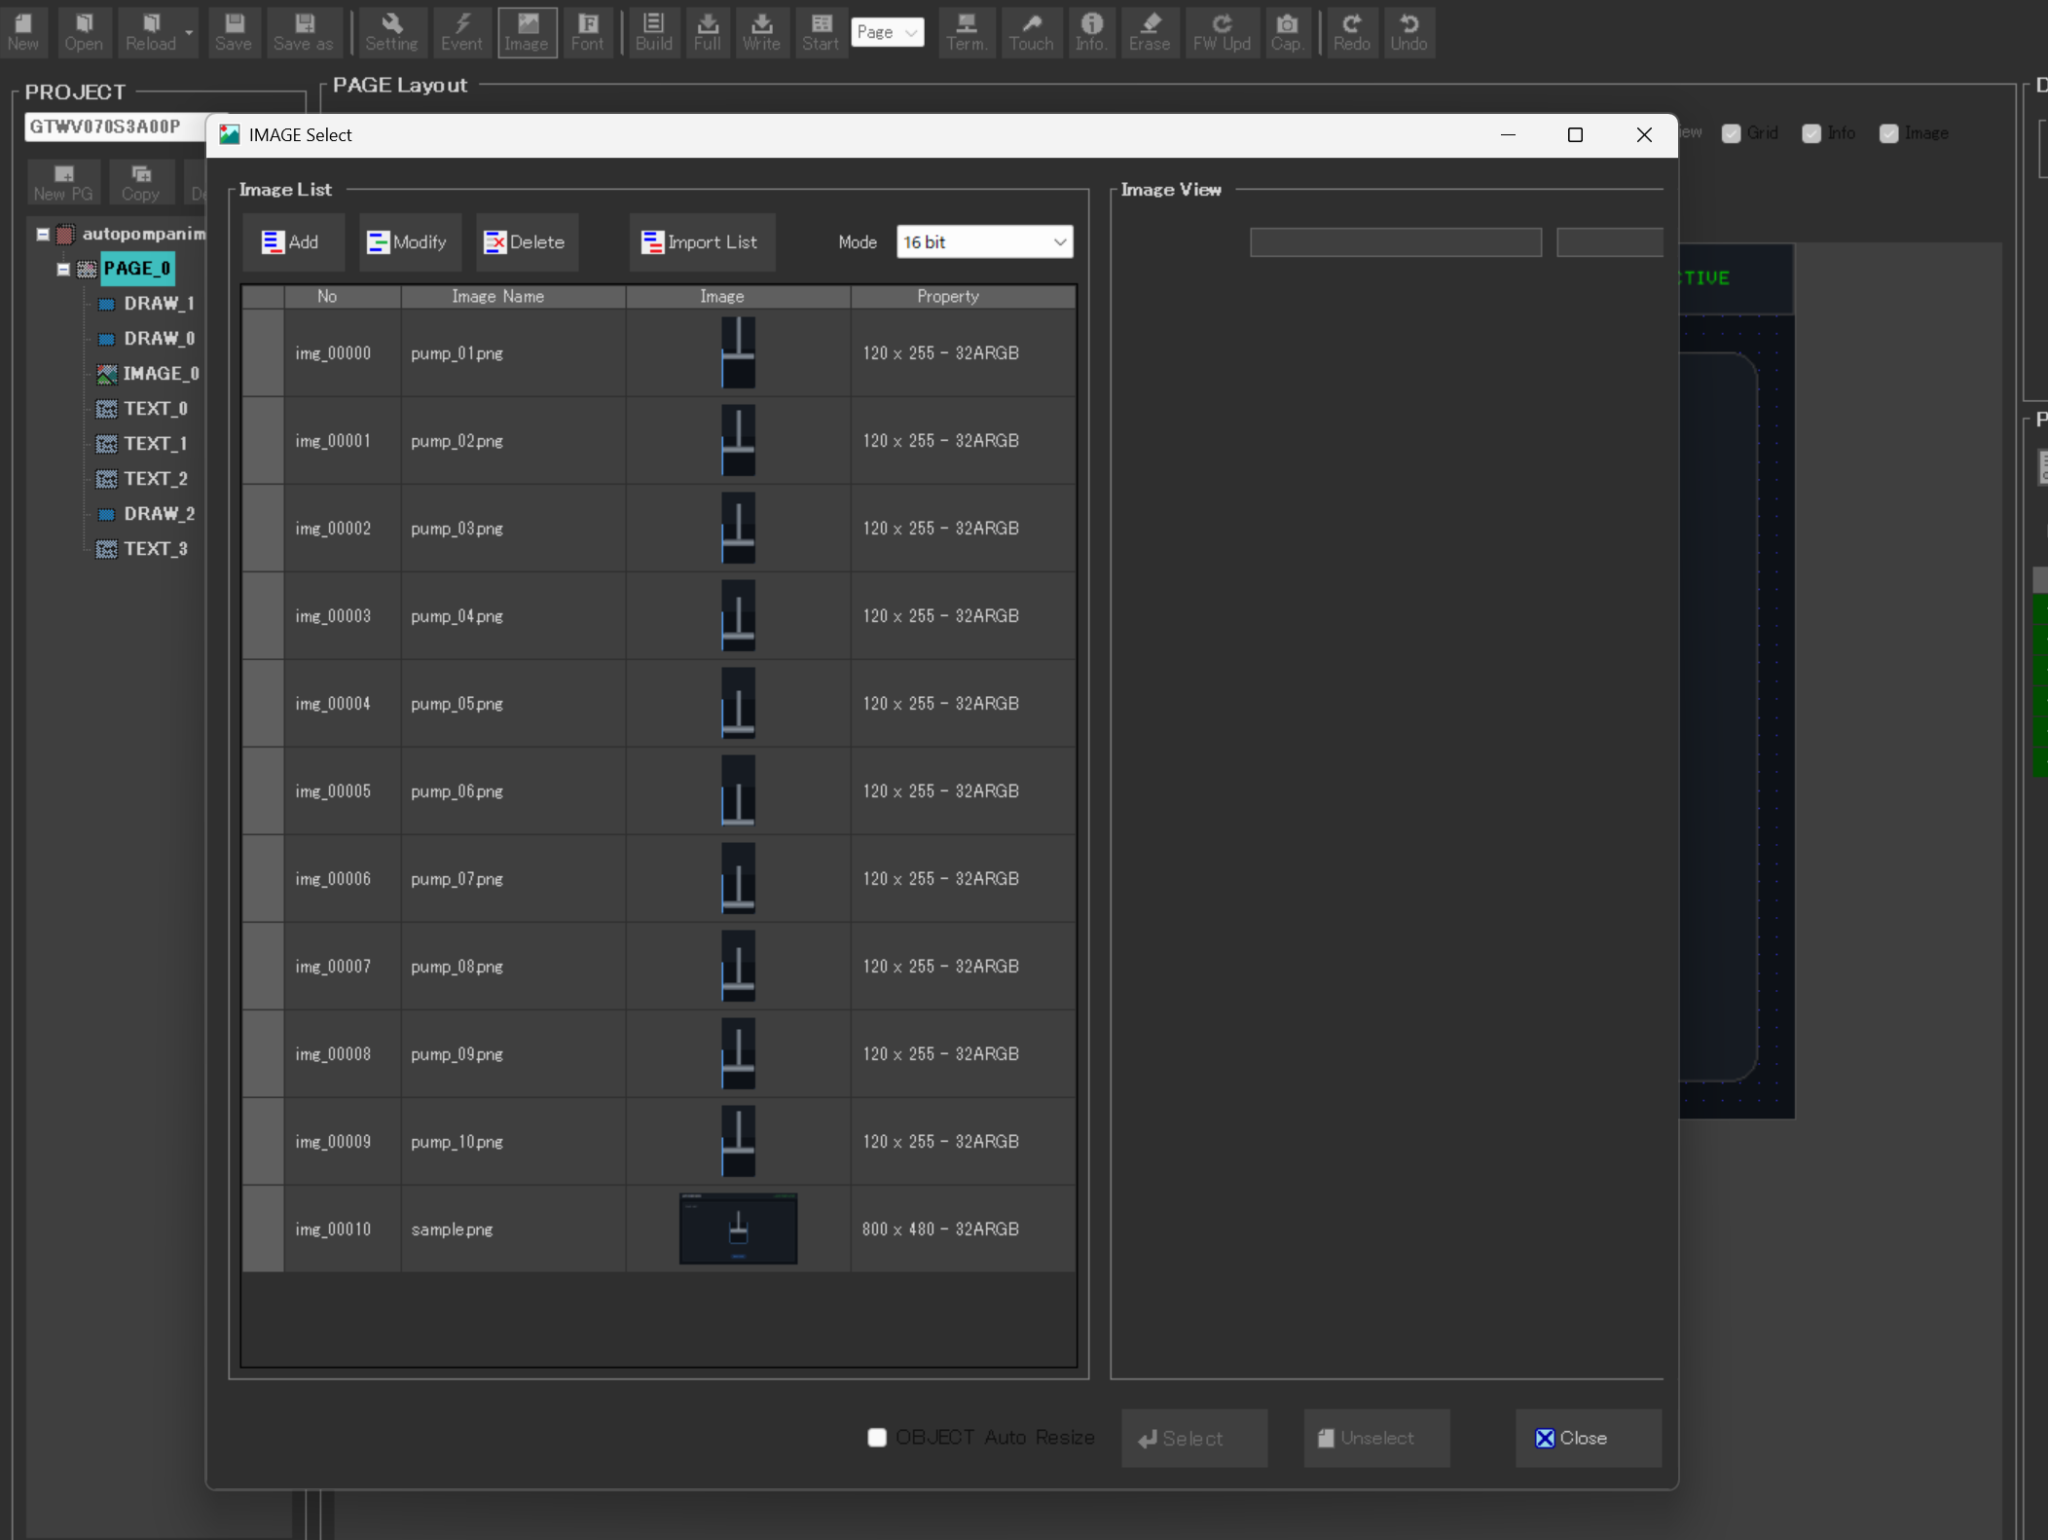
After registering the images, place an Image Object on the screen. Images can also be registered when creating an Image Object.
Instead of placing 10 separate Image Objects, we use one Image Object and switch the image displayed in that object from the Arduino.
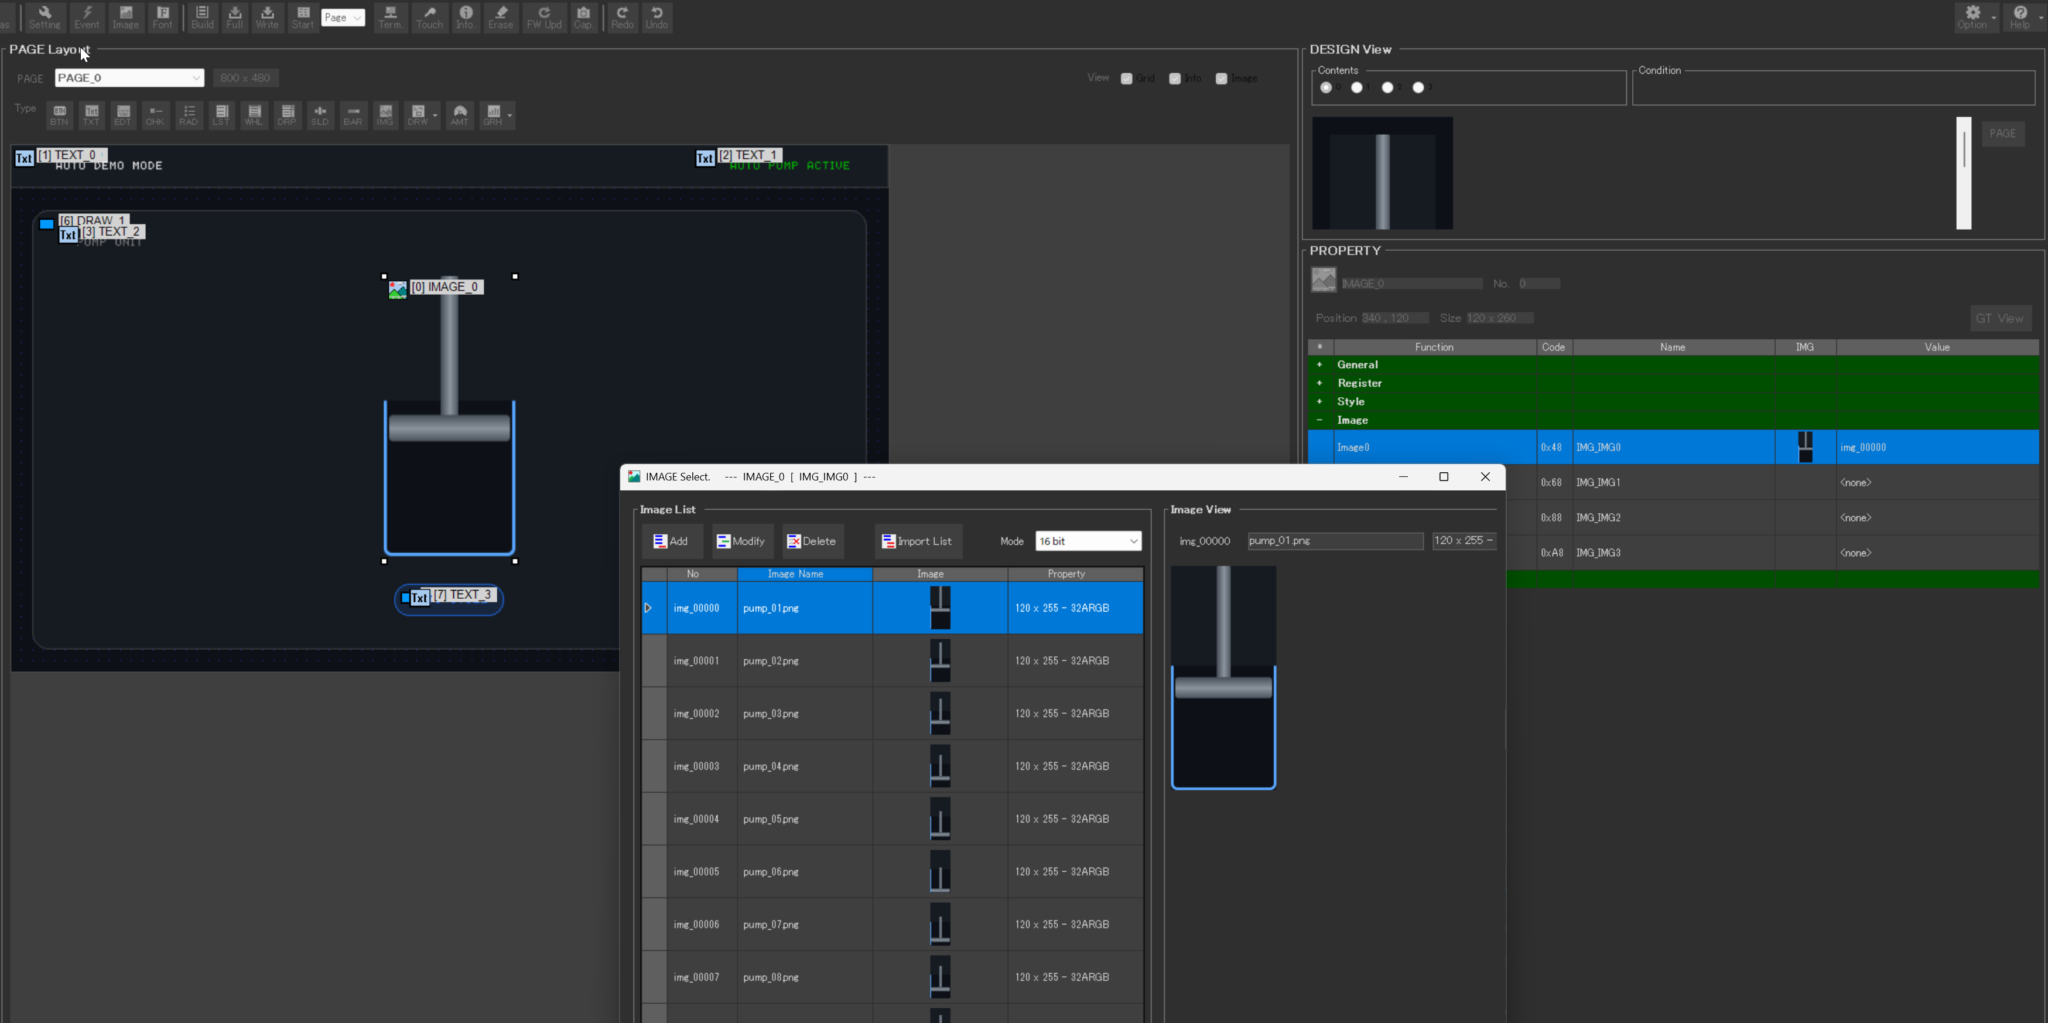
After completing the screen and image settings, save the project and perform a Build.
Checking Image Addresses After Build
In this program, the image displayed in the Image Object is changed by specifying the address of an image registered in GT Design Studio from the Arduino.
The image addresses can be checked in a CSV file generated when the project is built in GT Design Studio.
When a project is saved in GT Design Studio, a folder with _prj_files appended to the project name is created in the project save location.
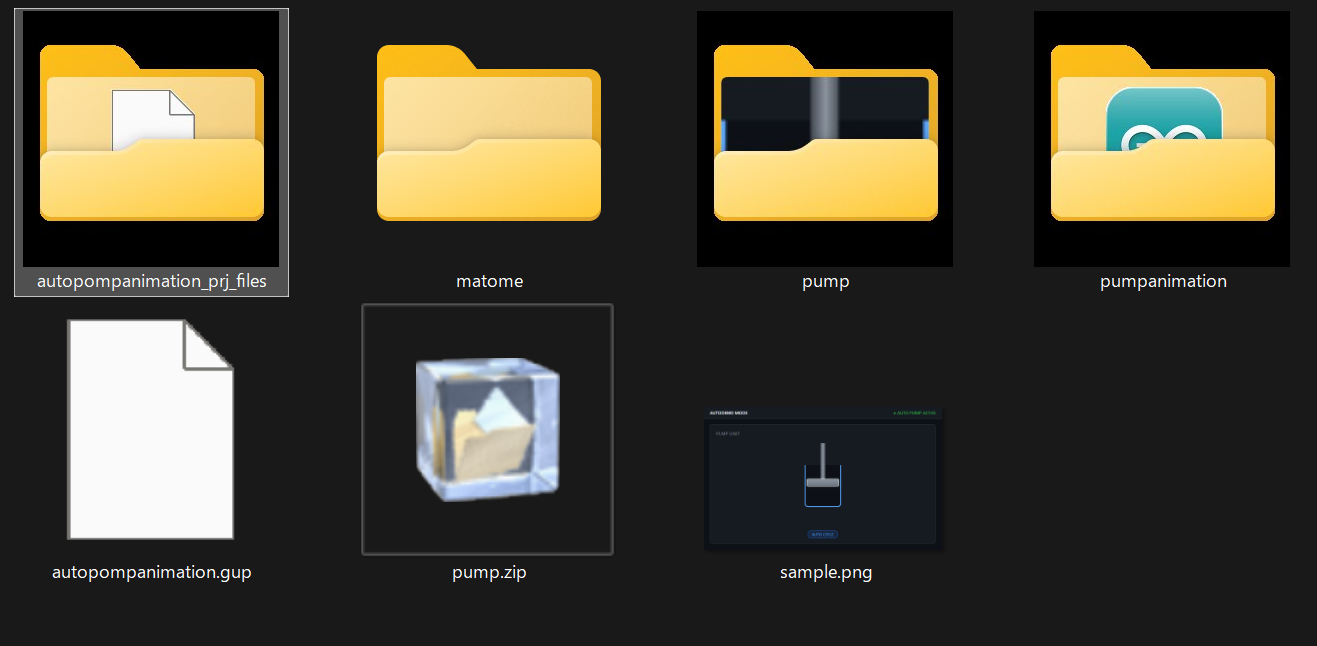
The project name used in this example is autopompanimation, so the following folder is created.
autopompanimation_prj_files
When the project is built, an output folder with _output appended to the project name is created inside this folder.
In this example, the folder structure is as follows.
autopompanimation_prj_files
└─ autopompanimation_output
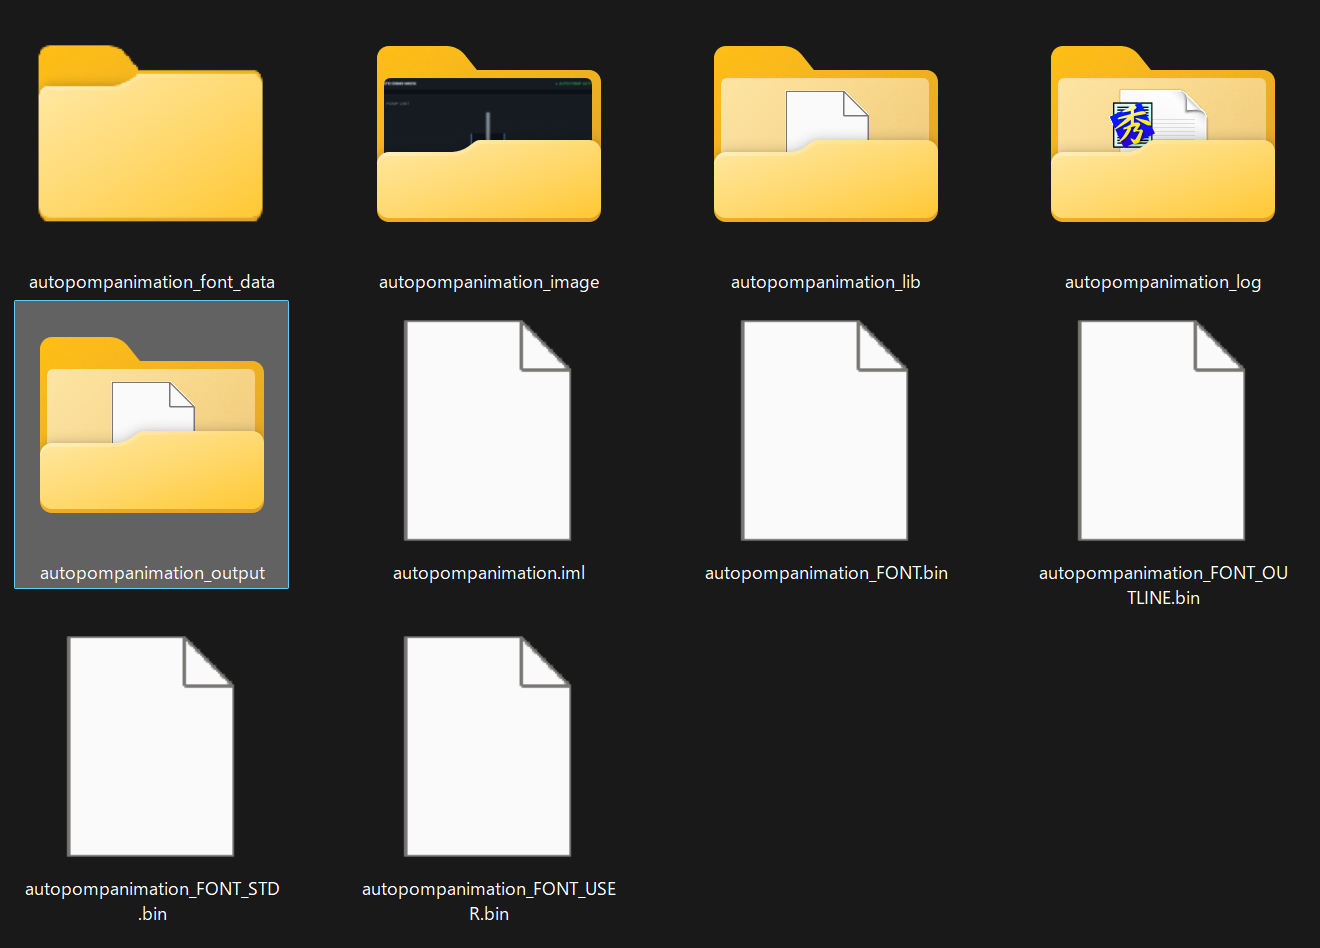
The autopompanimation_output folder contains the files generated by the Build process.
The file used to check the image addresses in this example is:
autopompanimation_IMG.csv
The autopompanimation portion of the file name is the project name. If a different project name is used, check the _IMG.csv file with the corresponding project name.
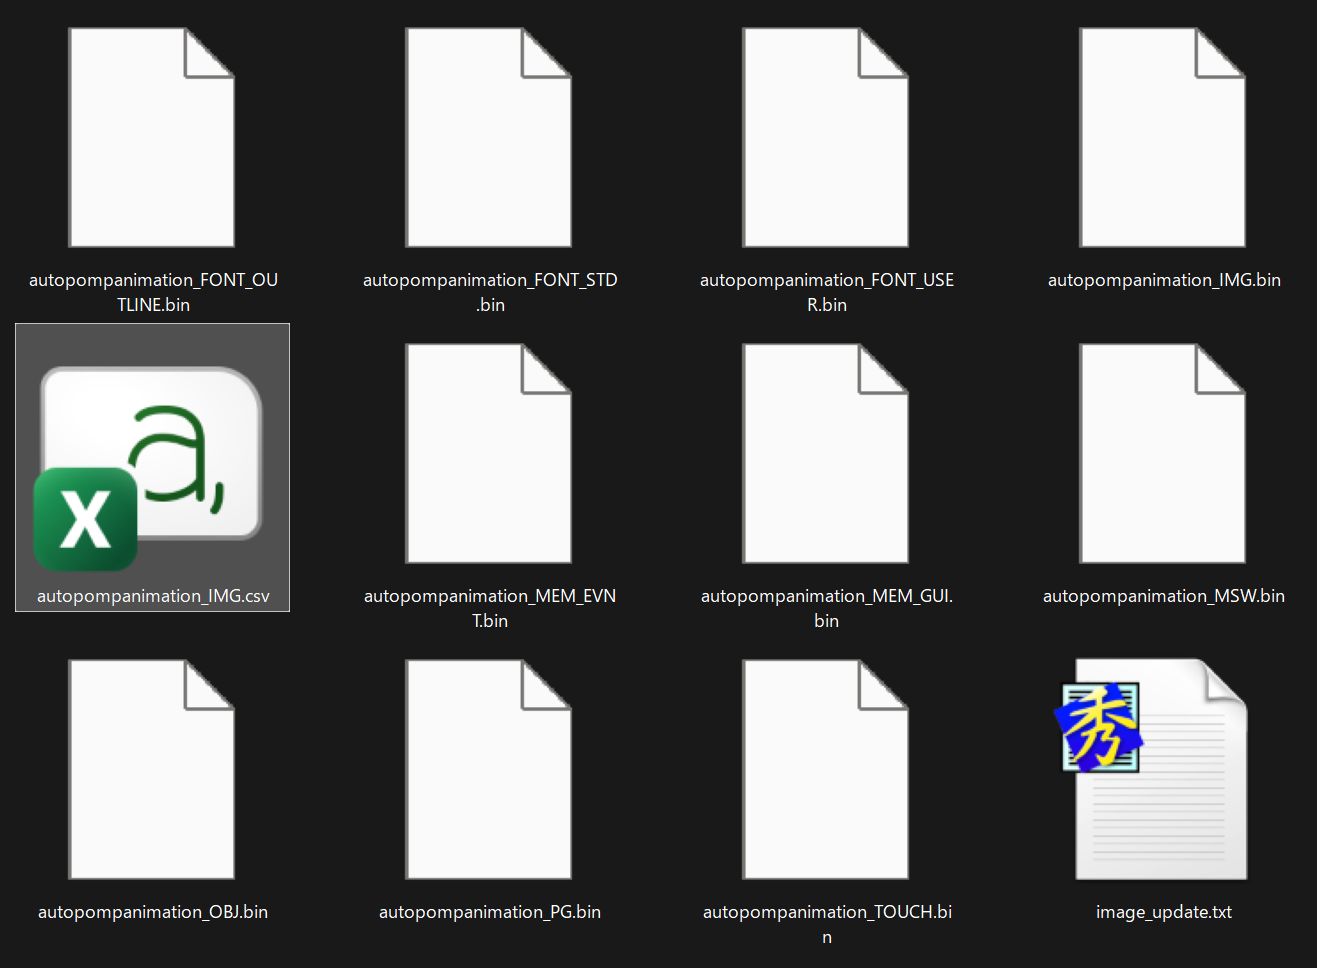
Open autopompanimation_IMG.csv to view information about each registered image, including the image file name and image address.
The CSV file contains the following fields.
IMG_NAME,IMG_FILE,IMG_ADRS,IMG_LEN,NAME_ADRS
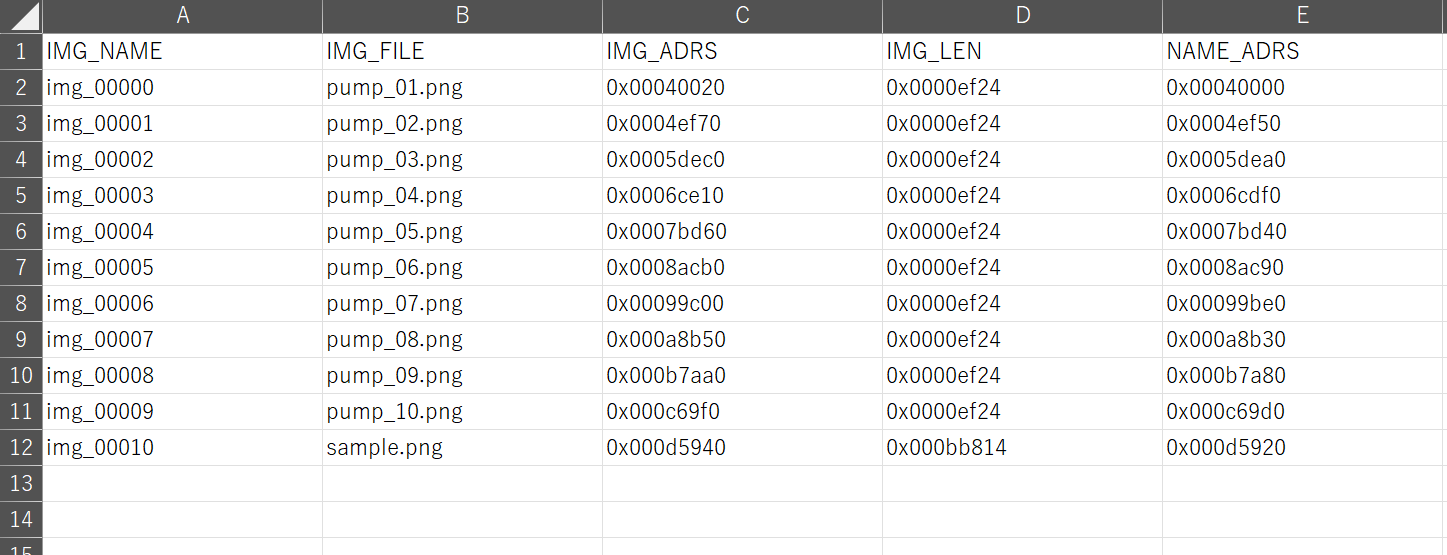
In this example, we use the values listed under IMG_ADRS.
For example, the address assigned to the first image, pump_01.png, is:
0x00040020
Different addresses are assigned to pump_02.png, pump_03.png, and the other registered images.
We will use the image addresses listed in this CSV file in the Arduino program.
Arduino Program
Now that the image addresses have been confirmed, create the program to be written to the Arduino.
In this program, the addresses of the 10 images obtained from autopompanimation_IMG.csv are set in the program and sent to the GT-SP in sequence.
DownloadDownload sample project & program (for GT Design Studio & Arduino)
|
1 2 3 4 5 6 7 8 9 10 11 12 13 14 15 16 17 18 19 20 21 22 23 24 25 26 27 28 29 30 31 32 33 34 35 36 37 38 39 40 41 42 43 44 45 46 47 48 49 50 51 52 53 54 55 56 57 58 59 60 61 62 63 64 65 66 67 68 69 70 71 72 73 74 75 76 77 78 79 80 81 82 83 84 85 86 87 88 89 90 91 92 93 94 95 96 97 98 99 100 101 102 103 104 105 106 107 108 109 110 111 112 113 114 115 116 117 118 119 120 121 122 123 124 125 126 127 128 129 130 131 132 133 134 135 136 137 138 139 140 141 142 143 144 145 146 147 148 149 150 151 152 153 154 155 156 157 158 159 160 161 162 163 164 165 166 167 168 169 170 171 172 173 174 175 176 |
#include <string.h> // ピン接続 | Pin assign #define GT_DTR 4 #define GT_DSR 6 #define GT_RESET 5 #define GT_TRDY 7 // 画像アドレスを格納する配列 (10コマ分) | Array storing image addresses (10 frames) unsigned long pump_img[10]; int current_frame = 0; void setup() { pinMode(GT_DTR, INPUT); pinMode(GT_DSR, OUTPUT); pinMode(GT_RESET, OUTPUT); pinMode(GT_TRDY, INPUT); digitalWrite(GT_RESET, HIGH); digitalWrite(GT_DSR, LOW); Serial.begin(38400); Serial.setTimeout(100); // autopompanimation_IMG.csvから取得した画像アドレス | Image addresses obtained from autopompanimation_IMG.csv pump_img[0] = 0x00040020; pump_img[1] = 0x0004ef70; pump_img[2] = 0x0005dec0; pump_img[3] = 0x0006ce10; pump_img[4] = 0x0007bd60; pump_img[5] = 0x0008acb0; pump_img[6] = 0x00099c00; pump_img[7] = 0x000a8b50; pump_img[8] = 0x000b7aa0; pump_img[9] = 0x000c69f0; } void loop() { // オブジェクト0、プロパティ0x48(Image0)、データ長4バイトで画像アドレスを送信 | Send image address to Object 0, Property 0x48 (Image0), with a data length of 4 bytes gtsp_ObjPrpSet_val(0, 0x48, 4, pump_img[current_frame]); current_frame++; if (current_frame >= 10){ current_frame = 0; } // フレームリセット | Reset frame // アニメーションのコマ送り間隔 | Animation frame interval delay(100); } /********************** 関数 | Function **********************/ //////////////////////////////////////////////////// // オブジェクト制御コマンド-プロパティ設定(数値用) | Object Control Command -Property Setting (for Value) // (バイト長4バイトまで | Byte length is up to 4 byte) //////////////////////////////////////////////////// void gtsp_ObjPrpSet_val(int obj, int prp, int ln, unsigned long val ) { gt_print("CMD"); //コマンドヘッダ | Command header gt_put(0xd3); //オブジェクト-プロパティ設定コマンド | Object-Property Setting gt_put(obj >> 0); //オブジェクトNo. 下位バイト | Object No. Lower byte gt_put(obj >> 8); //オブジェクトNo. 上位バイト| Object No. Upper byte gt_put(prp >> 0 ); //プロパティNo. 下位バイト | Property No. Lower byte gt_put(prp >> 8); //プロパティNo. 上位バイト| Property No. Upper byte gt_put(ln >> 0); //データ長 最下位バイト | Data length Least significant byte gt_put(ln >> 8); //データ長 下位バイト | Data length second byte gt_put(ln >> 16); //データ長 上位バイト | Data length third byte gt_put(ln >> 24); //データ長 最上位バイト| Data length Most significant byte if (ln >=1){ gt_put(val >> 0); } //データ 最下位バイト | Data Least significant byte if (ln >=2){ gt_put(val >> 8); } //データ 下位バイト | Data second byte if (ln >=3){ gt_put(val >> 16); } //データ 上位バイト | Data third byte if (ln >=4){ gt_put(val >> 24); } //データ 最上位バイト| Data Most significant byte } //////////////////////////////////////////////////// // オブジェクト制御コマンド - プロパティ設定 (文字列用) | Object Control Command - Property Setting (for String) //////////////////////////////////////////////////// void gtsp_ObjPrpSet_string(int obj, int prp, String val ) { gt_print("CMD"); //コマンドヘッダ | Command header gt_put(0xd3); //オブジェクト-プロパティ設定コマンド | Object-Property Setting gt_put(obj >> 0); //オブジェクトNo. 下位バイト | Object No. Lower byte gt_put(obj >> 8); //オブジェクトNo. 上位バイト| Object No. Upper byte gt_put(prp >> 0); //プロパティNo. 下位バイト | Property No. Lower byte gt_put(prp >> 8); //プロパティNo. 上位バイト| Property No. Upper byte gt_put(val.length() >> 0); //データ長 最下位バイト | Data length Least significant byte gt_put(val.length() >> 8); //データ長 下位バイト | Data length second byte gt_put(val.length() >> 16); //データ長 上位バイト | Data length third byte gt_put(val.length() >> 24); //データ長 最上位バイト| Data length Most significant byte gt_print(val); //文字列送信 | Send string } //////////////////////////////////////////////////// // オブジェクト制御コマンド-プロパティ読み出し(数値用) | Object Control Command -Property Read (for Value) //////////////////////////////////////////////////// unsigned long gtsp_ObjPrpRead_val(int obj, int prp, int ln) { unsigned long val; gt_print("CMD"); //コマンドヘッダ | Command header gt_put(0xd4); //オブジェクト-プロパティ設定コマンド | Object-Property Setting gt_put(obj >> 0); //オブジェクトNo. 下位バイト | Object No. Lower byte gt_put(obj >> 8); //オブジェクトNo. 上位バイト| Object No. Upper byte gt_put(prp >> 0); //プロパティNo. 下位バイト | Property No. Lower byte gt_put(prp >> 8); //プロパティNo. 上位バイト| Property No. Upper byte gt_put(ln >> 0); //データ長 最下位バイト | Data length Least significant byte gt_put(ln >> 8); //データ長 下位バイト | Data length second byte gt_put(ln >> 16); //データ長 上位バイト | Data length third byte gt_put(ln >> 24); //データ長 最上位バイト| Data length Most significant byte //プロパティデータ受信 | Receive property data while (Serial.available()==0){} val = gtsp_signal_read_val(); return val; } //////////////////////////////////////////////////// // 1byte送信 | Send byte to GT-SP //////////////////////////////////////////////////// void gt_put(unsigned char onebyte) { while ( digitalRead(GT_DTR) == HIGH ) {} //ビジーチェック | Busy check Serial.write(onebyte); } //////////////////////////////////////////////////// // 文字列送信 | Send String to GT-SP //////////////////////////////////////////////////// void gt_print(String val) { int val_i; //文字列を1文字ずつ送信 | Send string per one byte for (val_i = 0; val_i < val.length(); val_i++) { while ( digitalRead(GT_DTR) == HIGH ) {} //ビジーチェック | Busy check Serial.print(val.substring(val_i, val_i+1)); } } //////////////////////////////////////////////////// // データ受信(文字列用) | Receive data from GT-SP (for String) //////////////////////////////////////////////////// String gtsp_signal_read(){ byte res_dl[4] = ""; unsigned long dl; char res_data_char[255]=""; if (Serial.find("RESb", 4)){ Serial.readBytes(res_dl, 4); //データ長抽出 | Read data length dl = (unsigned long)(res_dl[0] + (res_dl[1]<<8) + (res_dl[2]<<16) + (res_dl[3]<<24)); //データ長変換 | Data length Serial.readBytes(res_data_char, dl); //データ抽出 | Read data return String(res_data_char); //String型変換、リターン | Return as String } } //////////////////////////////////////////////////// // データ受信(数値用) | Receive data from GT-SP (for Value) // (バイト長4バイトまで | Byte length is up to 4 byte) //////////////////////////////////////////////////// unsigned long gtsp_signal_read_val(){ byte res_dl[4] = ""; unsigned long dl; byte res_val[4] = ""; unsigned long val; if (Serial.find("RESb", 4)){ Serial.readBytes(res_dl, 4); //データ長抽出 | Read data length dl = (unsigned long)(res_dl[0] + (res_dl[1]<<8) + (res_dl[2]<<16) + (res_dl[3]<<24)); //データ長変換 | Data length Serial.readBytes(res_val, dl); //データ抽出 | Read data val = (unsigned long)(res_val[0] + (res_val[1]<<8) + (res_val[2]<<16) + (res_val[3]<<24)); //データ抽出 | Read data return val; //リターン | Return } } |
Understanding the Program
First, let’s look at the section where the image addresses are set.
pump_img[0] = 0x00040020;
pump_img[1] = 0x0004ef70;
pump_img[2] = 0x0005dec0;
pump_img[3] = 0x0006ce10;
pump_img[4] = 0x0007bd60;
pump_img[5] = 0x0008acb0;
pump_img[6] = 0x00099c00;
pump_img[7] = 0x000a8b50;
pump_img[8] = 0x000b7aa0;
pump_img[9] = 0x000c69f0;
These values correspond to the IMG_ADRS values in autopompanimation_IMG.csv, arranged in order from pump_01.png to pump_10.png.
The image address stored in this array is sent to the GT-SP using the following line.
gtsp_ObjPrpSet_val(0, 0x48, 4, pump_img[current_frame]);
By changing the value of current_frame in sequence,
pump_img[0]
pump_img[1]
pump_img[2]
the registered image addresses are sent one by one in sequence.
After the tenth image is displayed, current_frame is reset to 0, and the sequence starts again from the first image.
Repeating this process continuously switches the 10 still images and displays them as an animation.
The image switching speed is set in the following line.
delay(100);
In this example, the image changes every 100 milliseconds.
A smaller value makes the animation faster, while a larger value makes it slower. Adjust this value according to the images used and the desired animation speed.
Summary
In this article, we registered multiple images in GT Design Studio and displayed an animation on the GT-SP by specifying the image addresses from the Arduino in sequence.
When a project is built in GT Design Studio, an _IMG.csv file is generated in the project output folder. The address assigned to each registered image can be checked in the IMG_ADRS field of this CSV file.
By setting these image addresses in the Arduino program and sending them to the GT-SP in sequence, multiple images can be displayed continuously using a single Image Object.
If images are added or their registration order is changed, the image addresses may change after the project is rebuilt. In that case, check the latest _IMG.csv file and update the addresses used in the program.
In this example, we specified the image addresses from the CSV file directly in the program.
When image addresses are specified directly, editing and rebuilding the project may change the addresses. Therefore, the _IMG.csv file must be checked and the values in the program updated each time the addresses change.
In the next article, we will use definition files to specify images by file name instead of directly specifying image addresses.